Affiliate Disclosure: Hey there! As an Amazon Associate, some links on this page may be affiliate links which means that, if you choose to make a purchase, I may earn a commission at no extra cost to you. I greatly appreciate your support!
Natural Disaster Preparedness: A Step-by-Step Guide
Natural disaster preparedness means having a documented plan, a stocked supplies kit, and trained household members before a disaster strikes — not during one. The difference between a prepared and unprepared household often comes down to decisions made weeks or months in advance. This guide walks you through every critical step, from assessing your home’s vulnerabilities to rebuilding after a disaster.
Key Takeaways
- Disaster preparedness is a layered system: plans, supplies, training, and mental readiness all work together
- Your geographic location determines which disasters to prioritize — don’t prepare generically
- A functional emergency supplies kit covers a minimum of 72 hours, ideally two weeks
- Every household member, including children, should know the evacuation plan and their specific role
- Home hardening (storm shutters, seismic strapping, flood barriers) significantly reduces structural damage
- Insurance review is a preparedness step, not an afterthought
- Pets require their own emergency plan and supply kit
- Post-disaster recovery is slower without pre-documented financial and medical records
- Mental preparation is as important as physical preparation — stress responses impair decision-making
- Preparedness plans need regular review; update yours every six months or after any major life change
Understanding the Importance of Disaster Readiness
Disaster readiness is your primary line of defense when nature stops cooperating. It doesn’t just help you survive the immediate event — it determines how quickly you recover, how much you lose, and whether your family stays together and functional under pressure.
Most people understand this in theory. Far fewer act on it. According to FEMA’s 2023 National Household Survey, only about 45% of Americans reported having an emergency plan, and fewer still had practiced it. That gap between knowing and doing is where disasters become tragedies.
Here’s what preparedness actually means in practice:
- Physical readiness: Supplies, shelter reinforcement, evacuation routes
- Informational readiness: Knowing local hazards, warning systems, and shelter locations
- Procedural readiness: A written, practiced emergency action plan
- Mental readiness: The ability to stay calm, make decisions, and support others under stress
- Community readiness: Knowing your neighbors, local resources, and mutual aid networks
Preparedness isn’t a one-time purchase or a single weekend project. It’s a mindset and a maintenance habit. The preppers and survivalists who fare best in real disasters aren’t necessarily those with the most gear — they’re the ones who’ve thought through scenarios, drilled their plans, and built genuine resilience into their daily lives.
If you’re just getting started, The Ultimate Emergency Preparedness Guide for Preppers is a solid foundation to build from before diving into the specifics here.
The Different Types of Natural Disasters
 Understanding which disasters are most likely in your region is the first step toward meaningful preparation. Preparing for everything equally is inefficient. Preparing for nothing is dangerous.
Natural disasters fall into several broad categories, each with distinct warning patterns, timelines, and survival demands:
Geophysical events
- Earthquakes — little to no warning; structural damage is the primary threat
- Volcanic eruptions — regional; ash fall, lava flow, and toxic gas are the main hazards
- Tsunamis — often triggered by undersea earthquakes; coastal populations face the highest risk
Meteorological and hydrological events
- Hurricanes and tropical storms — tracked days in advance; wind, storm surge, and flooding
- Tornadoes — rapid onset, often minutes of warning; extreme wind damage in a narrow path
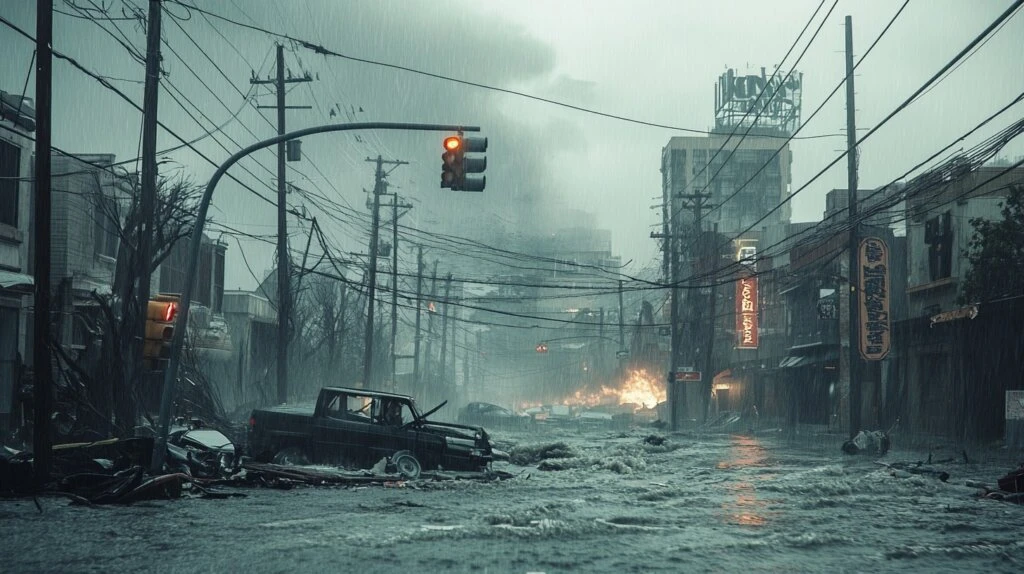
- Floods — can be slow-rising (river floods) or sudden (flash floods); the most common natural disaster type globally
- Winter storms and blizzards — cold exposure, power loss, and road closures
Climatological events
- Wildfires — increasingly common in drought-affected regions; fast-moving and unpredictable
- Extreme heat events — underestimated; heat is the leading weather-related killer in the U.S.
- Droughts — slow-onset but devastating to water and food supply
Biological and compound events
- Pandemics — require a different preparedness model (stockpiling, isolation planning)
- Compound disasters — a wildfire followed by flooding, or an earthquake followed by a tsunami
Choose your preparation focus based on geography. If you live in the Gulf Coast, hurricanes and flooding deserve your primary attention. If you’re in the Pacific Northwest, earthquake and tsunami preparedness matters more. The Midwest demands tornado readiness. The Mountain West increasingly requires wildfire planning.
Don’t ignore secondary risks either. A hurricane can trigger flooding 200 miles inland. An earthquake can rupture gas lines and start fires. Layered thinking makes your plan more durable.
Assessing Your Home’s Vulnerability to Natural Disasters
Before you buy a single piece of gear, assess what you’re actually protecting and where your weak points are. A home vulnerability assessment is the diagnostic step that makes every other preparedness action more targeted and effective.
Start with location-based risk:
- Check FEMA’s Flood Map Service Center to determine if your property is in a designated flood zone
- Review your state’s geological survey maps for earthquake fault proximity
- Use the USDA’s wildfire risk maps if you’re in a fire-prone region
- Contact your local emergency management office — they often publish community hazard assessments
Then assess the structure itself:
- Roof condition: Missing or loose shingles become projectiles in high winds; older roofs may not meet current wind-resistance codes
- Foundation: Cracks or settling can worsen significantly during seismic activity
- Windows and doors: Standard glass fails in hurricane-force winds; older frames may not seal against floodwater
- Garage door: One of the most common failure points in high-wind events
- Utility connections: Gas lines, electrical panels, and water shutoffs should be accessible and clearly labeled
- Chimney and masonry: Unreinforced masonry is a serious earthquake hazard
- Large trees: Proximity to the house matters; dead or diseased trees near the roofline are a wind and fire risk
Common mistake: Homeowners often focus on the interior (furniture strapping, safe rooms) while neglecting the envelope of the house itself. A reinforced bookcase doesn’t help if your roof fails.
After completing your assessment, prioritize fixes by likelihood and severity. A flood barrier in a high-risk flood zone is a better investment than storm shutters in a low-wind region. Be specific, not generic.
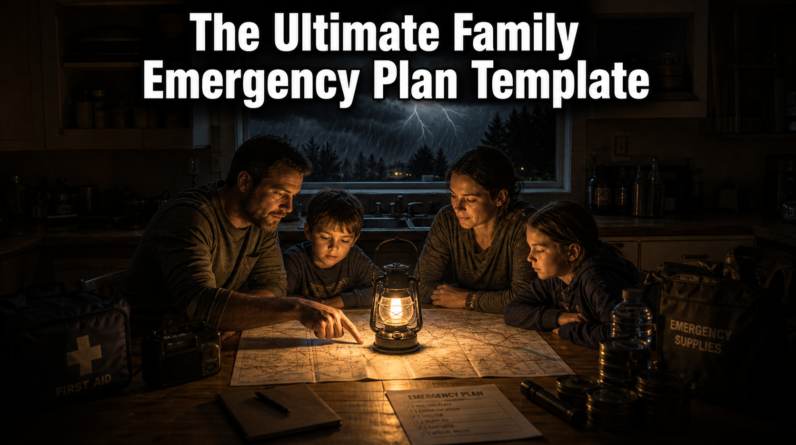
Developing an Emergency Action Plan
An emergency action plan (EAP) is the written, practiced document that tells every member of your household exactly what to do when a disaster strikes. Without one, people default to panic, hesitation, or conflicting instincts — none of which help.
A functional EAP covers six core elements:
- Hazard identification: List the specific disasters most likely in your area and the warning signs for each
- Communication plan: How will family members reach each other if cell networks are down? Designate an out-of-area contact as a central point of communication
- Evacuation routes: At least two routes out of your home and two routes out of your neighborhood
- Shelter-in-place procedures: What to do if evacuation isn’t possible — which room, which supplies, for how long
- Roles and responsibilities: Who grabs the go-bag, who accounts for children, who handles pets, who shuts off utilities
- Meeting points: One location near the home, one farther away (a school, library, or relative’s house)
Keep it simple enough to follow under stress. A laminated one-page summary posted inside a kitchen cabinet is more useful than a 20-page binder that nobody reads. The full plan lives in a binder; the summary lives where people can find it in 30 seconds.
Review your EAP every six months and after any significant change: a new baby, a move, a change in household members, or a new regional hazard.
For a deeper look at evacuation-specific planning, The Ultimate Evacuation Plan Guide covers routes, timing, and decision triggers in detail.
Creating a Comprehensive Evacuation Plan
 An evacuation plan is your scripted response to the moment you hear “get out now.” It should require zero improvisation, because improvisation under stress is where people get hurt.
The core components of a solid evacuation plan:
- Trigger criteria: Know in advance what conditions mean you leave immediately (mandatory evacuation order, rising water at the door, visible fire within X miles). Don’t wait for certainty — leave early
- Primary and secondary routes: Map both on paper. GPS fails. Cell towers fail. Paper doesn’t
- Destination hierarchy: Where are you going? First choice: a family member’s home outside the risk zone. Second choice: a pre-researched hotel or motel. Third choice: an official emergency shelter
- Vehicle readiness: Keep your gas tank above half during storm season. Have a jump starter in the car. Know your vehicle’s cargo capacity
- Go-bag readiness: Your evacuation bag should be packed and accessible at all times during high-risk seasons
Timing matters more than most people realize. Leaving 24–48 hours before a hurricane landfall means open roads and available fuel. Leaving 6 hours before means gridlock, empty gas stations, and dangerous conditions. Early departure is almost always the right call.
Practice the plan as a family at least twice a year. Walk the routes. Time the process. Identify what slows you down — then fix it before it matters.
For a complete packing framework, the 72-Hour Bug Out Bag Checklist gives you a detailed, field-tested list to work from.
Building an Effective Disaster Supplies Kit
A disaster supplies kit is your survival margin when infrastructure fails. It’s not about having everything — it’s about having the right things, in the right quantities, in an accessible condition.
The baseline: 72-hour kit
Every household should have a minimum 72-hour kit. This covers the period when emergency services are overwhelmed and before outside help arrives. Think of it as your bridge.
Extended supply: two-week home cache
For serious preppers and those in high-risk areas, a two-week home supply is the more realistic target. Extended power outages, road closures, and supply chain disruptions can stretch well beyond three days.
What to include:
Water
- One gallon per person per day (drinking and sanitation)
- Include a quality water filter (Sawyer Squeeze, Berkey countertop filter) for extended scenarios
- Store water in food-grade containers away from direct sunlight
Food
- Non-perishable, calorie-dense items: canned goods, freeze-dried meals, rice, oats, peanut butter, jerky
- Prioritize foods your family actually eats — stress is not the time to introduce unfamiliar meals
- A manual can opener is non-negotiable
Medical and hygiene
- First aid kit with trauma supplies (tourniquet, Israeli bandage, wound closure strips)
- A 30-day supply of any prescription medications — work with your doctor to maintain a rolling supply
- Sanitation supplies: hand sanitizer, wet wipes, feminine hygiene products, waste bags
Power and communication
- Flashlights with extra batteries, or rechargeable headlamps
- Hand-crank or battery-operated NOAA weather radio
- Portable power bank for phones
- Battery-powered or hand-crank AM/FM radio
Documents and finances
- Copies of IDs, insurance policies, medical records, and property documents in a waterproof bag
- Some cash in small bills — ATMs and card readers fail during power outages
Comfort and morale
- Books, playing cards, or small games for children
- Comfort foods that store well (coffee, chocolate, hard candy)
- A change of clothes and sturdy footwear for each person
Common mistake: Building a kit and never rotating it. Set a calendar reminder every six months to check expiration dates, replace batteries, and update documents.
For a thorough look at what most people forget, 15 Things Missing From Your Emergency Kit That Could Cost You Everything is worth reading before you consider your kit complete.
Securing Your Home for Natural Disasters
Home hardening reduces damage before a disaster arrives. It’s one of the highest-return investments in your preparedness strategy — dollar for dollar, structural improvements often outperform gear purchases.
General hardening measures:
- Strap water heaters and large appliances to wall studs (earthquake and high-wind protection)
- Anchor heavy furniture (bookshelves, filing cabinets) to walls
- Install smoke and carbon monoxide detectors on every floor; test them monthly
- Know the location of your main shutoffs: gas, water, and electrical panel
Hurricane and high-wind hardening:
- Install impact-resistant windows or storm shutters
- Reinforce garage doors — they’re the most common structural failure point in hurricanes
- Secure or store outdoor furniture, grills, and decorations before storms
- Trim trees and remove dead branches within striking distance of the house
Flood hardening:
- Install check valves in plumbing to prevent sewage backflow
- Use water-resistant building materials in basements and lower floors
- Consider a sump pump with a battery backup
- Elevate electrical panels, HVAC systems, and appliances above the base flood elevation
Earthquake hardening:
- Bolt the house to its foundation if it isn’t already
- Reinforce cripple walls (the short wood-framed walls between the foundation and first floor)
- Secure the water heater with flexible connectors and seismic straps
- Move heavy items from high shelves to lower ones
Wildfire hardening:
- Create a defensible space of at least 30 feet around the home (clear of dry vegetation)
- Use Class A fire-rated roofing materials
- Install ember-resistant vents — embers entering attic vents are a leading cause of home ignition
- Clear gutters of dry debris regularly during fire season
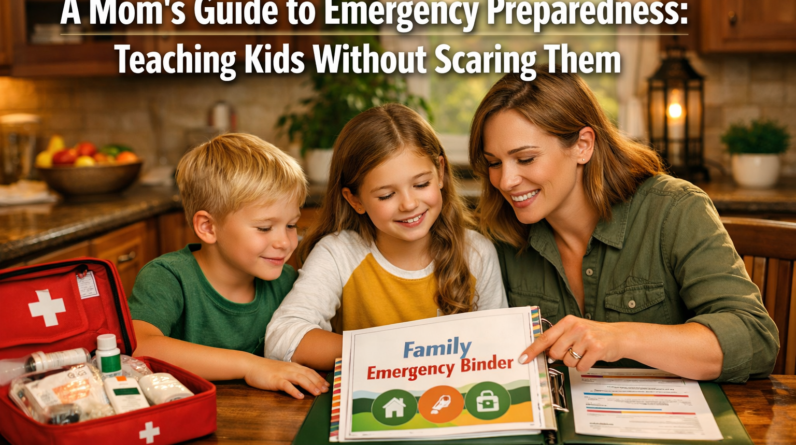
Preparing Your Family for Natural Disasters
Preparation only works if every person in the household understands it. A plan that lives only in one person’s head isn’t a plan — it’s a single point of failure.
Start with honest, age-appropriate conversations. Children can handle more information than parents often assume. What they can’t handle well is sensing that adults are hiding something. Explain the risks clearly, explain what the family is doing about them, and emphasize that preparation is about being smart — not being scared.
Assign roles based on age and ability:
- Adults: primary decision-making, utility shutoffs, driving, heavy lifting
- Teenagers: accountability for younger siblings, communication tasks, operating equipment
- Children (school age): knowing the meeting point, memorizing an emergency contact number, and carrying their own small pack
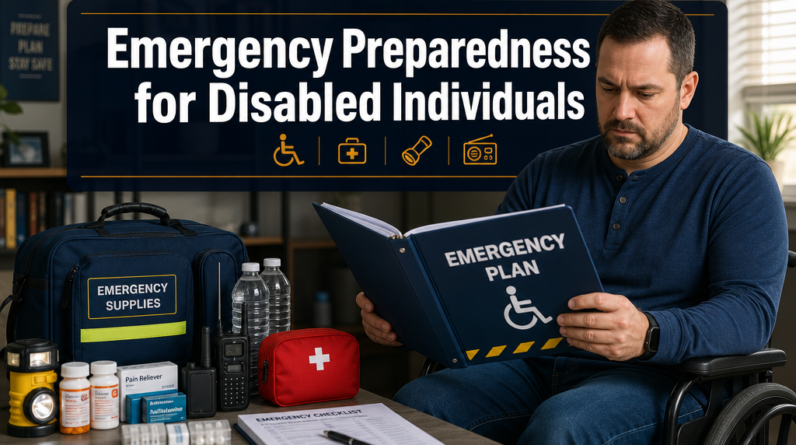
- Elderly or mobility-limited members: identify specific assistance needs and plan for them explicitly — don’t assume they can follow a standard evacuation timeline
Build preparedness into normal life:
- Keep go-bags accessible, not buried in a closet
- Discuss the plan at dinner once a season — not as a drill, just as a conversation
- Let children participate in kit-building; ownership increases compliance
- Know each family member’s schedule so you can account for scenarios where disaster strikes during school or work hours
For families with specific age-related considerations, 9 Essential Disaster Prep Strategies for Seniors addresses the unique challenges older household members face.
How to Train Your Family for Emergency Situations
Knowledge without practice is fragile. Training converts your plan from paper into muscle memory — and muscle memory is what works when adrenaline shuts down careful thinking.
Conduct regular drills:
- Fire drill: At a minimum twice a year. Include a nighttime drill — most house fires happen when people are asleep
- Evacuation drill: Walk the full route at least once a year. Time it. Note what slows you down
- Shelter-in-place drill: Practice sealing a room against smoke or chemical hazard; practice identifying the safest interior room during a tornado
Teach practical skills, not just procedures:
- First aid and CPR — the American Red Cross offers accessible courses; recertify every two years
- How to shut off gas, water, and electricity at the main shutoffs
- How to use a fire extinguisher (PASS: Pull, Aim, Squeeze, Sweep)
- Basic navigation without GPS — a skill that matters more than most people expect
For a broader skill-building framework, 14 Essential Survival Skills Every Prepper Must Know covers the competencies that translate directly to disaster survival.
After each drill, debrief. What went well? What took too long? What was confusing? A five-minute conversation after a drill is worth more than an hour of planning that never gets tested.
Ensuring Pet Safety During Natural Disasters
Pets are family members, and they require their own preparedness plan. Many people have delayed or refused evacuation because they couldn’t bring their animals — a decision that has cost lives.
Plan for your pets before disaster strikes:
- Identify pet-friendly emergency shelters and hotels along your evacuation routes in advance — most public emergency shelters do not accept animals
- Microchip your pets and keep tags current with your phone number
- Have a photo of yourself with your pet in case you’re separated and need to prove ownership
Build a pet emergency kit:
- Food and water for at least 72 hours
- Medications and a copy of vaccination records
- Carrier or crate (pets travel more safely and calmly when crated)
- Leash, collar, and a familiar toy or blanket for comfort
- Waste bags, litter, and sanitation supplies
During evacuation:
- Never leave pets behind if you can avoid it — animals left in sealed homes during floods or fires rarely survive
- Keep pets on leash or in carriers even in familiar environments — the chaos of a disaster can cause even calm animals to bolt
The Ultimate Pets Emergency Preparedness Checklist is the most comprehensive resource for this topic and is worth bookmarking.
Understanding the Role of Insurance in Disaster Preparedness
 Insurance is a preparedness tool that most people don’t review until they need it — which is exactly the wrong time to discover its gaps.
What to review now, before a disaster:
- Homeowner’s or renter’s insurance: Does it cover the specific disasters in your region? Standard policies typically exclude flood and earthquake damage — these require separate riders or standalone policies
- Flood insurance: Available through FEMA’s National Flood Insurance Program (NFIP) or private insurers; there’s typically a 30-day waiting period before it takes effect, so don’t wait until a storm is forecast
- Earthquake insurance: Offered as a separate policy in most states; deductibles are often high (10–20% of dwelling value), so understand what you’re actually covered for
- Actual cash value vs. replacement cost: Replacement cost coverage pays what it costs to replace an item new; actual cash value pays the depreciated value. The difference matters enormously after a major loss
Document your possessions:
- Walk through your home with your phone and record a video of every room and its contents
- Store the video in cloud storage, not just on a local device that could be destroyed
- Keep receipts for high-value items (appliances, electronics, jewelry) in your waterproof document bag
After a disaster, act quickly. Most policies have notification requirements. Contact your insurer as soon as it’s safe to do so, document all damage before cleanup begins, and keep receipts for any emergency repairs or temporary housing.
Maintaining Your Disaster Preparedness Plan
A preparedness plan that isn’t maintained degrades. Supplies expire. Family circumstances change. New hazards emerge. Treating preparedness as a one-time project is one of the most common and costly mistakes preppers make.
Build a maintenance schedule:
Trigger-based updates matter too. If you have a new baby, add infant supplies. If a family member develops a medical condition, update the medication supply and shelter-in-place procedures. If you move to a new region, reassess your entire hazard profile.
Sign up for your local emergency alert system (most counties in the U.S. use Wireless Emergency Alerts and Integrated Public Alert and Warning System notifications). Know what the alerts mean and what action each one requires.
Mental Preparation for Natural Disasters
Physical preparation without mental preparation is incomplete. The psychological dimension of disaster survival is real, well-documented, and consistently underestimated.
What happens to the brain under extreme stress:
Under acute stress, the brain’s threat-response system (the amygdala) can override rational decision-making. This is why people freeze, make poor choices, or become paralyzed by indecision during disasters — even when they “know” what to do. Drilling your plan converts conscious procedures into automatic responses, which are far more resistant to stress interference.
Build mental resilience before you need it:
- Scenario planning: Think through specific disaster scenarios in advance. What would you do if a wildfire started while you were at work and your kids were at school? Walking through these scenarios mentally reduces the shock of encountering them in reality
- Stress inoculation: Controlled exposure to discomfort (cold showers, fasting, physical challenge) builds tolerance for the discomfort that accompanies real emergencies
- Mindfulness and breathing: Simple breathing techniques (box breathing: 4 counts in, 4 hold, 4 out, 4 hold) can interrupt a stress response and restore decision-making capacity in minutes
- Community connection: Social support is one of the strongest predictors of post-disaster psychological recovery. Know your neighbors. Build relationships before you need them
Post-disaster mental health:
Expect psychological aftereffects. Anxiety, sleep disruption, irritability, and intrusive thoughts are normal responses to abnormal events. They don’t indicate weakness — they indicate that your nervous system is processing something significant. Seek professional support if symptoms persist beyond a few weeks or interfere with daily function.
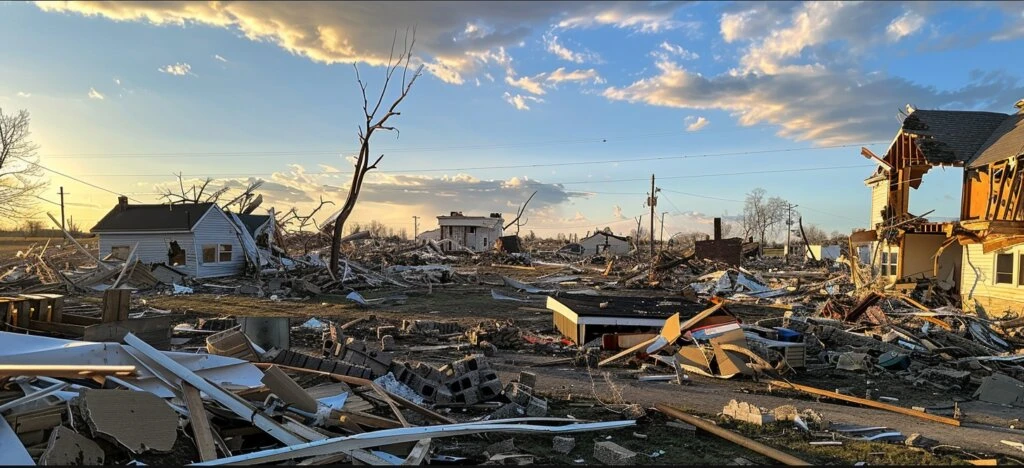
Post-Disaster Safety Measures
The immediate aftermath of a disaster is often as dangerous as the event itself. Structural damage, contaminated water, gas leaks, downed power lines, and secondary events (aftershocks, post-fire flooding) all pose serious risks to people who let their guard down too soon.
Before re-entering your home:
- Wait for official clearance from local authorities — don’t assume a structure is safe because it’s still standing
- Look for visible structural damage: cracks in the foundation, leaning walls, sagging roof
- Smell for gas before entering; if you detect gas, don’t enter — call the gas company from outside
- Check for downed power lines around the property; treat all downed lines as live
Inside the home:
- Don’t use open flames (candles, lighters) until you’ve confirmed there’s no gas leak
- Wear sturdy footwear — debris, broken glass, and nails are common floor hazards
- Don’t use tap water until authorities confirm it’s safe; floodwater contaminates municipal supplies
- Document all damage with photos and video before touching or cleaning anything
Ongoing safety:
- Be alert for secondary hazards: aftershocks after earthquakes, dam releases after floods, re-ignition after wildfires
- Monitor official channels (NOAA Weather Radio, local emergency management) for updated guidance
- Avoid flood-damaged areas; floodwater carries sewage, chemicals, and debris, and can hide structural damage to roads and bridges
Recovering and Rebuilding After a Natural Disaster
Recovery is a process, not a moment. It unfolds over weeks, months, and sometimes years — and the households that recover fastest are almost always those that prepared most thoroughly.
Immediate recovery priorities (first 72 hours):
- Account for all household members and pets
- Address medical needs first
- Secure temporary shelter if your home is uninhabitable
- Contact your insurance company and begin the claims process
- Notify your employer, children’s school, and any relevant institutions of your situation
Short-term recovery (first 30 days):
- Work with your insurer to assess and document damage
- Hire licensed, reputable contractors — post-disaster fraud is common; verify credentials and get multiple quotes
- Apply for FEMA Individual Assistance if your county has been declared a disaster area
- Access community resources: Red Cross, local food banks, community organizations
Long-term rebuilding:
- Rebuild smarter, not just faster. If your home floods, elevate it. If it burned, use fire-resistant materials. Use the rebuild as an opportunity to address the vulnerabilities your assessment identified
- Rebuild your supply cache as soon as finances allow — don’t wait until the next threat
- Debrief your preparedness plan: what worked, what failed, what you wish you’d had
The Ultimate Disaster Preparedness Checklist is a useful companion document for tracking your recovery and rebuild progress systematically.
FAQ
Why is disaster readiness important?
Because disasters don’t announce themselves with enough lead time to improvise. Preparedness converts a crisis from a chaotic emergency into a managed response. Households with plans, supplies, and trained members consistently experience fewer injuries, less financial loss, and faster recovery than those without.
What are the different types of natural disasters?
The main categories are geophysical (earthquakes, volcanic eruptions, tsunamis), meteorological (hurricanes, tornadoes, winter storms), hydrological (floods, flash floods), climatological (wildfires, extreme heat, drought), and biological (pandemics). Most regions face elevated risk from two or three types; prepare specifically for yours.
How can I assess my home’s vulnerability to natural disasters?
Start with FEMA’s flood maps and your state’s geological hazard resources to understand location-based risk. Then, physically inspect your home for structural weaknesses: roof condition, foundation integrity, window and door resilience, and utility shutoff accessibility. Prioritize fixes by the likelihood and severity of the hazards in your area.
What should be included in an emergency action plan?
A functional EAP includes: identified local hazards, a household communication plan, at least two evacuation routes, shelter-in-place procedures, assigned roles for each household member, and designated meeting points near and away from home. Keep a laminated one-page summary in an accessible location.
How can I secure my home for natural disasters?
Home hardening depends on your primary hazard. For hurricanes: storm shutters and reinforced garage doors. For earthquakes: foundation bolting, seismic strapping for appliances, and secured heavy furniture. For wildfires: defensible space and ember-resistant vents. For floods: check valves, sump pumps, and elevated electrical systems.
What should I include in a disaster supplies kit?
At minimum: one gallon of water per person per day for 72 hours, non-perishable food, a first aid kit with trauma supplies, flashlights and batteries, a weather radio, a 30-day supply of medications, copies of critical documents, and cash in small bills. For extended preparedness, build toward a two-week supply.
What role does insurance play in disaster preparedness?
Insurance is your financial recovery mechanism. Standard homeowner’s policies typically exclude flood and earthquake damage — both require separate coverage. Review your policy annually, document your possessions on video, and store that documentation in cloud storage. Know your deductibles and coverage limits before you need to use them.
How can I ensure the safety of my pets during natural disasters?
Microchip and tag your pets, build a dedicated pet emergency kit (food, water, medications, carrier, records), and identify pet-friendly shelters and hotels along your evacuation routes in advance. Never leave pets behind if evacuation is possible.
How can I maintain disaster preparedness?
Set a biannual calendar reminder to rotate supplies, check batteries, update documents, and review your plan. Conduct at least two household drills per year. Update your plan after any major life change: new household members, medical changes, or relocation.
What are the steps in recovering and rebuilding after a natural disaster?
Account for all household members, address medical needs, secure shelter, and contact your insurer within the first 72 hours. Over the following 30 days, document damage, apply for assistance programs, and hire verified contractors. Long-term, rebuild with the vulnerabilities you identified in mind — and restock your preparedness supplies as soon as possible.
Is mental preparation really part of disaster preparedness?
Yes, and it’s frequently the missing piece. Stress impairs decision-making; drilled procedures don’t. Scenario planning, breathing techniques, and community relationships all contribute to better outcomes during and after a disaster. Post-disaster psychological effects are normal and should be addressed, not ignored.
How often should I update my emergency plan?
At a minimum, review it every six months. Update it immediately after any significant life change: a move, a new family member, a medical diagnosis, or a change in your regional hazard profile.
Products, Tools, and Resources
These are tools and resources worth having based on practical, real-world use — not because they’re the most expensive options on the market.
Weather and alerts
A NOAA hand-crank weather radio (Midland ER310 or similar) is one of the most reliable tools in any emergency kit. It works when the power is out, when cell networks are jammed, and when your phone battery is dead. Keep one in your home kit and one in your vehicle kit.
Water filtration
The Sawyer Squeeze filter is compact, durable, and filters up to 100,000 gallons before needing replacement. It’s the right choice for go-bags and evacuation kits. For home use, a Berkey countertop gravity filter handles larger volumes without electricity and removes a wide range of contaminants.
Power backup
A portable power station (Jackery 300 or Goal Zero Yeti series) can charge phones, run a CPAP machine, and power small lights for several days. Pair it with a small solar panel for extended outages. These have become significantly more affordable in recent years and are worth the investment for anyone in a high-outage-risk area.
Food storage
For long-term food supply, freeze-dried meals (Mountain House, Augason Farms) offer 25-30 year shelf lives and require only water to prepare. For everyday rotation, focus on canned goods, rice, oats, and legumes. The 50 Best Foods for Long-Term Storage guide gives you a practical, prioritized list.
First aid
The MyMedic MyFAK or a comparable trauma-capable first aid kit is worth the upgrade from a basic drugstore kit. Add a tourniquet (CAT or SOFTT-W), hemostatic gauze, and a chest seal if you’re building a serious kit. Take a Stop the Bleed course — it’s free, widely available, and teaches you to use these tools effectively.
Documentation
A waterproof document bag (like those from OverBoard or similar brands) keeps your critical papers — IDs, insurance policies, medical records, property documents — protected during floods and evacuations. Store a digital backup in an encrypted cloud folder as a secondary measure.
Go-bag foundation
If you’re building or upgrading your bug-out bag, the Bug Out Bag for Beginners: Complete 2026 Guide covers what to include, what to skip, and how to pack it for real-world use rather than worst-case fantasy scenarios.
For a comprehensive overview of all preparedness topics, visit the PrepperHQ Emergency Preparedness Hub — it covers everything from food storage to grid-down scenarios in one place.