
Hey there! Some links on this page may be affiliate links which means that, if you choose to make a purchase, I may earn a commission at no extra cost to you. I greatly appreciate your support. Read the full disclosure here.
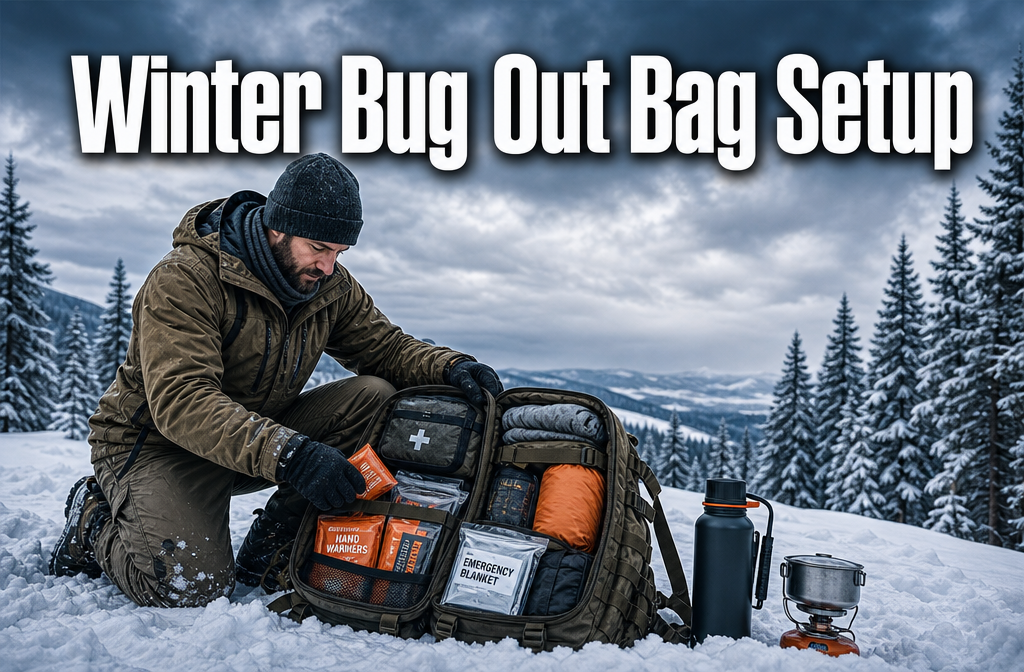
A winter bug out bag setup is a specialized emergency pack built to keep you alive when cold temperatures, ice, and snow turn a standard evacuation into a life-threatening event. Unlike a three-season bag, a winter-specific kit prioritizes thermal regulation, moisture management, and calorie-dense nutrition above almost everything else. The difference between the two isn’t just a few extra layers — it’s the difference between surviving a 48-hour winter evacuation and not making it through the first night.
Key Takeaways 🎒
- Hypothermia kills faster than hunger or thirst. Thermal protection is the non-negotiable foundation of any winter bug out bag.
- A complete, well-equipped winter survival bag costs between $150 and $600, depending on gear quality and climate severity.
- The layering system (base, mid, shell) is more important than any single piece of gear.
- Waterproofing is critical — wet gear in freezing temperatures is as dangerous as no gear at all.
- Seniors and people with limited mobility need modified kits with lighter loads and mobility aids.
- At sub-zero temperatures, standard water filters freeze and fuel canisters lose pressure — you need cold-rated alternatives.
- Alaska-level cold demands different gear than Colorado mountain conditions — location determines your kit, not a generic checklist.
- Most preppers underpack calories and overpack tools. In winter, your body burns 3,000–5,000+ calories per day moving through snow.
- A winter bag is heavier than a standard kit. If you’re on foot in snow, every ounce matters — ruthless weight discipline is required.
- Always test your kit before you need it. Gear that’s never been used in the cold will surprise you in the worst way.
What Exactly Is a Bug Out Bag, and How Is It Different for Winter?
A bug out bag (BOB) is a pre-packed emergency kit designed to sustain one person for 72 hours during a forced evacuation. A winter-specific version of that kit is fundamentally different in weight, bulk, caloric load, and gear selection because cold weather introduces threats that don’t exist in other seasons.
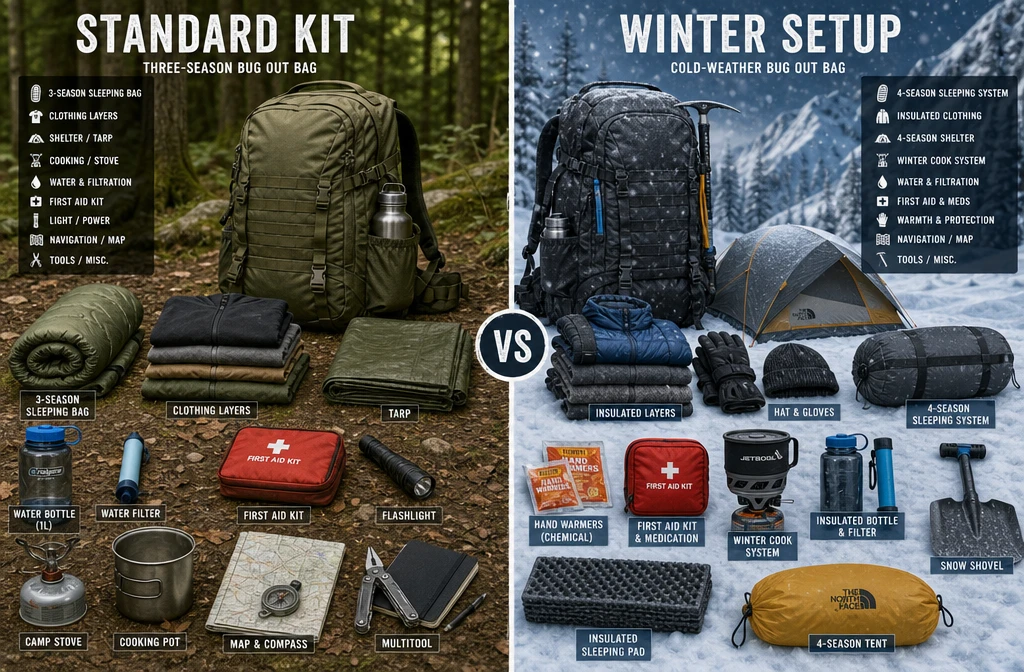
In a standard three-season bag, shelter and water take priority. In a bug out bag for winter survival setup, thermal regulation moves to the top of the list. Exposure to temperatures below freezing — especially with wind or moisture — can cause hypothermia in under an hour without proper protection. That changes everything about how you pack.
Key differences between a standard BOB and a winter BOB:
| Feature | Standard Bug Out Bag | Winter Bug Out Bag |
|---|---|---|
| Primary threat | Dehydration, exposure | Hypothermia, frostbite |
| Shelter priority | Tarp or bivy | 4-season tent or insulated bivy |
| Clothing layers | Light, versatile | Full layering system (3 layers) |
| Water strategy | Filter + purification tabs | Insulated bottles + chemical backup |
| Caloric load | ~1,800–2,200 cal/day | ~3,000–5,000 cal/day |
| Bag weight | 25–35 lbs | 35–55 lbs |
| Fire-starting tools | Basic | Multiple redundant methods |
The core survival logic doesn’t change — shelter, water, food, navigation, first aid. But winter amplifies every failure point. A leaking water bottle becomes a frozen water bottle. A damp sleeping bag becomes a death trap. That’s the mindset shift a winter kit demands.
What Gear Do You Absolutely Need in a Winter Emergency Kit?
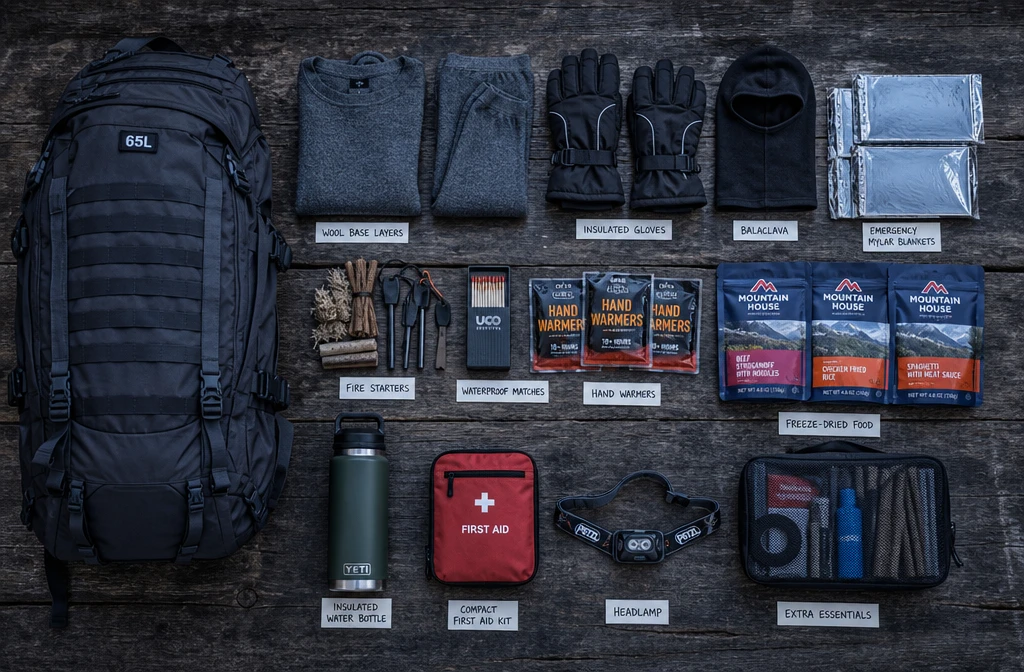
The non-negotiables for a winter emergency bag fall into five categories: thermal protection, fire, water, food, and navigation. Skip any one of these and the rest of your kit becomes less useful.
🔥 Thermal Protection (Highest Priority)
- Base layer: Merino wool or synthetic moisture-wicking fabric. Never cotton — it holds moisture and accelerates heat loss.
- Mid layer: Fleece jacket or down vest for insulation.
- Shell layer: Waterproof, windproof outer jacket and pants.
- Extremity protection: Insulated gloves (with liner gloves inside), wool hat, balaclava, wool socks (at least two pairs), and waterproof insulated boots rated to your lowest expected temperature.
- Sleeping system: A sleeping bag rated at least 10–15°F below the coldest temperature you expect, plus a closed-cell foam sleeping pad (foam insulates from ground cold better than inflatable pads in extreme conditions).
- Emergency Mylar blankets: Pack at least two. They’re lightweight, cheap, and can save your life.
🔥 Fire Starting
Pack at least three redundant fire-starting methods: a windproof lighter, waterproof matches in a sealed container, and a ferrocerium rod with tinder. In wet or snowy conditions, commercial fire starters (wax-based tinder cubes) are worth their weight.
💧 Water
An insulated stainless steel water bottle (32 oz minimum) is essential — it can be used to melt snow and won’t crack in the cold. Chemical purification tablets work at any temperature. Standard pump filters can freeze and crack; if you carry one, keep it inside your jacket against your body.
🍫 Food
High-fat, high-calorie foods perform best in the cold: nuts, nut butter packets, hard cheeses, chocolate, and freeze-dried meals. Your body burns significantly more calories staying warm and moving through snow than it does in summer conditions. For more on food selection, see The Ultimate Bug Out Bag Food List for Survival.
A topographic map of your bug-out route and a quality baseplate compass. In winter, landmarks disappear under snow and GPS batteries drain faster in the cold. Practice navigation before you need it — see The Complete Beginner’s Guide to Navigation Without GPS for a solid foundation.
How Much Does a Complete Winter Survival Bug Out Bag Cost?
A functional winter bug out bag can be assembled for $150 to $600, depending on whether you prioritize budget gear or performance-rated equipment. A fully optimized kit with professional-grade cold-weather gear can exceed $1,000, but that level isn’t necessary for most preppers.
Budget breakdown by tier:
| Tier | Total Cost | Best For |
|---|---|---|
| Budget (functional) | $150–$250 | Mild winter climates, beginners |
| Mid-range (reliable) | $250–$450 | Most US winter conditions |
| Performance (cold-rated) | $450–$600+ | Extreme cold, Alaska-level temps |
Where to spend more: Sleeping bag, boots, and outer shell. These are the items that keep you alive. Cheap sleeping bags lose loft quickly and often aren’t rated to their advertised temperature.
Where you can save: Fire starters, navigation tools, and food. A $4 ferrocerium rod works as well as a $30 one. Store-brand freeze-dried meals are nearly identical to premium brands in caloric content.
Decision rule: If your budget is under $200, prioritize thermal gear first. A $60 sleeping bag rated to 0°F beats a $200 multi-tool every time in a winter emergency.
Best Lightweight Winter Bug Out Bag Items for Extreme Cold
Weight is a serious constraint when building a bug out bag for winter survival setup intended for foot travel in snow. Every extra pound becomes significant when you’re breaking trail through knee-deep drifts.
Lightweight gear picks that don’t sacrifice warmth:
- Sleeping bag: A quality down bag (800-fill power) compresses small and weighs under 3 lbs while providing genuine sub-zero protection.
- Shelter: A bivy sack (emergency or purpose-built) weighs 1–2 lbs versus 5–8 lbs for a tent. Pair it with a tarp for wind protection.
- Clothing: Merino wool base layers weigh less than fleece and regulate temperature better across a wider range.
- Hand warmers: Air-activated chemical warmers weigh almost nothing and can prevent frostbite in an emergency. Pack 10–15 pairs.
- Headlamp: A lithium-battery headlamp (lithium batteries maintain power in cold; alkaline batteries lose capacity rapidly below freezing).
- Traction devices: Microspikes or Yaktrax slip over boots and weigh under 1 lb. On icy terrain, they’re the difference between covering ground and breaking an ankle.
- Compact stove: A canister stove with a cold-rated fuel blend (isobutane-propane) lets you melt snow for water and cook hot meals. Keep the fuel canister warm in your sleeping bag overnight.
Pack rule for winter foot travel: Total loaded weight should not exceed 25–30% of your body weight. For most adults, that’s 40–55 lbs maximum — and in deep snow, even 40 lbs feels like 60.
Survival Bag Items That Work in Temperatures Below Zero Degrees
Below 0°F (-18°C), standard gear fails in predictable ways. Knowing which items hold up and which ones don’t could save your life.
Items that fail below zero — and what to use instead:
| Standard Item | Problem Below 0°F | Cold-Rated Alternative |
|---|---|---|
| Standard pump water filter | Freezes, cracks | Chemical tabs or boiling |
| Alkaline batteries | Lose 50–75% capacity | Lithium batteries only |
| Standard fuel canisters | Pressure drops, stove won’t light | Isobutane-propane blend (kept warm) |
| Hydration bladder hoses | Freeze solid | Insulated bottle, blow back after each sip |
| Standard lip balm/sunscreen | Freezes in tube | Petroleum jelly in a small tin |
| Cotton clothing | Absorbs moisture, accelerates heat loss | Wool or synthetic only |
Additional sub-zero essentials:
- Vapor barrier liners inside sleeping bags prevent moisture from degrading insulation in multi-night cold-weather use.
- Insulated gaiters keep snow out of boots and add a meaningful layer of warmth to lower legs.
- Chemical heat packs designed for toe warmers can be taped inside boots for extended warmth.
- A stainless steel thermos filled with hot liquid before departure retains heat for 6–8 hours and provides both hydration and warming.
Differences Between a Winter Bug Out Bag and a Regular Emergency Kit
A regular emergency kit (like a standard 72-hour bag) is designed for general-purpose use across multiple scenarios. A winter bug out bag is purpose-built for cold-weather survival and is a fundamentally different tool.
For a deeper look at standard bug out bag construction, the 72 Hour Bug Out Bag Checklist: Complete Prepper Guide 2026 covers the baseline framework well. The winter version builds on that foundation with significant additions.
Core differences:
- Weight: A winter kit runs 10–20 lbs heavier due to insulation, layered clothing, and a warmer sleeping system.
- Shelter: A regular kit might include a tarp or emergency bivy. A winter kit needs a four-season shelter or a high-quality insulated bivy rated for freezing temperatures.
- Water strategy: In winter, water sources may be frozen. Snow melting becomes a primary water acquisition method, requiring a heat source and extra fuel.
- Caloric density: Winter kits need significantly more calories per day due to thermogenesis (your body burning calories to stay warm).
- Clothing volume: A full layering system adds bulk that a standard kit doesn’t account for.
What stays the same: First aid, communication tools, documents, cash, and basic navigation gear don’t change significantly between seasons. The Bug Out Bag Mistakes to Avoid: A Prepper’s Complete Guide outlines the universal errors that apply regardless of season.
Common Mistakes People Make Preparing Winter Emergency Bags
Most winter bug out bag mistakes fall into three categories: underestimating cold, ignoring moisture, and overpacking the wrong things.
The most common and dangerous mistakes:
-
Packing cotton clothing. Cotton is the most dangerous fabric in cold, wet conditions. It absorbs sweat and moisture, then holds it against your skin, accelerating heat loss. Every cotton item should be replaced with wool or synthetic.
-
Relying on a single fire-starting method. Wet conditions, frozen fingers, and wind make fire starting difficult. One lighter isn’t enough. Pack three methods minimum.
-
Underestimating caloric needs. Moving through snow in cold weather burns 3,000–5,000+ calories per day. A standard 72-hour food supply of 1,800 cal/day will leave you dangerously depleted.
-
Not waterproofing gear inside the bag. Rain, snow melt, and condensation can saturate a pack’s contents. Use dry bags or heavy-duty zip-lock bags to protect sleeping bags, clothing, and electronics.
-
Buying a sleeping bag rated for exactly the expected temperature. Sleeping bag ratings are survival ratings, not comfort ratings. Buy a bag rated 10–15°F colder than your expected low.
-
Never testing the kit in actual cold. Gear that looks good in a warm garage behaves very differently at 10°F. Practice setting up your shelter and starting a fire with gloves on before you need to do it for real.
-
Ignoring boot fit with thick socks. Boots that fit perfectly with thin socks may be painfully tight with two pairs of wool socks. Test your footwear with the socks you’ll actually wear.
Bug Out Bag Essentials for Someone Living in Alaska vs. Colorado
Location determines your kit. A prepper in Fairbanks, Alaska faces fundamentally different threats than someone in Denver, Colorado — and packing the same bag for both situations is a mistake.
Alaska (extreme cold, remote terrain, potential for -40°F):
- Sleeping bag rated to -20°F or colder (expedition-grade)
- Vapor barrier liner for multi-night use
- Expedition-weight base layers
- Bear spray and bear canister if bugging out through wilderness
- Snowshoes (microspikes aren’t enough in deep Alaskan snow)
- Extra fuel (double what you think you’ll need — cold burns through fuel fast)
- Signaling mirror and PLB (personal locator beacon) — cell coverage is often nonexistent
- Larger first aid kit with frostbite treatment supplies
Colorado (variable winter, altitude, 0°F to -20°F possible at elevation):
- Sleeping bag rated to -10°F
- Altitude sickness medication (acetazolamide) if bugging out above 8,000 feet
- UV-protective sunglasses (snow blindness is a real risk at altitude)
- Avalanche awareness tools if routes cross avalanche terrain
- Microspikes or crampons for icy mountain trails
- Layering system suitable for wide temperature swings (Colorado can go from 40°F to -10°F in hours)
The shared principle: Both kits prioritize thermal protection, redundant fire starting, and moisture management. The difference is in the degree of insulation, the weight of the shelter system, and the terrain-specific tools.
For region-specific threat analysis, the Ultimate Geographic Threat Prep Guide (By US Region) is a useful companion resource.
How to Waterproof and Protect Gear in a Winter Survival Bag
Wet gear in freezing temperatures is one of the most dangerous situations a prepper can face. Waterproofing your bag’s contents isn’t optional — it’s a core part of any bug out bag for winter survival setup.
Layered waterproofing strategy:
- Pack liner: Line the inside of your bag with a heavy-duty trash bag or a purpose-built pack liner. This is your first and most important layer of protection.
- Dry bags by category: Use color-coded dry bags to organize and protect gear by category — clothing, fire kit, food, electronics. Roll-top dry bags rated for submersion are worth the investment.
- Zip-lock bags: For smaller items (fire starters, documents, medications), heavy-duty zip-lock bags provide an additional moisture barrier.
- Rain cover: A pack rain cover adds protection from snow accumulation on the outside of your bag. Most quality packs include one, but carry a backup.
- Treat your outer clothing: Apply DWR (durable water repellent) spray to your shell jacket and pants seasonally. A shell that’s lost its DWR treatment soaks through quickly.
Protect electronics specifically: Cold temperatures drain batteries and can damage devices. Keep your phone, GPS, and radio inside an inner pocket against your body heat. Store spare batteries in a small insulated pouch.
Quick tip: Silica gel packets in your electronics bag reduce condensation damage when moving between cold outside air and warm interior environments.
Emergency Winter Bag Recommendations for Seniors or People With Limited Mobility
Seniors and people with limited mobility face specific challenges with winter bug out bags: weight, grip, balance on ice, and thermoregulation. A standard kit needs meaningful modification to be practical and safe for this group.
For broader context on senior-specific preparedness, the 9 Essential Disaster Prep Strategies for Seniors covers the foundational principles well.
Key modifications for seniors and limited-mobility preppers:
- Reduce pack weight to 15–20 lbs maximum. Prioritize the highest-impact items and accept that some redundancy will be sacrificed.
- Use a wheeled bug out bag when terrain allows. Hard-sided rolling bags or wheeled duffel bags work well on plowed roads or sidewalks.
- Trekking poles are essential. They provide balance on ice, reduce knee strain on uneven terrain, and double as shelter poles.
- Microspikes over boots are non-negotiable for anyone at fall risk. A fall on ice in cold weather is a potentially fatal event for older adults.
- Pre-warm gear before use. Hand warmers, boot warmers, and a warm base layer stored near the body make cold-weather movement significantly more manageable.
- Medications: Cold weather affects many medications (insulin, for example, should not freeze). Carry an insulated medication pouch and know the storage requirements for every medication in your kit.
- Higher-calorie, easy-to-eat food: Arthritis and cold-stiffened fingers make cooking difficult. Pre-packaged, high-calorie foods that require no preparation are preferable.
- Buddy system planning: Seniors bugging out alone in winter conditions face compounded risk. A family bug out bag plan that accounts for different physical abilities is far safer than solo preparation.
How to Pack a Bug Out Bag If You Might Need to Travel on Foot in Snow
Foot travel in snow demands a specific packing strategy that balances weight distribution, accessibility, and warmth retention. A poorly packed bag becomes a liability on the trail.
Packing principles for winter foot travel:
- Heavy items close to your back, high in the pack. This keeps the center of gravity over your hips and reduces strain on your lower back — critical when footing is uncertain.
- Frequently accessed items on top or in outer pockets. Gloves, hand warmers, snacks, and your fire kit should be reachable without unpacking. You don’t want to dig through your bag in a snowstorm with frozen fingers.
- Sleeping bag at the bottom. It’s the last thing you’ll need and the bulkiest item. Keep it in a waterproof compression sack.
- Layering system accessible. You’ll be adding and removing layers constantly as your exertion level changes. Keep mid-layers in an accessible outer pocket.
- Water insulated and upright. An insulated bottle stored upright in a side pocket stays accessible and won’t freeze as quickly as one buried in the pack.
Foot travel gear additions:
- Gaiters (keep snow out of boots)
- Microspikes or snowshoes depending on snow depth
- Trekking poles
- A route map in a waterproof map case attached to the outside of the bag
Pace yourself. Sweating in cold weather is dangerous — moisture soaks your base layer and causes rapid heat loss when you stop moving. The rule is: if you’re sweating, you’re moving too fast or wearing too much. Vent layers before you overheat.
For the broader skill set required during a winter evacuation on foot, 10 Critical Bug-Out Survival Skills Every Prepper Must Master Before SHTF is required reading.
Most Affordable Winter Survival Bag Options Under $200
A functional bug out bag for winter survival setup can be built for under $200 if you’re strategic about where you spend. The key is prioritizing thermal protection over tools and gadgets.
Under-$200 winter BOB build:
| Item | Estimated Cost |
|---|---|
| 65L tactical backpack (budget brand) | $35–$55 |
| Sleeping bag (0°F rated, synthetic) | $50–$70 |
| Wool base layer set (top + bottom) | $25–$40 |
| Waterproof shell jacket | $30–$50 |
| Wool hat + gloves + balaclava | $15–$25 |
| Fire kit (lighter + matches + ferro rod + tinder) | $10–$15 |
| Emergency Mylar blankets (pack of 4) | $5–$8 |
| Insulated stainless steel water bottle | $15–$25 |
| Chemical purification tablets | $8–$12 |
| 3-day food supply (nuts, bars, freeze-dried) | $20–$35 |
| Headlamp with lithium batteries | $15–$20 |
| Basic first aid kit | $15–$20 |
| Total estimate | $143–$230 |
Where to cut costs without cutting safety:
- Buy sleeping bags and packs from reputable budget brands (Teton Sports, ALPS Mountaineering) rather than no-name brands.
- Thrift stores are excellent sources for wool base layers and fleece mid-layers.
- Military surplus stores often carry high-quality cold-weather gear at significant discounts.
Where not to cut costs: Boots and socks. Frostbitten feet end an evacuation. Spend what it takes to get properly insulated, waterproof footwear.
For a broader framework on building a complete kit affordably, The Complete Bug Out Bag Guide: Build a Perfect 72-Hour Kit for Under $200 covers the general approach in detail.
What Supplies Do Professional Survivalists Recommend for Winter Scenarios?
Experienced survivalists and wilderness survival instructors consistently emphasize a few items that casual preppers overlook when building a winter kit.
Gear that professionals prioritize that beginners often skip:
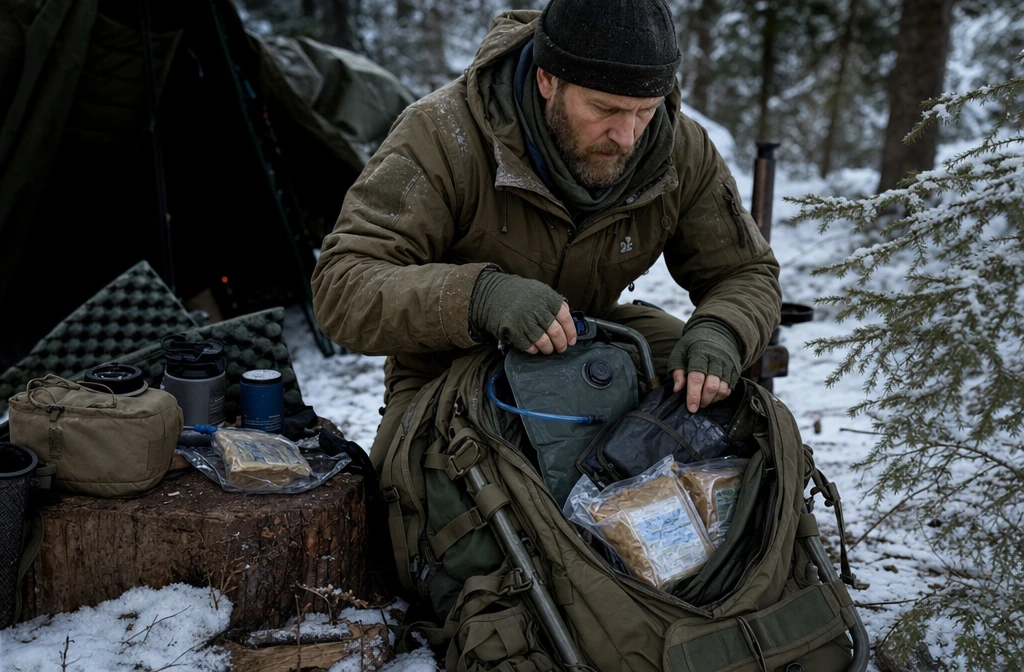
- A quality foam sleeping pad in addition to a sleeping bag. Ground cold is as dangerous as air cold. Closed-cell foam pads (like the Therm-a-Rest Z-Lite) are indestructible, don’t deflate, and provide meaningful insulation from frozen ground.
- A quality fixed-blade knife rated for cold-weather use. Folding knives can freeze shut. A full-tang fixed blade is more reliable in extreme cold. See Survival Knife Training and Qualities for what to look for.
- A small folding saw or hatchet for processing firewood. Trying to break frozen branches by hand is exhausting and inefficient.
- Redundant navigation tools. GPS devices fail in cold. A paper topo map and compass are the professional standard for winter navigation.
- A signal mirror and whistle. In snow-covered terrain, visual and auditory signals are often more reliable than electronic ones.
- A personal locator beacon (PLB) for anyone bugging out through remote terrain. These are one-time-use satellite emergency beacons that work anywhere on earth, regardless of cell coverage.
Professionals also emphasize skills over gear. A person who knows how to build a debris shelter, start a fire in wet conditions, and navigate by map and compass will outperform a well-equipped but unskilled prepper every time. Building those skills is covered in 25 Most Critical Wilderness Survival Skills — Ranked by Life-Saving Priority.
FAQ: Bug Out Bag for Winter Survival Setup
Q: How heavy should a winter bug out bag be? A fully loaded winter bug out bag should weigh no more than 25–30% of your body weight. For most adults, that’s 40–55 lbs. If you’re planning foot travel in snow, aim for the lower end of that range.
Q: Can I use my regular bug out bag in winter by just adding more clothes? Not reliably. A standard bag often lacks the volume for a full winter layering system and a cold-rated sleeping bag. More importantly, the gear selection inside needs to change — not just the clothing. A winter-specific rebuild is safer than patching a three-season kit.
Q: What sleeping bag temperature rating do I actually need? Buy a bag rated 10–15°F below the coldest temperature you realistically expect. Sleeping bag ratings are survival minimums, not comfort ratings. If your lowest expected temperature is 20°F, buy a 5°F or 0°F bag.
Q: How do I keep water from freezing in my bug out bag? Use an insulated stainless steel water bottle and keep it close to your body or inside your jacket when temperatures drop. Hydration bladder hoses freeze quickly — switch to bottles in winter. Chemical purification tablets work at any temperature and don’t freeze.
Q: Should I pack a tent or a bivy in my winter bug out bag? It depends on your expected conditions. A quality insulated bivy sack is lighter and faster to deploy. A four-season tent provides better wind and snow protection for multi-night use. In severe conditions, the tent is the safer choice. For most preppers in moderate winter climates, a bivy plus tarp is a workable compromise.
Q: What food is best for a winter bug out bag? High-fat, high-calorie foods: nuts, nut butter packets, hard chocolate, jerky, and freeze-dried meals. Fat provides more calories per gram than carbohydrates and digests slowly, providing sustained energy. Avoid foods that freeze solid (canned goods, water-heavy foods).
Q: Do hand warmers actually help in a survival situation? Yes — significantly. Air-activated chemical hand warmers provide 8–12 hours of heat and can prevent frostbite in extremities. They’re also useful for warming a sleeping bag before you get in, keeping batteries warm, and preventing medications from freezing.
Q: Is a bug out bag for winter survival setup different for urban versus rural environments? Yes. Urban winter evacuees may be walking on plowed sidewalks and roads, making wheeled bags viable and reducing the need for snowshoes. Rural preppers need to plan for off-road travel through snow, which demands different footwear, navigation tools, and caloric planning.
Q: How often should I rotate the gear in my winter bug out bag? At minimum, do a full gear review at the start of each winter season. Check battery levels, food expiration dates, medication expiration dates, and the condition of your sleeping bag’s loft. Replace chemical hand warmers annually — they lose potency over time.
Q: What’s the single most important item in a winter bug out bag? A properly rated sleeping bag. You can improvise fire, find food, and navigate with basic tools — but there’s no improvising a warm, dry place to sleep in sub-zero temperatures. The sleeping bag is the item that keeps you alive through the night.
Conclusion: Build It Before Winter Arrives
A bug out bag for winter survival setup isn’t a luxury for hardcore survivalists — it’s a practical necessity for anyone who lives where temperatures drop below freezing. The stakes in winter are simply higher. Cold kills faster than almost any other environmental threat, and it does so quietly, without warning.
Actionable next steps:
- Audit your current bag. Pull everything out and identify what fails in freezing temperatures (cotton clothing, alkaline batteries, standard water filters).
- Prioritize thermal gear first. If your budget is limited, a proper sleeping bag and layering system come before everything else.
- Waterproof everything inside your bag. Use pack liners and dry bags before the first storm of the season.
- Test your kit in actual cold. Set up your shelter, start your stove, and put on your full gear system in real winter conditions before you need to rely on it.
- Build your skills alongside your gear. Review 25 Most Critical Wilderness Survival Skills and practice fire starting, navigation, and shelter building in winter conditions.
- Tailor your kit to your location. Alaska and Colorado are not the same. Know your region’s specific threats and pack accordingly.
Preparedness isn’t about fear. It’s about knowing that when the temperature drops and the roads close and the power goes out, you have exactly what you need — and you know how to use it.
Products, Tools, and Resources Worth Knowing
These are the categories of gear that consistently make the difference in a real winter survival situation. No affiliate pressure — just honest, experience-based recommendations.
- Sleeping bags: Look at Teton Sports, ALPS Mountaineering, or Western Mountaineering for reliable cold-weather ratings at various price points. Verify the EN/ISO temperature rating, not just the brand’s marketing language.
- Base layers: Smartwool and Icebreaker make excellent merino wool base layers. Patagonia’s Capilene line is a strong synthetic alternative. Budget option: Minus33 merino wool is significantly cheaper and performs well.
- Fire starters: The Light My Fire Swedish FireSteel is a proven ferro rod. UCO Stormproof matches are genuinely windproof and worth carrying as a backup.
- Water bottles: Klean Kanteen and Hydro Flask both make reliable insulated stainless steel bottles. The 32 oz wide-mouth format is ideal for melting snow.
- Traction devices: Kahtoola Microspikes are the gold standard for icy trail travel. Yaktrax are a functional budget alternative for moderate conditions.
- Personal locator beacons: ACR ResQLink and Garmin inReach Mini are the two most trusted options. A PLB is a one-time cost that could save your life in remote winter terrain.
- Dry bags: Sea to Summit and SealLine make quality roll-top dry bags. A set of three sizes (5L, 10L, 20L) covers most packing needs.
For a comprehensive overview of survival gear priorities beyond winter-specific items, The Essential Survival Gear Guide: 50 Items Ranked by Priority is a solid reference to keep bookmarked.
References
- U.S. Centers for Disease Control and Prevention. (2017). Winter Weather: Hypothermia. https://www.cdc.gov/disasters/winter/staysafe/hypothermia.html
- National Weather Service, NOAA. (2023). Wind Chill Chart and Frostbite Times. https://www.weather.gov/safety/cold-wind-chill-chart
- Federal Emergency Management Agency (FEMA). (2020). Are You Ready? An In-Depth Guide to Citizen Preparedness. https://www.ready.gov/sites/default/files/2020-03/ready_are-you-ready-guide.pdf
- Wilderness Medical Society. (2019). Practice Guidelines for the Out-of-Hospital Evaluation and Treatment of Accidental Hypothermia. Wilderness & Environmental Medicine.
- U.S. Army Survival Manual FM 21-76. (1999). Chapter 15: Cold Weather Survival. Department of the Army.