
Hey there! Some links on this page may be affiliate links which means that, if you choose to make a purchase, I may earn a commission at no extra cost to you. I greatly appreciate your support. Read the full disclosure here.
Exposure kills faster than thirst, hunger, or blood loss in most wilderness emergencies. According to the U.S. Army Survival Manual (FM 3-05.70), a person without shelter can die from hypothermia in as little as three hours in wet, windy conditions, even when temperatures are well above freezing. That single fact is why mastering bushcraft shelter building techniques in the wild is not optional for any serious survivalist or prepper. It is the foundational skill that keeps every other skill relevant.
This guide covers everything from choosing the right shelter type for your environment to building a fully insulated structure with nothing but what the forest provides.
Key Takeaways
- Shelter is the first survival priority in cold, wet, or windy conditions, before water and food.
- A lean-to can be built in under two hours with basic materials; a debris hut takes longer but provides far superior insulation.
- Natural materials, dead branches, bark, leaves, pine needles, and moss, are sufficient to build a waterproof, wind-blocking shelter.
- Site selection is as important as construction technique; poor placement can make a well-built shelter dangerous.
- Insulating the ground beneath you is critical, you lose more body heat to the ground than to cold air.
- Beginners should practice these skills before an emergency, not during one.
- Tools help but are not required; effective shelters can be built with bare hands and knowledge alone.
- Winter bushcraft shelters require additional insulation depth and a different structural approach than three-season shelters.
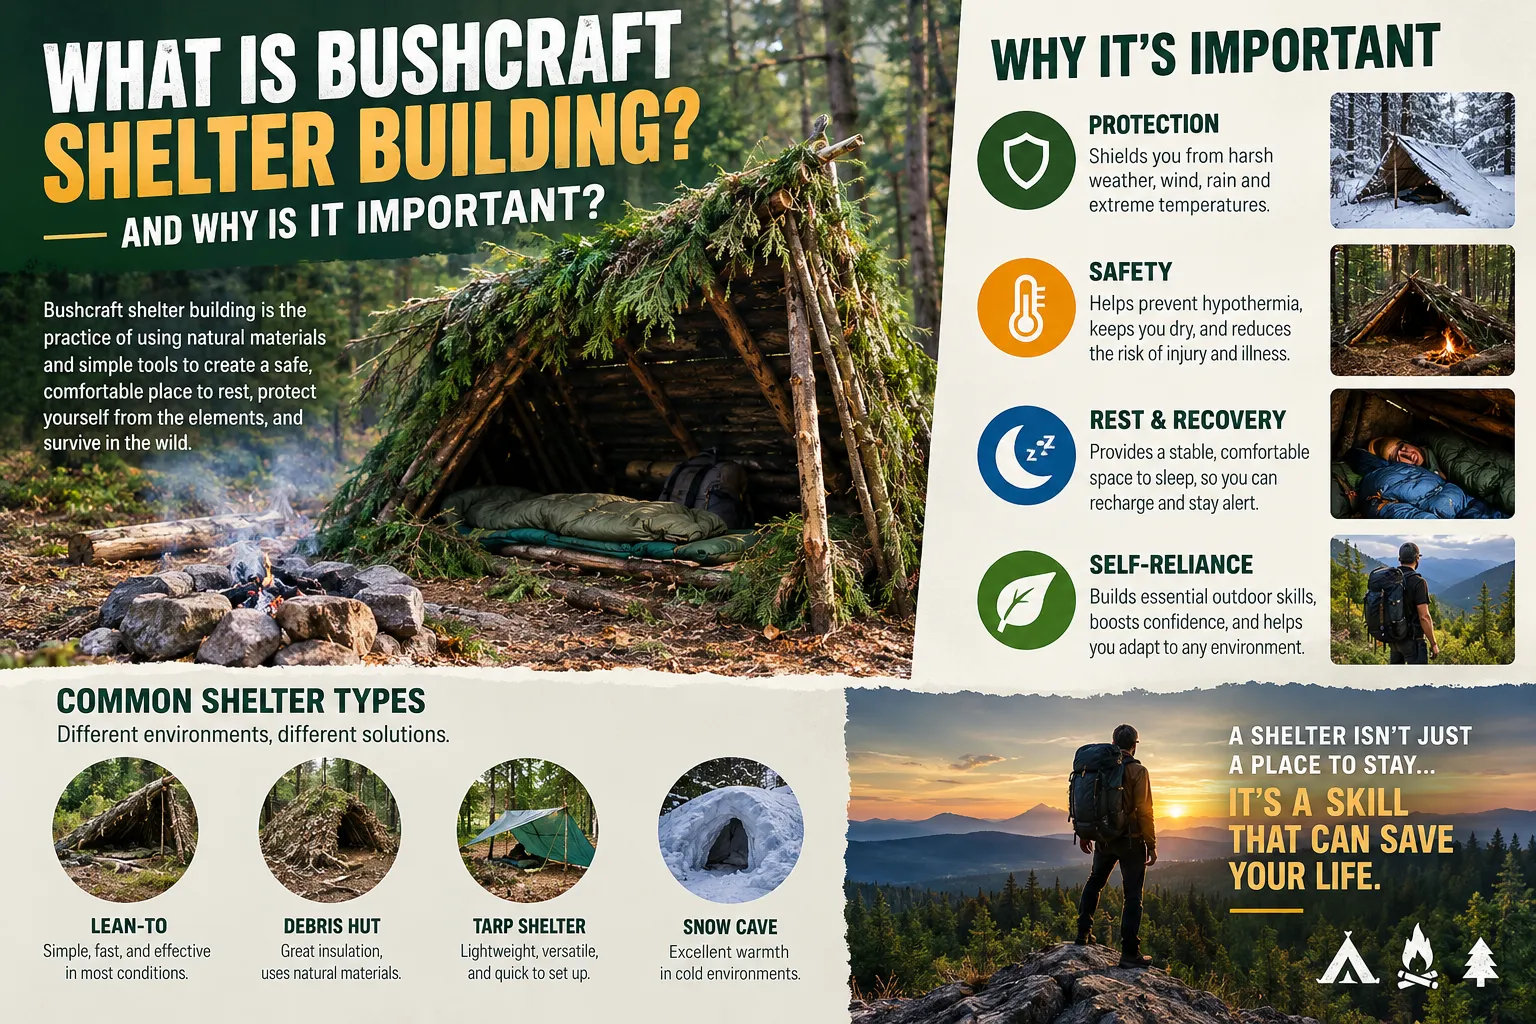
What Is Bushcraft Shelter Building and Why Is It Important
Bushcraft shelter building is the practice of constructing a protective structure using only natural, locally available materials, no tent, no tarp, no manufactured gear. It is important because shelter is the most time-sensitive survival need a person faces in a wilderness emergency.
When the body loses core temperature faster than it can generate heat, hypothermia sets in. Wind strips warmth from exposed skin. Rain saturates clothing and accelerates heat loss. A properly built natural shelter blocks all three threats simultaneously. For preppers and survivalists, this skill represents the difference between a bad night and a fatal one.
Beyond emergencies, bushcraft shelter skills build the broader competency framework described in our guide to 25 Most Critical Wilderness Survival Skills, the kind of layered preparedness that lets you function confidently in any environment.
What Materials Do You Need for Bushcraft Shelter Building
The materials needed for most bushcraft shelter building techniques in the wild are entirely sourced from the surrounding environment. No purchases required.
Core natural materials:
- Ridgepole: A straight, strong branch or small log, 8 to 12 feet long, to form the structural spine
- Rib branches: Smaller sticks and branches angled against the ridgepole to create the frame
- Debris insulation: Dry leaves, pine needles, bark, bracken fern, and grass piled thickly over the frame
- Lashing material: Flexible green vines, plant fibers, or strips of inner bark (no cordage required for basic builds)
- Ground insulation: A deep bed of dry leaves, moss, or pine needles inside the shelter floor
The key word throughout is “dry.” Wet debris insulates poorly and adds weight that can collapse a structure. Always source dead, dry material when possible, and build on dry ground.
Optional tools that speed construction:
- A fixed-blade knife or hatchet for notching, cutting, and processing wood
- Paracord for lashing ridgepoles and reinforcing frames
- A folding saw for cutting branches cleanly
Check out our 7 Essential Wilderness Survival Tools Every Hiker Needs for a practical gear list that complements natural shelter-building skills.
Best Bushcraft Shelter Types for Different Weather Conditions
Different environments and weather conditions demand different shelter designs. Choosing the wrong type wastes energy and time, both of which are critical resources in a survival situation.
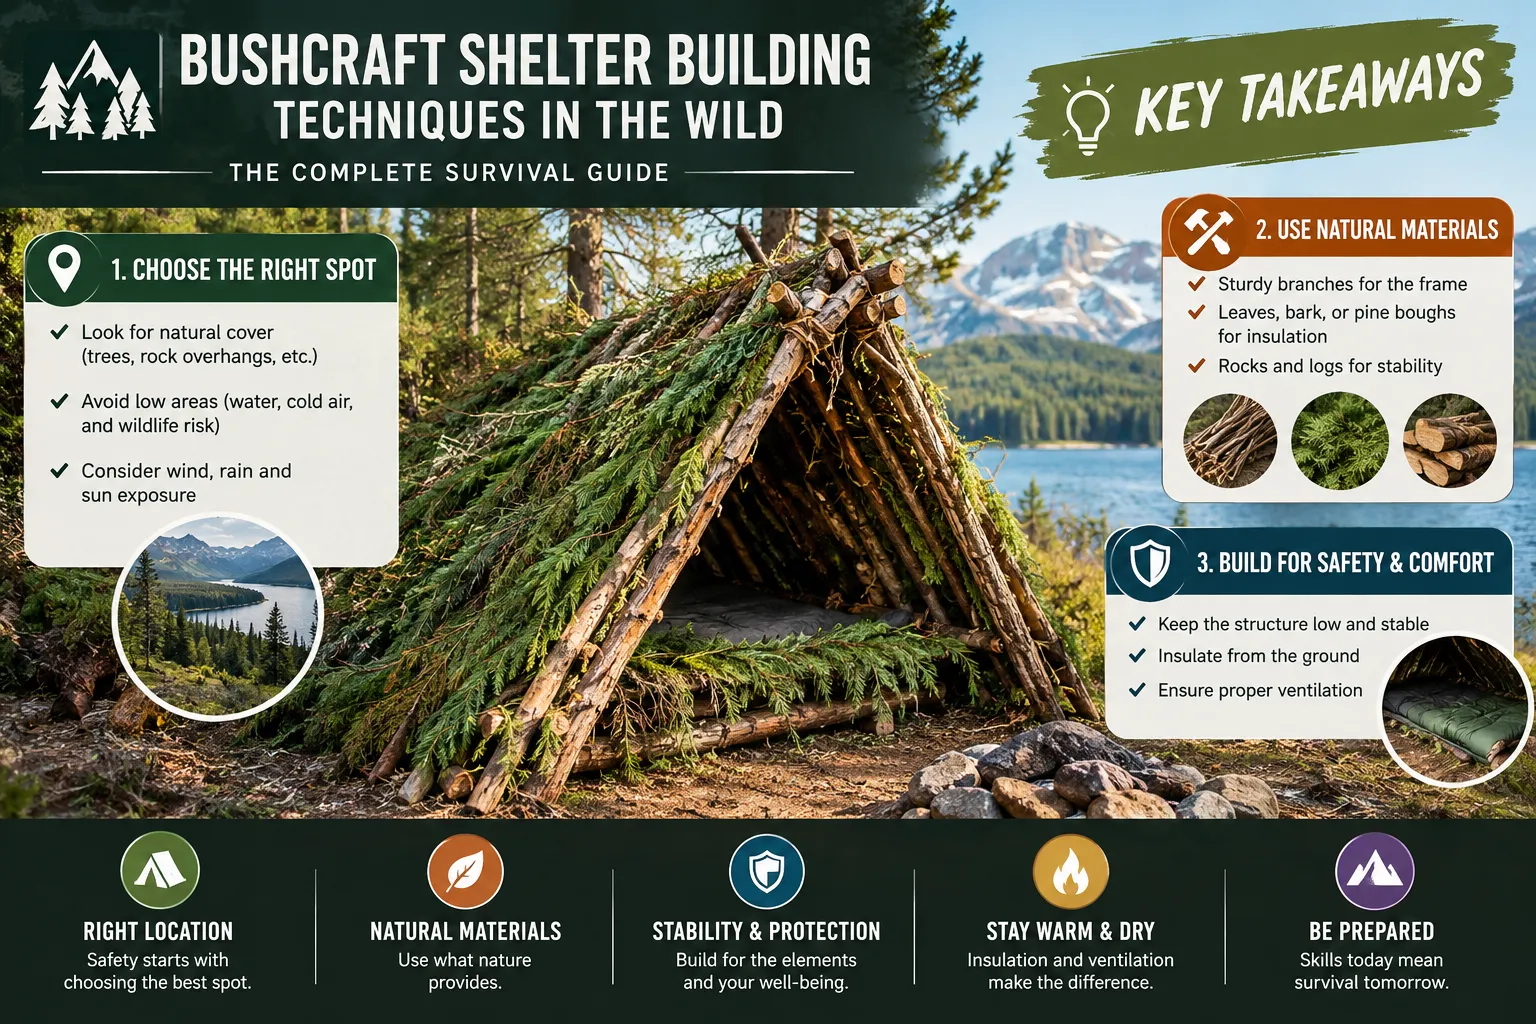
| Shelter Type | Best Conditions | Build Time (est.) | Skill Level |
|---|---|---|---|
| Lean-To | Mild weather, rain, light wind | 1 to 2 hours | Beginner |
| Debris Hut | Cold, wet, no fire available | 3 to 5 hours | Intermediate |
| A-Frame | Rain, moderate cold, forested areas | 2 to 3 hours | Beginner, Intermediate |
| Snow Quinzhee | Deep winter, heavy snow available | 4 to 6 hours | Advanced |
| Wickiup / Tipi Frame | Long-term camp, group shelter | Half day or more | Advanced |
Decision rule: Choose a lean-to when you need speed and have a fire. Choose a debris hut when temperatures are dangerously low and no fire is possible. In winter with adequate snow depth, a quinzhee is the warmest option available.
How to Build a Lean-To Shelter in the Wilderness
A lean-to is the fastest functional shelter a person can build in the wild, and it is the right starting point for anyone learning bushcraft shelter building techniques in the wild. It provides solid rain and wind protection with minimal construction time.
Step-by-step lean-to construction:
- Select your site. Find two trees roughly 8 to 10 feet apart. Avoid low ground, dry riverbeds, and areas with dead overhead branches (called “widow makers”).
- Secure the ridgepole. Lash or wedge a sturdy horizontal branch between the two trees at shoulder height. This is your main support beam.
- Lean rib branches. Place angled branches from the ridgepole to the ground at a 45-degree angle, spaced 6 to 12 inches apart. This forms the roof structure.
- Weave cross-branches. Lay smaller sticks horizontally across the ribs to create a lattice that debris can grip.
- Layer debris from bottom to top. Start at the base and work upward, layering leaves, bark, and pine needles like roof shingles, each layer overlapping the one below. Aim for at least 2 feet of thickness for rain resistance.
- Build side walls. Lean additional branches along the sides and cover with debris to block wind.
- Insulate the floor. Pile 4 to 6 inches of dry leaves or pine needles inside as bedding.
A lean-to works best when positioned with its open face toward a fire. The fire reflects heat into the shelter, dramatically improving warmth. For fire-starting skills that pair with this setup, see our guide on how to start a survival fire in rain.
Difference Between a Debris Hut and a Lean-To Shelter
A lean-to is an open-faced, single-slope structure that relies on fire for warmth. A debris hut is a fully enclosed, body-heat-only shelter that functions like a sleeping bag made of natural materials. They serve different survival purposes.
The debris hut is built around the sleeper’s body dimensions, just wide enough to fit inside and no larger. This matters because excess interior space means excess air volume, and your body cannot heat that air efficiently. A well-built debris hut with 2 to 3 feet of debris insulation can maintain a survivable interior temperature even when outside temperatures drop well below freezing.
Key differences at a glance:
- Lean-to: Open face, fast to build, requires fire, good for mild conditions
- Debris hut: Fully enclosed, slower to build, no fire needed, superior cold-weather performance
Choose a debris hut when temperatures are life-threatening and fire is not an option due to wet conditions or lack of ignition materials. If fire is accessible, a lean-to paired with a good fire is faster and more comfortable for most three-season conditions.
Bushcraft Shelter Building for Beginners Step by Step
For beginners, the best first project is a simple A-frame debris shelter. It combines the structural logic of a lean-to with the enclosed warmth of a debris hut, and it teaches the core skills that apply to every other shelter type.
Beginner A-Frame build process:
- Find a ridgepole 10 to 12 feet long and prop one end in a forked tree or on a stump at waist height, the other end on the ground.
- Lean rib branches along both sides of the ridgepole at a 45-degree angle, creating a triangular cross-section.
- Weave smaller sticks horizontally across the ribs to form a lattice.
- Cover the entire frame with debris, leaves, bark, grass, pine needles, working from the bottom up. Minimum 2 feet thick.
- Close the back end with stacked branches and debris.
- Leave a small entrance at the front, just large enough to crawl through.
- Pile 6 to 8 inches of dry debris inside for ground insulation.
Common beginner mistake: Building too large. A shelter that fits your body snugly will retain heat far better than a roomy one. If you can sit up inside, it’s too big for cold-weather use.
For a broader foundation of outdoor skills that complement shelter building, our 20 Essential Bushcraft Skills for Beginners is the logical next step.
How to Build a Shelter Without Tools in the Wild
Building a shelter without tools is entirely possible and is a core competency within bushcraft shelter building techniques in the wild. The key is working with the natural shapes and strengths of available materials rather than forcing them.
No-tool strategies:
- Use forked trees as natural anchors for ridgepoles instead of lashing.
- Snap branches to length by bending them over a knee or against another tree, no cutting required.
- Use gravity and weight to hold structures in place; lean heavy branches against each other in a tripod or A-frame configuration.
- Source flexible green vines (grapevine, wisteria, or similar) for natural lashing when cordage is unavailable.
- Exploit existing natural features, a fallen log, a rock overhang, or a dense conifer with low-hanging branches can serve as one wall or roof, cutting construction time significantly.
The biggest limitation without tools is processing large wood. Focus on smaller-diameter branches (thumb to wrist thickness) that can be managed by hand, and compensate with greater debris depth for insulation.
Best Bushcraft Shelter Techniques for Winter Survival
Winter survival demands a fundamentally different approach to shelter. Cold air, wind, and snow load all increase the structural and thermal demands on any natural shelter.
Winter-specific techniques:
- Snow quinzhee: Pile snow into a mound roughly 8 feet in diameter and 6 feet high. Let it sinter (harden) for 2 hours, then hollow it out from the inside, leaving 8 to 10 inches of wall thickness. Insert sticks through the outer wall beforehand as thickness guides. A small ventilation hole in the roof is non-negotiable to prevent CO2 buildup and condensation.
- Super-insulated debris hut: In winter, double the standard debris depth to 4 to 5 feet on all sides. Pack the interior with the driest leaves available and seal the entrance with a debris plug.
- Trench shelter: In deep snow, dig a trench, roof it with branches and a snow layer, and sleep inside. Snow is an excellent insulator, interior temperatures stay near 32°F (0°C) regardless of outside conditions.
Critical winter rule: Never sleep directly on snow or frozen ground. Ground insulation is as important as overhead cover. See the next section for detail on this.
Pair your winter shelter with reliable fire-starting skills. Our guide on how to start a fire without matches covers friction-based and spark-based methods that work in cold, wet conditions.
How to Insulate a Bushcraft Shelter from the Ground
Ground insulation is the most overlooked element in survival shelter construction, and it is responsible for more cold-related casualties than inadequate overhead cover. The ground conducts heat away from the body roughly 25 times faster than still air.
Ground insulation method:
- Clear the shelter floor of rocks, sticks, and any moisture sources.
- Pile dry leaves, pine needles, bracken fern, or dry grass to a depth of at least 4 to 6 inches, more in winter.
- Compress the pile by sitting on it, then add another 2 to 3 inches on top. Debris compresses significantly under body weight.
- If bark slabs are available, lay them flat as a base layer before adding softer debris on top.
- In winter or on frozen ground, aim for 8 to 12 inches of uncompressed debris, which will compress to roughly 4 to 6 inches under your body.
Choose X if: You’re in a conifer forest, use dry pine needles, they are abundant, shed water well, and compress less than deciduous leaves. In a deciduous forest, dry oak or beech leaves work well. Avoid wet or green vegetation; it conducts cold rather than blocking it.
Can You Build a Waterproof Shelter with Just Natural Materials
Yes. A properly layered debris shelter built with sufficient thickness and correct shingle-style layering will shed rain effectively. The key is technique, not materials.
Waterproofing principles for natural shelters:
- Layer like roof shingles: Always apply debris from the bottom of the roof upward so each layer overlaps the one below. Water flows down and over each layer rather than under it.
- Thickness matters: A 2-foot-thick debris roof will shed moderate rain. In heavy rain, 3 feet is more reliable.
- Bark shingles: Large sheets of birch, pine, or cedar bark laid in overlapping rows provide excellent waterproofing and are more durable than loose debris.
- Angle: A steeper roof pitch sheds water faster. Aim for at least a 45-degree angle on any rain-facing surface.
- Avoid gaps: Even small gaps in the debris layer create drip points. Pack debris tightly and fill gaps as you build.
A natural shelter will never be as instantly waterproof as a modern tent, but a well-constructed one will keep a person dry through significant rainfall. The investment is time and material depth.
Bushcraft Shelter Building vs. Camping Tent: Which Is Better
A camping tent is faster to set up, more consistently waterproof, and lighter to carry. A natural bushcraft shelter requires no gear, leaves no trace, and can be built anywhere materials are available. They serve different purposes and are not truly in competition.
Choose a tent when:
- You’re on a planned trip with a known route and pack weight is manageable
- Weather is severe and time is limited
- You’re with children or group members who cannot assist with construction
Choose bushcraft shelter building when:
- Gear is lost, damaged, or unavailable
- You’re in a bug-out or emergency scenario with no pre-staged equipment
- Long-term wilderness living requires a structure that integrates with the environment
- You’re practicing and building skills before an emergency occurs
The honest answer for preppers: carry a tent or emergency bivy as your primary shelter, and know bushcraft shelter techniques as your backup. Skills don’t run out of batteries. For families preparing for wilderness scenarios, our Wilderness Survival for Families with Children guide covers how to adapt these skills for group situations.
Common Mistakes People Make Building Survival Shelters
Even experienced outdoorspeople make avoidable errors when building natural shelters under pressure. Knowing these mistakes in advance is the fastest way to build better shelters from the start.
The most costly mistakes:
- Building too large: Extra interior volume means your body heat dissipates before warming the space. Size the shelter to your body, not your comfort instincts.
- Poor site selection: Building in a drainage path, under dead branches, or in an exposed ridgeline location creates new dangers. Spend 5 minutes evaluating the site before touching a single branch.
- Insufficient debris depth: Most beginners underestimate how much debris is needed. Two feet looks like a lot until it compresses and gets wet. Three feet is rarely too much.
- Neglecting ground insulation: Covered in the previous section, this is the single most common and most dangerous omission.
- Building near water for convenience: Streams and lakeshores are cold, windy, and prone to flooding. Camp at least 200 feet from any water source.
- No ventilation in enclosed shelters: A fully sealed snow or debris shelter can accumulate CO2 overnight. Always maintain a small ventilation opening.
- Skipping practice: Building a shelter for the first time during an actual emergency is a serious disadvantage. Practice in your backyard or on day hikes first.
Bushcraft Shelter Building Skills Everyone Should Know
Regardless of experience level, certain core bushcraft shelter building techniques in the wild form the foundation of wilderness self-reliance. These are the non-negotiable skills every survivalist and prepper should have practiced before they need them.
The essential skill set:
- Site evaluation: Reading terrain, identifying hazards, and selecting a defensible, dry, sheltered location
- Ridgepole and frame construction: Building a stable structural frame without nails, screws, or manufactured fasteners
- Debris layering: Applying natural insulation correctly for both waterproofing and thermal retention
- Ground insulation: Building a sleeping platform that separates the body from cold ground
- Fire integration: Positioning a shelter to maximize heat reflection from a fire (lean-to orientation)
- Emergency improvisation: Recognizing and using natural features, rock overhangs, fallen logs, dense conifers, as partial shelter components
These skills pair directly with fire-making and water procurement. Once shelter is secure, water becomes the next priority. Our guide on how to purify water without tools outdoors covers that next critical step.
Also worth noting: a well-rounded prepper’s bug out bag should always include at minimum a lightweight emergency bivy or tarp as a backup to natural shelter skills, not a replacement for them.
Frequently Asked Questions
How long does it take to build a bushcraft shelter?
A basic lean-to takes 1 to 2 hours for a moderately fit adult with no tools. A debris hut takes 3 to 5 hours depending on debris availability. A snow quinzhee requires 4 to 6 hours including sintering time. Practice reduces these times significantly.
What is the warmest natural shelter you can build?
A well-constructed debris hut with 3 to 4 feet of insulation on all sides and a thick ground bed is the warmest natural shelter achievable without fire. Interior temperatures can remain survivable even in sub-zero outdoor conditions.
Do I need tools to build a survival shelter?
No. Effective shelters can be built with bare hands using natural materials. Tools like a knife or folding saw speed up the process and improve precision, but they are not required for a functional, life-saving structure.
What is the best natural material for shelter insulation?
Dry leaves, pine needles, and bracken fern are the top choices in most temperate environments. The key quality is dryness, wet material loses most of its insulating value and adds weight that can collapse a structure.
How do I keep a natural shelter dry inside?
Use shingle-style layering on the roof (bottom to top), maintain a minimum 2-foot debris thickness, choose a site with natural wind protection, and always build a thick ground insulation layer to prevent moisture wicking from the soil.
Is a debris hut safe to sleep in?
Yes, when properly built. The main risks are insufficient ventilation (always leave a small air gap), structural collapse from wet or heavy debris (build with dry materials and a strong frame), and building in a hazardous location. None of these risks are difficult to manage with basic knowledge.
Can children help build a bushcraft shelter?
Yes. Children can collect debris, pass materials, and help with layering. Involving children in shelter-building practice is one of the most effective ways to build family resilience. Our Wilderness Survival for Families with Children guide covers age-appropriate task assignments.
What is the biggest mistake beginners make with natural shelters?
Building too large. A shelter that fits the body snugly retains body heat effectively. A spacious shelter loses heat faster than a person can generate it, which defeats the purpose entirely.
How much debris do I actually need for a debris hut?
More than you think. A pile of debris that looks like it would fill a pickup truck bed is roughly the right amount for a single-person debris hut in mild conditions. In winter, double that estimate.
Does the direction a shelter faces matter?
Yes. In the Northern Hemisphere, orienting the entrance away from the prevailing wind (typically from the north or northwest) reduces heat loss. For lean-tos with a fire, face the open side toward the fire and position the back wall to reflect heat inward.
What natural materials work for lashing without cordage?
Green grapevine, wisteria, willow shoots, inner bark strips from basswood or cedar, and long grass twisted into cordage all work as natural lashing. They are weaker than manufactured cordage but sufficient for shelter frames when used in multiple wraps.
Can a bushcraft shelter protect against wildlife?
A natural shelter provides no meaningful barrier against determined wildlife. The more important protection is site selection, avoid building near game trails, berry patches, or water sources that attract animals. Fire is a far more effective wildlife deterrent than any shelter structure.
Conclusion
Mastering bushcraft shelter building techniques in the wild is one of the highest-return investments a survivalist or prepper can make. The skill costs nothing to learn, requires no gear to practice, and can be the deciding factor between surviving and not surviving an unplanned night in the wilderness.
Start with the lean-to. Build it in your backyard on a weekend afternoon. Then build a debris hut and actually sleep in it. That single night of practice will teach you more than hours of reading, and it will reveal exactly where your technique needs work before the stakes are real.
Actionable next steps:
- Practice a lean-to build in a local park or your backyard this month.
- Source and carry a fixed-blade knife and 50 feet of paracord as minimum shelter-building tools.
- Read our 20 Essential Bushcraft Skills for Beginners to build the surrounding skill set.
- Add fire-starting practice to your shelter sessions, the two skills are inseparable in cold conditions.
- Review your bug out bag to ensure it includes at minimum an emergency bivy as a backup shelter option.
Preparedness is not about fear. It is about having the skills and confidence to protect yourself and the people you care about when the unexpected happens. Shelter is where that confidence begins.
Products, Tools, and Resources
Building natural shelters is fundamentally a skills-based practice, but a few well-chosen tools make the process faster, safer, and more reliable.
Recommended tools for bushcraft shelter building:
- Fixed-blade survival knife (4 to 6 inch blade): The single most useful tool for processing branches, splitting bark, and creating notches for lashing. Look for a full-tang design with a carbon or stainless steel blade. Mora, ESEE, and Benchmade all produce reliable options at various price points.
- Folding pruning saw: Cuts branches cleanly and quickly without an axe. Silky and Bahco make compact, lightweight models that fit in any pack.
- 50 feet of 550 paracord: Versatile, lightweight, and strong enough for any shelter lashing application. Keep a dedicated coil in your pack separate from other uses.
- Emergency bivy or SOL Escape Bivvy: A 3.5-ounce reflective bivy serves as a critical backup when natural shelter construction is not possible due to time, injury, or terrain. It pairs with a debris hut to dramatically improve warmth retention.
- Tarp (8×10 feet, silnylon or Dyneema): A lightweight tarp extends the functionality of any natural frame shelter and provides immediate rain protection while the debris layer is built. It bridges the gap between pure bushcraft and practical field use.
These tools are not substitutes for skill, they are multipliers. A person with knowledge and no tools will always outperform a person with tools and no knowledge. Build the skills first, then equip accordingly.