

Affiliate Disclosure: Hey there! As an Amazon Associate, some links on this page may be affiliate links which means that, if you choose to make a purchase, I may earn a commission at no extra cost to you. I greatly appreciate your support!
There’s a moment that happens to almost everyone who spends real time in the woods.
It’s not dramatic. There’s no emergency, no crisis. You’re sitting beside a fire you built yourself, in a shelter you constructed from what the forest gave you, drinking water you purified from a stream you found by reading the land. And something shifts — quietly, permanently — in how you understand your relationship with the natural world.
That moment is what bushcraft is actually about.
Not survival. Not crisis management. Not preparing for the apocalypse. Bushcraft is the ancient, deeply human practice of developing genuine competence in woodland environments — the ability to work with nature rather than against it, to use what the forest provides, and to move through wild places with the quiet confidence of someone who belongs there.
This guide ranks the 20 most essential bushcraft skills for beginners in the order that matters: by how quickly each skill builds on the previous one, by how much each skill expands your capability in the woods, and by how practically achievable each skill is for someone starting from zero.
Read it in order. The sequence is the curriculum.
What Bushcraft Actually Is — And Why It’s Different From Everything You’ve Seen Online
Before ranking the skills, the philosophy needs to be clear, because misunderstanding what bushcraft is leads beginners to learn the wrong things in the wrong order.
Bushcraft is not wilderness survival. Survival is crisis management — the application of emergency skills when something has gone wrong. Bushcraft is craft — the deliberate, patient development of woodland skills practiced for their own sake, in conditions you’ve chosen, with time to do things properly.
Bushcraft is not camping. Camping uses manufactured equipment to make the outdoors comfortable. Bushcraft uses natural materials and developed skills to make the outdoors functional.
And bushcraft is definitely not a YouTube aesthetic. The social media version — dramatic fire lighting, elaborate camp setups, expensive gear reviews — has created a distorted picture of what the practice actually involves. Real bushcraft is slower, quieter, and more deeply satisfying than anything that photographs well.
Understanding this distinction changes how you approach learning. Bushcraft skills are developed through patient, repeated practice in real woodland environments. They cannot be learned from videos alone. They require your hands, your attention, and your willingness to fail repeatedly before you succeed.
The short version: The 20 most essential bushcraft skills for beginners follow a specific learning sequence — knife safety and use, fire starting (modern methods), shelter building, water procurement and purification, natural tinder identification, fire by friction (bow drill), foraging basics, cordage making, wood carving, navigation, tracking, trapping basics, fishing without commercial equipment, food preservation, tool making, plant medicine, hide tanning, basket weaving, advanced navigation, and long-term camp craft. The sequence reflects the order in which each skill enables the next.
Key Takeaways:
– Begin with knife safety and basic use, as this foundational skill supports nearly all other bushcraft practices and prevents common injuries.
– Master modern fire-starting methods first, then progress to primitive techniques like the bow drill to ensure reliable fire-making in all conditions.
– Develop skills in shelter building, water procurement, and natural tinder identification early to prioritize warmth, hydration, and successful fire starting.
– Focus on sustainable sustenance skills such as wild plant foraging, cordage making, and wood carving to enhance self-reliance with natural materials.
– Advance through navigation, trapping, fishing, and long-term camp craft gradually, integrating each skill to build competence and confidence in woodland living.
The Bushcraft Skill Priority Framework — Why Order Matters More Than You Think
Most bushcraft guides present skills as a flat list. This guide doesn’t, because the order in which you learn bushcraft skills determines how quickly you develop genuine competence.
The priority framework used here is based on three criteria:
Safety dependency: Skills that prevent injury or death come first. Knife safety before knife use. Fire safety before fire starts.
Skill dependency: Skills that enable other skills come before the skills they enable. You cannot make natural cordage without knowing which plants to use. You cannot use a bow drill without knowing how to identify appropriate wood.
Practice accessibility: Skills that can be practiced in local parks and woodlands before requiring remote wilderness access come before skills that require specific environments or conditions.
This framework produces a learning sequence that systematically builds genuine competence — each skill expanding your capabilities and enabling the next.
Tier 1: Foundation Skills — The Non-Negotiables
These are the skills that every bushcrafter must develop before anything else. They are the foundation on which all other bushcraft competence is built.
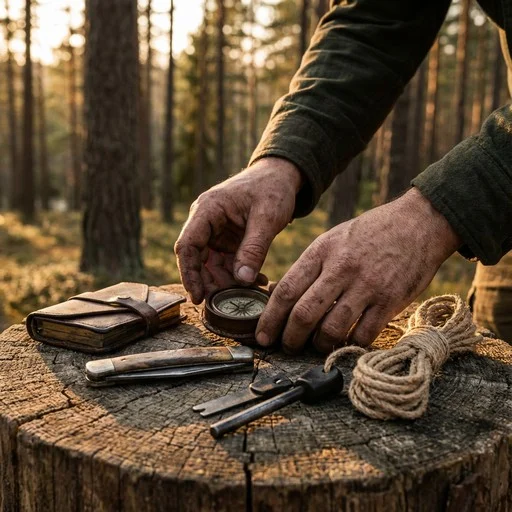
Skill #1: Knife Safety and Basic Knife Use — Before Anything Else
 The knife is the single most important tool in bushcraft. Almost every other skill on this list requires one. Learning to use a knife safely is not optional — it is the prerequisite for everything that follows.
Knife injuries are the most common bushcraft injuries, and almost all of them are preventable. They happen when beginners use incorrect technique, work with dull blades (which require more force and are more likely to slip), or fail to establish safe working zones.
The fundamental safety rules:
The blood bubble: Imagine a sphere around your body, approximately arm’s length in radius. Before making any cut, ensure no part of another person is within this sphere. This is your safe working zone.
Cut away from your body: Every cut should move the blade away from your body, not toward it. This sounds obvious until you’re trying to whittle a point on a stick and instinctively pull the knife toward yourself.
The femoral artery rule: Never cut toward your inner thigh. The femoral artery runs close to the surface here, and a cut to this area can be fatal within minutes. Always position your leg so that a slip would send the blade away from the inner thigh.
Secure your work: Use a carving horse, a log, or your knee (with the blade moving away from it) to secure the material you’re working. Trying to hold material in one hand while cutting with the other is a recipe for injury.
The five essential knife cuts every beginner must practice:
- The chest lever cut: Brace the knife against your chest with both thumbs on the spine, and push the material through the blade. Extremely controlled and safe.
- The thumb push cut: Place your thumb on the spine of the blade near the tip and push the blade through the material. Used for fine detail work.
- The forehand grip cut: The standard cutting grip — blade moving away from the body in a controlled stroke.
- The draw cut: Drawing the blade toward you in a controlled slicing motion. Used for fine work when the forehand cut is awkward.
- Batoning: Using a baton (a short, thick stick) to strike the spine of the knife and split wood. Used for splitting logs and processing firewood.
Choosing your first bushcraft knife:
For beginners, a fixed-blade knife with a full tang (the metal extends through the entire handle), a blade length of 4 to 5 inches, and a Scandinavian (Scandi) grind is the standard recommendation. The Scandi grind is easy to sharpen and produces a strong, predictable edge that is forgiving for beginners.
Recommended beginner bushcraft knives: Mora Companion (the most recommended beginner bushcraft knife, approximately $15 to $20), Mora Garberg (a step up, approximately $80 to $100), Hultafors Outdoor Knife (approximately $40 to $60).
Knife maintenance:
A sharp knife is a safe knife. A dull knife requires more force, is more likely to slip, and produces worse results. Learn to maintain your knife’s edge using a sharpening stone (a combination stone with coarse and fine grits is ideal for beginners) and a leather strop.
Skill #2: Fire Starting — Modern Methods First, Primitive Methods Later
 Fire is the second most important skill in bushcraft. It provides warmth, water purification, food preparation, light, and psychological comfort. Modern fire-starting methods are ranked here separately from primitive methods because they are categorically more reliable and should be the first resort in any situation.
Understanding the fire triangle:
Fire requires three elements: fuel, heat, and oxygen. Remove any one of them and the fire dies. Understanding this triangle is the foundation of all fire starting.
Fuel exists in three categories:
- Tinder: Fine, dry, combustible material that ignites from a spark or small flame
- Kindling: Small, dry sticks approximately pencil-diameter that catch from burning tinder
- Fuel wood: Progressively larger sticks and logs that sustain the fire
The fire lay:
Before lighting anything, build your fire lay — the arrangement of fuel that will allow the fire to grow from tinder to kindling to fuel wood.
Teepee lay: Arrange kindling in a cone shape over the tinder bundle, with progressively larger sticks on the outside. The most reliable lay for beginners.
Log cabin lay: Stack kindling in a square log-cabin pattern around the tinder. Burns longer and more evenly than the teepee.
Modern fire starting tools:
Lighter: The most reliable fire-starting tool available. A standard BIC lighter works in most conditions and provides hundreds of ignitions. Every bushcrafter should carry at least two.
Ferro rod (ferrocerium rod): Produces sparks at approximately 5,400°F — hot enough to ignite almost any dry tinder. Works when wet, works in cold temperatures, lasts for thousands of strikes.
Waterproof matches: Reliable backup. Store in a waterproof container with a striker.
Fire starting technique with a ferro rod:
- Prepare your tinder bundle — a bird’s nest-shaped bundle of dry, fine material
- Build your fire, lay around the tinder bundle
- Hold the ferro rod close to the tinder bundle (2 to 3 cm)
- Strike the rod with the back of your knife or the striker provided, directing sparks into the tinder
- When the tinder catches, gently blow to encourage the ember
- Transfer the burning tinder to the fire lay and continue blowing gently until the kindling catches
Fire safety in a bushcraft camp:
- Always clear a fire site of flammable material to a radius of at least 1 meter
- Never leave a fire unattended
- Have water or sand available to extinguish the fire
- Ensure the fire is completely extinguished before leaving — stir the ashes, add water, stir again, and check that no heat remains
Skill #3: Shelter Building — Staying Warm and Dry Without a Tent
In the Rule of Threes — the survival priority framework — shelter comes before water and food. In a harsh environment, an unprotected person can develop life-threatening hypothermia within 2 to 3 hours. Shelter building is the skill that addresses this threat.
In a bushcraft context, shelter building is also one of the most satisfying skills to develop — the ability to create a comfortable, functional living space from what the forest provides.
The debris hut — the most important primitive shelter:
The debris hut can be built anywhere there are trees, requires no tools beyond a knife, and provides remarkable thermal insulation through trapped air.
Construction:
- Find a ridgepole — a fallen branch or sapling, 9 to 12 feet long, strong enough to support weight
- Rest one end on a stump, forked branch, or rock approximately 2 to 3 feet off the ground; the other end rests on the ground
- Lean branches against both sides of the ridgepole at 45-degree angles, creating a triangular cross-section
- The interior should be just wide enough for your body — no wider (every extra inch is heat you must generate yourself)
- Cover the entire structure with leaves, pine needles, bark, and organic debris at least 2 feet thick
- Fill the interior with dry leaves before entering — you’ll sleep inside this material
- Stuff a large armful of debris into the entrance after you’re inside
The critical mistake: Building a shelter that’s too large. A debris hut should be body-sized. Larger shelters require more body heat to warm and provide less insulation per square foot.
Tarp shelter configurations:
For bushcrafters carrying a tarp — which should be in every kit:
- A-frame: Ridgeline between two trees at chest height, tarp draped over and staked at 45-degree angles. Most stable and weather-resistant.
- Lean-to: One edge attached to a ridgeline at head height, opposite edge staked to the ground. Fastest to set up, allows fire in front for heat reflection.
- Diamond: Upwind corner attached high, side corners staked to ground, downwind corner staked low. Most wind-resistant.
Shelter site selection:
Experienced bushcrafters assess shelter sites for:
- Natural windbreak (rock face, dense vegetation, hillside)
- Drainage — never in a depression or dry streambed
- Away from dead trees (widow-makers) and large branches overhead
- Proximity to building materials
- Proximity to water (but not so close as to be in a flood zone)
Skill #4: Water Procurement and Purification — The Skill That Buys You Time
Dehydration impairs cognitive function within 24 hours — exactly when you need your thinking to be sharpest. Water procurement and purification is the skill that addresses this need.
Finding water in woodland environments:
Water follows gravity. Understanding this principle allows you to locate water sources using terrain reading.
- Follow valleys and drainages downhill: Water flows to the lowest point. Following a valley or drainage downhill will eventually lead to a water source.
- Watch for concentrated green vegetation: Willows, cottonwoods, and cattails indicate water within a few feet of the surface.
- Listen: Moving water is audible at surprising distances in quiet environments.
- Transpiration bags: Tie a clear plastic bag around a leafy branch in direct sunlight. The plant’s transpiration process will collect clean water in the bag over several hours.
- Morning dew: Tie an absorbent cloth around your ankles and walk through the grass at dawn. Wring the cloth into a container.
Water purification methods:
Boiling (most reliable): A rolling boil for 1 minute (3 minutes above 6,500 feet) kills all biological pathogens. Requires a heat source and a container.
Portable water filters (Sawyer Squeeze, LifeStraw): Remove bacteria and protozoa but not viruses. Rated for 100,000 gallons (Sawyer). Immediate results.
Chemical treatment (chlorine dioxide tablets): The most effective chemical treatment option. Kills bacteria, viruses, and Cryptosporidium. Wait 30 minutes for bacteria and viruses; 4 hours for Cryptosporidium.
Improvised filtration: A layered filter of grass, sand, charcoal, and gravel removes particulate matter but does not reliably remove pathogens. Always follow with boiling or chemical treatment.
Building a woodland water filter:
- Cut the bottom off a plastic bottle (or use a birch bark cone)
- Layer from bottom to top: fine grass, fine sand, coarse sand, small gravel, large gravel
- Add a layer of crushed charcoal from your fire between the sand layers
- Pour water through the filter and collect the output
- Always boil or chemically treat the filtered water before drinking
Skill #5: Natural Tinder Identification — Knowing What Will Burn Before You Need It To
 The quality of your tinder determines whether your fire-starting attempt succeeds or fails. This skill is distinct from fire-starting technique because it requires botanical knowledge and field identification ability — the ability to look at a woodland environment and know what will burn.
Excellent natural tinder by category:
Plant-based tinder:
- Dry grass (crumbled fine)
- Cattail fluff — one of the best natural tinder available
- Dry inner bark of cedar, birch, or cottonwood (shredded fine)
- Dry pine needles
- Dry leaves (crumbled fine)
- Birch bark (contains natural oils that burn even when slightly damp)
- Dry seed heads of various plants
Fungal tinder:
- Amadou (from horse hoof fungus / Fomes fomentarius) — one of the best natural tinders available, used for thousands of years
- Dry bracket fungi
The moisture test: Tinder that feels even slightly cool to the touch contains moisture. Truly dry tinder feels room temperature and crumbles easily.
Tinder preparation: Even naturally dry tinder benefits from additional preparation — shredding, crumbling, and fluffing to maximize surface area and air circulation.
Seasonal Tinder Availability:
- Spring: Dry grass from the previous year, cattail fluff, dry inner bark
- Summer: Dry grass, dry seed heads, dry leaves in sheltered locations
- Autumn: Dry leaves, dry seed heads, dry grass
- Winter: Dry inner bark (always available), birch bark, amadou fungus
Tier 2: Sustenance Skills — Feeding Yourself From the Forest
These skills address the need to sustain yourself in a woodland environment over extended periods. They build on the foundation established by Tier 1 skills.
Skill #6: Fire by Friction — The Bow Drill Changes Everything
The bow drill is the primitive fire-starting method most accessible to beginners. It is the skill that separates those who can make fire from those who can make fire from nothing. It requires no manufactured tools — only wood, cordage, and technique.
Why does primitive fire starting matter:
Modern fire starting tools are reliable — until they’re not. Lighters run out of fuel. Ferro rods can be lost. Waterproof matches get wet. The ability to make fire from friction is the ultimate backup — and the skill that most deeply connects the practitioner to the ancient tradition of bushcraft.
The bow drill components:
- Fireboard: A flat piece of dry, soft wood (cedar, willow, cottonwood, basswood, hazel). Approximately 12 inches long, 3/4 inch thick.
- Spindle: A straight, dry stick of the same or similar wood, approximately 12 inches long. One end carved to a blunt point, the other to a rounded point.
- Bow: A curved branch approximately 24 inches long with a cord (paracord, natural cordage, or a shoelace) tied loosely enough to wrap once around the spindle.
- Handhold: A piece of hardwood or stone with a small depression to hold the top of the spindle.
- Tinder bundle: A bird’s nest-shaped bundle of dry, fine material.
The bow drill process:
- Cut a small depression in the fireboard and a notch from the depression to the edge
- Place a small piece of bark under the notch to catch the ember
- Wrap the bow cord once around the spindle
- Place the spindle in the depression, apply downward pressure with the handhold
- Use long, smooth bow strokes to rotate the spindle
- When smoke appears and dark powder accumulates in the notch, continue for 10 to 15 more strokes
- Tap the ember into the tinder bundle, fold the bundle around it, and blow gently until flame appears
The most common beginner mistakes:
- Using wood that isn’t completely dry
- Building a fire lay before creating the ember (the ember dies while you build)
- Stopping too soon when smoke appears
- Using a bow cord that’s too tight or too loose
- Applying insufficient downward pressure with the handhold
Wood selection for the bow drill:
The fireboard and spindle should be made from the same or similar wood. The wood must be dry, soft enough to create friction dust, and hard enough to maintain the spindle’s shape. In the UK and Europe: hazel, elder, willow, clematis. In North America: cedar, cottonwood, willow, basswood, mullein.
Skill #7: Wild Plant Foraging — The Most Accessible Food Source, and the Most Dangerous
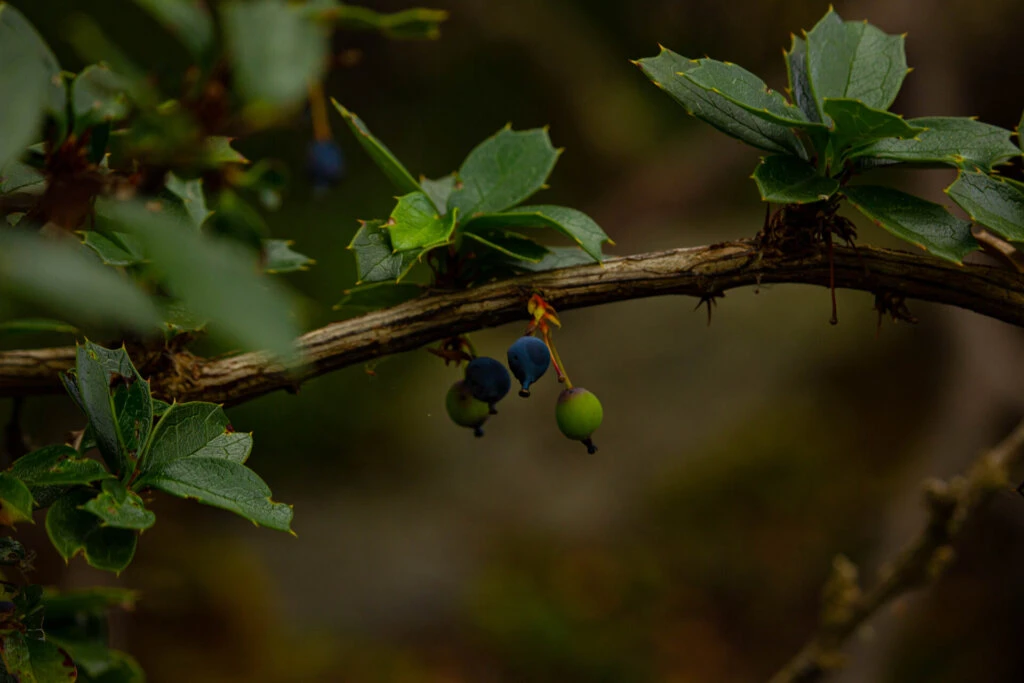 Wild plants are the most accessible food source in most woodland environments. They require no tools, no traps, and no hunting skills. But they also carry the highest risk of misidentification — and some misidentifications are fatal.
Safe foraging principles:
Positive identification only: Never eat a plant unless you can make a positive identification with complete confidence. “It looks like” is not sufficient. You must be certain.
Learn from qualified instructors: Photograph-based plant identification is dangerous for beginners. The safest way to learn foraging is from a qualified instructor in the field, with the actual plants in hand.
Start with distinctive species: Begin with plants that have no dangerous lookalikes — dandelion, nettles, elderflower, blackberries. These are distinctive enough that misidentification is unlikely.
The 10 most common edible wild plants for UK and European beginners:
- Dandelion (Taraxacum officinale): Entirely edible — leaves, flowers, and roots. Found everywhere.
- Stinging nettle (Urtica dioica): Highly nutritious. Cooking or drying neutralizes the sting.
- Elder (Sambucus nigra): Flowers and ripe berries are edible (cooked). Leaves, bark, and unripe berries are toxic.
- Blackberry (Rubus fruticosus): Ripe berries are edible raw. Leaves can be used for tea.
- Wild garlic (Allium ursinum): Identifiable by a strong garlic smell. Entirely edible.
- Hawthorn (Crataegus monogyna): Young leaves, flowers, and ripe berries are edible.
- Wood sorrel (Oxalis acetosella): Heart-shaped leaves with a pleasant lemony flavor. Edible raw.
- Chickweed (Stellaria media): Edible raw or cooked. Mild flavor.
- Plantain (Plantago major/lanceolata): Young leaves are edible raw or cooked.
- Cleavers (Galium aparine): Young shoots are edible raw or cooked. Seeds can be roasted as a coffee substitute.
The 10 most common edible wild plants for North American beginners:
- Dandelion (Taraxacum officinale): Entirely edible — leaves, flowers, and roots.
- Cattail (Typha species): Young shoots, pollen, and roots are edible. One of the most calorie-dense wild foods.
- Purslane (Portulaca oleracea): Edible raw or cooked. High in omega-3 fatty acids.
- Lamb’s quarters (Chenopodium album): Edible raw or cooked. Nutritionally similar to spinach.
- Wood sorrel (Oxalis species): Heart-shaped leaves with a lemony flavor. Edible raw.
- Blackberry/raspberry (Rubus species): Ripe berries are edible raw.
- Clover (Trifolium species): Flowers and young leaves are edible raw.
- Plantain (Plantago major/lanceolata): Young leaves are edible raw or cooked.
- Chickweed (Stellaria media): Edible raw or cooked.
- Wild garlic/ramps (Allium ursinum/tricoccum): Identifiable by garlic smell. Entirely edible.
Dangerous lookalikes to know:
- Wild garlic vs. Lily of the valley: Wild garlic smells strongly of garlic when crushed. Lily of the valley has no garlic odor and is highly toxic.
- Elder vs. Hemlock water dropwort: Elder has distinctive corky bark and opposite compound leaves. Hemlock water dropwort is one of the most toxic plants in Europe.
- Blackberry vs. Nightshade: True blackberries are distinctive. Nightshade berries are toxic.
Skill #8: Natural Cordage Making — The Connective Tissue of Bushcraft
Cordage — rope made from natural plant fibers — is the connective tissue of bushcraft. It’s used for shelter construction, trap setting, tool making, fishing, and dozens of other applications. The ability to make cordage from natural materials means you’re never without rope.
The best natural cordage plants by region:
UK and Europe:
- Stinging nettle (Urtica dioica) — one of the strongest natural cordage plants
- Dogbane (Apocynum cannabinum)
- Bramble/blackberry (Rubus fruticosus) — inner bark
- Lime/linden (Tilia species) — inner bark
- Iris (Iris species) — leaves
North America:
- Dogbane (Apocynum cannabinum) — the gold standard of North American cordage plants
- Stinging nettle (Urtica dioica)
- Cattail (Typha species) — leaves
- Basswood/linden (Tilia americana) — inner bark
- Yucca (Yucca species) — leaves (in appropriate regions)
The reverse wrap technique — making cordage step by step:
- Gather long plant fibers (from the plants listed above, processed by retting or pounding to separate the fibers)
- Divide the fibers into two equal bundles
- Hold the bundles together at one end and twist the right bundle clockwise (away from you)
- While maintaining that twist, wrap the right bundle over the left bundle (counterclockwise)
- Now the left bundle is on the right — twist it clockwise and wrap it over the other bundle
- Continue this process — twist clockwise, wrap counterclockwise — adding new fibers as the cordage grows
- The result is a two-ply twisted cordage that is surprisingly strong
Knots every bushcrafter must know:
- Square knot: Joins two pieces of rope of equal diameter
- Bowline: Creates a fixed loop that doesn’t slip under load
- Clove hitch: Attaches rope to a post or branch
- Taut-line hitch: Creates an adjustable loop that holds under tension
- Figure-eight: Creates a stopper knot
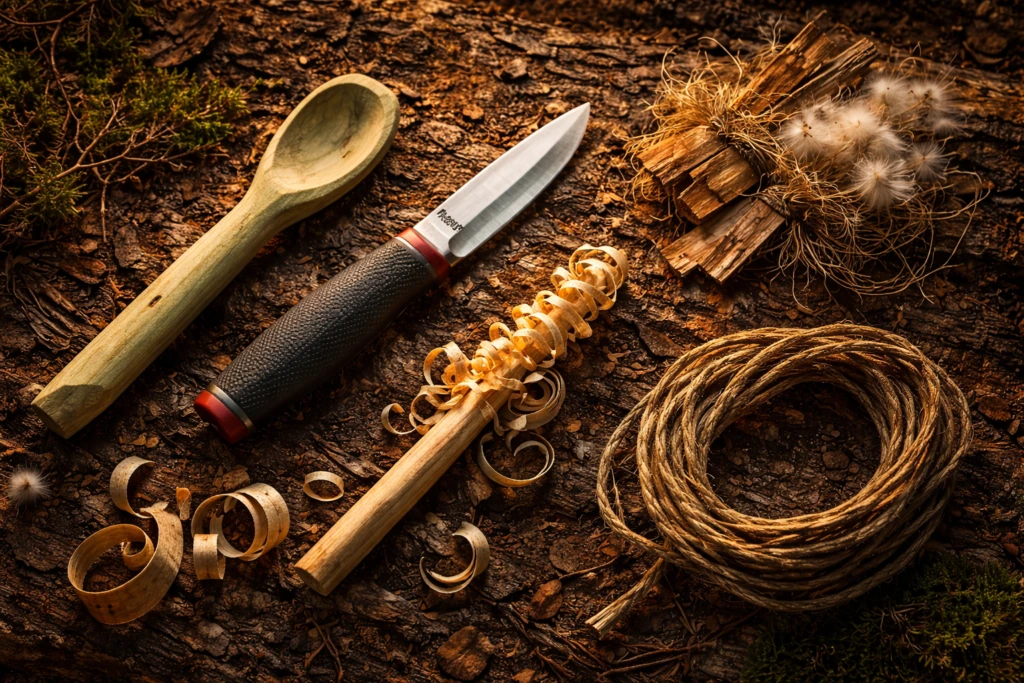
Skill #9: Wood Carving — Turning Raw Wood Into Something Useful
 Wood carving is the craft skill that most directly expresses the bushcraft philosophy — the ability to take a raw piece of wood and transform it into something useful. It develops knife skills, teaches wood properties, and produces items that improve camp life.
The best woods for beginner bushcraft carving:
Green (freshly cut) wood: Easier to carve than dry wood. Best choices: hazel, willow, lime/linden, birch, cherry.
Dry wood: Harder to carve but produces more durable finished items. Best choices: ash, oak, cherry, apple.
The Feather Stick — the beginner’s first carving project:
A feather stick is a piece of wood with thin curls of wood shaved along its length, creating a “feather” of fine wood shavings that ignites easily. It’s the perfect first carving project because it develops knife control and produces a useful fire-starting aid.
Process:
- Select a dry stick approximately 1 inch in diameter and 12 inches long
- Hold the stick vertically with one end on the ground
- Using the forehand grip, make thin, controlled cuts along the length of the stick, stopping before the shaving falls off
- Rotate the stick and repeat, creating a ring of feathers around the stick
- The goal is thin, curling shavings that remain attached to the stick
The wooden spoon — the classic beginner carving project:
Carving a wooden spoon is the traditional first major bushcraft carving project. It develops all the fundamental knife skills and produces a genuinely useful camp item.
Process:
- Select a piece of green wood approximately 2 inches in diameter and 12 inches long
- Split the wood in half along the grain
- Rough out the spoon shape using the forehand grip — remove material from the sides to create the handle and bowl outline
- Hollow the bowl using the thumb push cut and chest lever cut
- Refine the shape using progressively finer cuts
- Smooth the surface using a piece of rough bark or sandstone
Other beginner carving projects:
- Pot hook: A carved hook for hanging a pot over a fire
- Tent peg: A carved stake for securing a tarp or shelter
- Spatula: A flat cooking implement
Navigation is the skill that keeps you from getting lost — and the skill that allows you to explore confidently, knowing you can find your way back. In a bushcraft context, navigation is also the skill that allows you to locate resources (water, food, shelter, and materials) efficiently.
Map and compass basics:
A topographic map and baseplate compass are the foundation of bushcraft navigation. The key concepts:
- Contour lines: Lines on a topographic map connecting points of equal elevation. Closely spaced lines indicate steep terrain; widely spaced lines indicate gentle terrain.
- Magnetic declination: The angular difference between magnetic north (where your compass points) and true north (the direction toward the geographic North Pole). Must be accounted for in accurate navigation.
- Taking a bearing: Using a compass to determine the direction to a destination.
- Terrain association: Continuously matching terrain features you see in the real world to terrain features shown on your map.
Natural navigation in woodland environments:
- Solar navigation: The shadow stick method — place a stick vertically in the ground, mark the shadow tip, wait 15 to 20 minutes, mark the new shadow tip. The line between the two marks runs approximately east-west.
- Stellar navigation: Polaris (the North Star) indicates true north within approximately 1 degree. Find it by locating the Big Dipper and following the pointer stars.
- Water flow: Water flows downhill. Following water downstream leads to lower elevations and eventually human habitation.
Woodland navigation strategies:
- Handrails: Linear terrain features (streams, ridgelines, trails) that run parallel to your route and guide navigation.
- Catching features: Terrain features beyond your destination that tell you you’ve gone too far.
- Attack points: Large, easily identifiable terrain features near your destination from which you make your final approach.
Tier 3: Craft Skills — The Heart of Bushcraft
These skills represent the craft dimension of bushcraft — the ability to make things from natural materials that improve the quality and sustainability of woodland living.
Skill #11: Primitive Trapping — Protein With Minimal Energy Expenditure

Trapping provides protein with minimal ongoing energy expenditure. You set the trap and let it work while you attend to other priorities. It is more reliable than hunting for most beginners.
The figure-four deadfall trap:
One of the most widely applicable primitive traps requires only sticks and a heavy flat rock.
Construction:
- Carve the three sticks to the required shapes (the upright, the diagonal, and the toggle)
- Interlock the sticks to create a balanced support structure
- Prop the rock on the support structure
- Place bait at the trigger point
- When an animal disturbs the bait, the sticks collapse and the rock falls
The snare:
A simple wire or cordage loop set in an animal trail.
Construction:
- Identify an active animal trail (look for tracks, droppings, and worn vegetation)
- Create a loop of wire or cordage approximately the size of a fist for small game
- Suspend the loop at the appropriate height (approximately 4 inches off the ground for rabbits)
- Anchor the snare to a stake or tree
- Check snares every 4 to 6 hours
Legal note: Trapping regulations vary significantly by jurisdiction. In many countries and regions, trapping requires a license or is prohibited entirely. Always research and comply with local regulations. In a genuine survival emergency, legal considerations are secondary to survival.
Skill #12: Bushcraft Fishing Without Commercial Equipment
Fish are one of the most calorie-dense and widely available wild food sources. In many woodland environments, water bodies provide reliable food access that terrestrial foraging and trapping cannot match.
Improvised fishing methods:
Gorge hook: A small, straight piece of bone, wood, or metal sharpened at both ends and tied in the middle. When a fish swallows the bait, the gorge hook turns sideways and lodges in the throat.
Spear fishing: A sharpened stick or multi-pronged spear used in shallow, clear water. Most effective at dawn and dusk when fish are active near the surface.
Fish trap (weir): A funnel-shaped structure of rocks or sticks built in a stream that guides fish into a confined area from which they cannot easily escape.
Bait identification: Earthworms, insects, grubs, and small pieces of meat or fish are effective bait for most freshwater species.
Skill #13: Wild Food Preservation — Making Surplus Last
In extended bushcraft scenarios, the ability to preserve food — to store surplus for later consumption — becomes increasingly important. Food preservation prevents waste and provides a buffer against periods when food procurement is difficult.
Drying/dehydration:
The oldest and most universally applicable food preservation method. Removes moisture that bacteria and mold require to grow.
Technique:
- Cut food into thin slices (1/4 inch or less)
- Hang on a rack or string in direct sunlight with good air circulation
- In humid environments, build a small fire beneath the drying rack to accelerate the process
- Food is adequately dried when it is leathery and does not feel moist
Smoking:
Combines heat, dehydration, and antimicrobial compounds from wood smoke to preserve meat and fish.
Technique:
- Build a small fire with hardwood (avoid resinous woods like pine)
- Construct a rack above the fire at a height where the temperature is warm but not cooking (approximately 150 to 200°F)
- Hang thin strips of meat or fish on the rack
- Maintain a low, smoky fire for 6 to 12 hours
Cold storage:
In cold environments, natural refrigeration can extend food storage. Bury food in snow or cold ground, or store in a cold stream (in a sealed container).
Skill #14: Tracking — Reading the Invisible Life of the Woodland
Tracking is the skill that reveals the invisible life of the woodland. It allows you to locate game for hunting and trapping, understand the ecology of your environment, and move through the woods with a deeper awareness of what lives there.
The four categories of animal sign:
Tracks: The impressions left by an animal’s feet. Learning to identify tracks by species, determine direction of travel, and estimate age is the foundation of tracking.
Scat (droppings): Animal droppings reveal species, diet, and territory. Fresh scat indicates recent animal activity.
Feeding signs: Gnawed bark, broken branches, dug earth, and disturbed vegetation all indicate animal feeding activity.
Trails: Animals use the same routes repeatedly, creating worn trails through vegetation. Identifying and following animal trails leads to water sources, feeding areas, and bedding sites.
Tracking practice:
The best way to learn tracking is to follow a known animal’s trail and observe every sign it leaves. Start with large, distinctive animals (deer, rabbit) in soft ground (mud, snow) where tracks are clear. Progress to smaller animals and harder ground as your skills develop.
Skill #15: Primitive Tool Making — Creating Tools From What the Forest Gives You
The ability to create tools from natural materials is the skill that makes all other bushcraft skills sustainable over the long term. When manufactured tools break or are lost, primitive tool-making allows you to continue functioning.
Stone knapping — creating cutting tools:
Flint, obsidian, chert, and similar cryptocrystalline stones can be shaped into cutting tools by controlled fracturing.
Basic technique:
- Select a suitable stone (cryptocrystalline, no visible grain)
- Strike the edge of the stone with a harder hammerstone at a 30 to 45-degree angle
- Controlled strikes remove flakes, creating a sharp edge
- Pressure flaking (using a pointed tool to press and remove small flakes) refines the edge
Bone and antler tools:
Bone and antler can be shaped into needles, awls, hooks, and other tools using stone tools or a knife.
Wooden tools:
Digging sticks, fire-hardened spears, and various camp tools can be made from wood using a knife and fire.
Tier 4: Advanced Skills — The Long Game
These skills represent the advanced dimension of bushcraft — skills that take months or years to develop, but that dramatically expand your capability and connection to the natural world.
Skill #16: Medicinal Plant Knowledge — When the Forest Is Your Pharmacy
 In extended bushcraft scenarios without access to medical supplies, knowledge of medicinal plants can address pain, infection, and illness that would otherwise compromise your ability to function.
Essential medicinal plants:
Plantain (Plantago major/lanceolata): Chewed and applied as a poultice, plantain has documented antimicrobial and anti-inflammatory properties. Effective for insect stings, minor wounds, and skin irritation.
Yarrow (Achillea millefolium): Applied to wounds, yarrow has hemostatic (blood-stopping) properties. Also used as a fever reducer when consumed as a tea.
Willow bark (Salix species): Contains salicin, a compound related to aspirin. Chewing willow bark or making a tea from it provides mild pain relief and fever reduction.
Elder (Sambucus nigra): Elderflower tea has antiviral properties. Elderberry (cooked) supports immune function.
Echinacea (Echinacea species): Has documented immune-stimulating properties. Used as a tea or tincture to support immune function.
Critical caution: Medicinal plant knowledge requires identification. Misidentification of medicinal plants carries the same risks as misidentification of food plants. Learn from qualified instructors and verified field guides before relying on this knowledge.
Skill #17: Hide Tanning — One of the Most Ancient and Complex Bushcraft Skills
Hide tanning is the ability to transform a raw animal skin into durable, flexible leather. It is a skill that takes significant time to learn but produces materials of extraordinary quality and durability.
The brain tanning process:
Brain tanning is the traditional method used by indigenous peoples worldwide. Every animal has enough brain to tan its own hide.
Basic process:
- Flesh the hide — remove all fat and membrane from the skin side
- Dehair the hide — soak in wood ash lye solution to loosen hair, then scrape clean
- Brain the hide — work a solution of brain (mixed with water) into the hide repeatedly
- Soften the hide — work the hide continuously as it dries to prevent stiffening
- Smoke the hide — smoke over a smoldering fire to set the tanning and make the hide water-resistant
The result: brain-tanned buckskin is one of the most beautiful and functional natural materials available — soft, supple, warm, and durable.
Skill #18: Basket Weaving and Container Making — Carrying and Storing What the Forest Provides
The ability to make containers from natural materials — baskets, bowls, and vessels — is a fundamental bushcraft skill that addresses the need to carry, store, and process food and water.
Materials for basket weaving:
- Willow withies: The traditional basket-weaving material. Flexible, strong, and widely available.
- Hazel rods: Stronger than willow, used for more structural baskets.
- Bramble/blackberry: Inner bark can be used for weaving.
- Rush and sedge: Flat-leaved plants used for coiled baskets.
- Birch bark: Can be folded and stitched into containers.
Basic coiled basket technique:
- Create a bundle of rush or sedge as the core
- Wrap a binding material (split rush, cordage) around the core
- Coil the wrapped core into a flat base, stitching each coil to the previous one
- Build up the sides by continuing to coil and stitch
- Finish the rim with a decorative binding
Advanced navigation builds on the basic navigation skills developed in Skill #10 to include more sophisticated techniques: dead reckoning, celestial navigation, and the ability to navigate in complex terrain and poor visibility.
Dead reckoning:
The process of calculating your current position based on a known starting position, your direction of travel, your speed, and elapsed time.
Pace counting: Measure your pace count — the number of times your left foot hits the ground per 100 meters. Most adults have a pace count of 60 to 70 on flat terrain.
Celestial navigation:
Beyond Polaris, advanced navigators use the moon, planets, and star patterns to determine direction and time.
Terrain mastery:
The ability to read terrain — to understand what the landscape is telling you about what lies ahead — is the skill that connects map reading, compass navigation, and natural navigation into a coherent system.
Skill #20: Long-Term Camp Craft — The Culmination of the Bushcraft Journey
 Long-term camp craft is the integration of all previous skills into a sustainable, comfortable, and ecologically responsible woodland living system. It is the culmination of the bushcraft journey — the ability to live well in the woods for extended periods using primarily natural materials and developed skills.
The elements of a long-term bushcraft camp:
Permanent shelter: A more substantial structure than a debris hut — a lean-to with a raised sleeping platform, a log cabin, or a tipi-style structure.
Food systems: A combination of foraging, trapping, fishing, and food preservation that provides reliable nutrition.
Water systems: A reliable water source with established purification methods.
Tool maintenance: The ability to maintain and repair all tools, including sharpening knives, maintaining fire-starting equipment, and repairing cordage.
Ecological responsibility: Long-term camp craft requires an understanding of ecological impact — how to use natural resources without depleting them, how to minimize your footprint, and how to leave the woodland in better condition than you found it.
The Bushcraft Skills Training Roadmap — From Zero to Competent
Month 1: Foundation
Week 1: Knife safety and basic cuts. Practice the five essential cuts daily. Carve a feather stick.
Week 2: Fire starting with modern methods. Practice with a ferro rod until you can reliably start a fire in under 5 minutes. Learn to identify 5 natural tinder materials in your local area.
Week 3: Shelter building. Build a debris hut in your local woodland. Sleep in it for one night.
Week 4: Water procurement and purification. Practice locating water sources using terrain reading. Practice purification using boiling and chemical treatment.
Month 2: Sustenance
Week 5: Begin bow drill practice. Expect 10 to 20 hours before reliable ember production.
Week 6: Foraging basics. Learn to identify 5 edible plants in your local area with complete confidence.
Week 7: Natural cordage making. Practice the reverse wrap technique until you can make 2 meters of cordage in under 30 minutes.
Week 8: Wood carving. Complete a carved wooden spoon from start to finish.
Month 3: Craft and Integration
Week 9: Navigation. Practice map and compass navigation on a route you don’t know.
Week 10: Tracking. Spend time following animal trails and identifying animal signs.
Week 11: Primitive trapping. Set and check figure-four deadfall traps (in compliance with local regulations).
Week 12: Integration. Spend 24 hours in the woodland using only bushcraft skills — no manufactured food, no tent, no GPS.
The Questions Every Beginner Actually Asks
What’s the most important bushcraft skill to learn first?
Knife safety and basic knife use. The knife is the single most important tool in bushcraft — almost every other skill requires one. Learning to use a knife safely is the prerequisite for everything that follows. After knife safety, the priority sequence follows the Rule of Threes: shelter, water, fire, food.
Can I actually learn bushcraft without going into the wilderness?
Yes — and more effectively than most people realize. Many of the most important bushcraft skills can be practiced in local parks, woodlands, and even backyards. Knife skills can be practiced anywhere. Fire starting can be practiced in a backyard fire pit. Cordage making can be practiced at home. Foraging can be practiced in local parks. Wilderness practice is valuable for integration and scenario testing, but it is not required for developing foundational competence.
How long does it actually take to become competent at bushcraft?
Basic bushcraft competence — enough to spend a comfortable night in the woods using primarily natural materials and developed skills — is achievable in 3 to 6 months of regular practice (2 to 3 sessions per week). Mastery of the full range of bushcraft skills, including primitive fire starting, advanced foraging, and long-term camp craft, takes years of dedicated practice. Bushcraft is a lifelong pursuit, not a course to complete.
What’s the difference between bushcraft and survival skills?
Bushcraft is the deliberate, patient development of woodland skills practiced for their own sake, in conditions you’ve chosen, with time to do things properly. Survival is crisis management — the application of emergency skills when something has gone wrong. The skills overlap significantly, but the philosophy and context are different. Bushcraft practitioners develop skills through patient practice; survival situations demand immediate application of whatever skills are available.
What gear do I actually need to start?
The minimum gear for beginning bushcraft practice: a quality fixed-blade knife (Mora Companion is the standard recommendation), a ferro rod, a tarp (3×3 meters minimum), paracord (50 meters), a water filter or purification tablets, and a topographic map of your local area. Everything else can be acquired gradually as your skills develop and your needs become clearer.
Is bushcraft dangerous for beginners?
Bushcraft carries real risks — primarily from knife injuries, fire, and the consequences of getting lost. These risks are manageable with proper training, appropriate caution, and a gradual progression from simple to complex skills. The most important safety practices: learn knife safety before knife use, never practice fire starting in dry conditions without water available, always tell someone where you’re going and when you’ll return, and carry a phone or emergency communication device even when practicing primitive skills.
Products / Tools / Resources
These are the specific items and resources that form the foundation of a serious bushcraft practice — selected for reliability, value, and genuine usefulness for beginners.
Knives
Mora Companion — The most consistently recommended beginner bushcraft knife. Fixed blade, full tang, Scandi grind, approximately $15 to $20. The best value in bushcraft knives, period. Start here before spending more.
Mora Garberg — A significant step up from the Companion. Full tang, more robust construction, available with a multi-mount sheath. Approximately $80 to $100. Worth the investment when you’re ready to upgrade.
Hultafors Outdoor Knife — A Swedish-made alternative to the Mora range. Excellent quality, Scandi grind, approximately $40 to $60.
Fire Starting
Bayite ferro rod (6-inch, large) — The standard recommendation for bushcraft fire starting. Produces sparks at 5,400°F, works when wet, lasts for thousands of strikes. The 6-inch version is significantly easier to use than smaller rods, especially with cold hands.
UCO Stormproof matches — Waterproof, windproof, and burn for approximately 15 seconds each. Reliable backup when a lighter fails.
Shelter
Aqua Quest Guide tarp (3×3 meters) — Silnylon construction, fully waterproof, and versatile enough for every tarp configuration. The standard recommendation for bushcraft tarps.
Paracord (550 lb, 50 meters) — The most versatile cordage for bushcraft applications. Used for shelter construction, lashing, and dozens of other applications. Buy more than you think you need.
Water
Sawyer Squeeze water filter — Rated for 100,000 gallons, weighs 3 ounces, removes 99.99999% of bacteria and protozoa. The standard recommendation for portable water filtration.
Potable Aqua chlorine dioxide tablets — The most effective chemical water treatment option. Kills bacteria, viruses, and Cryptosporidium. Keep a supply in every kit.
Suunto A-10 compass — The most recommended entry-level compass for beginners. Accurate, durable, and straightforward to use. The right starting point for most people.
Harvey Superwalker maps (UK) / National Geographic Trails Illustrated maps (North America) — Waterproof, tear-resistant topographic maps. Buy the map for your local area before you need it.
Books
Bushcraft 101 by Dave Canterbury — One of the most comprehensive and readable bushcraft books for beginners. Covers all the foundational skills with clear, practical instruction. A genuinely good starting point.
Bushcraft: Outdoor Skills and Wilderness Survival by Mors Kochanski — The definitive bushcraft reference. Dense, comprehensive, and authoritative. The book that serious bushcrafters return to repeatedly.
The Forager’s Harvest by Samuel Thayer — The most accurate and comprehensive foraging guide for North American beginners. Thayer’s approach to plant identification is rigorous and safe.
Food for Free by Richard Mabey — The classic UK foraging guide. Comprehensive, well-illustrated, and written with genuine expertise.
Courses
Woodlore (Ray Mears’ school, UK) — One of the most respected bushcraft schools in the world. Offers courses for all levels from beginner to advanced. If you can afford one course, make it this one.
Tom Brown Jr.’s Tracker School (North America) — One of the most respected primitive skills schools in North America. Focuses on tracking, awareness, and traditional survival skills.
British Bushcraft (various independent instructors) — Many excellent independent bushcraft instructors offer courses throughout the UK. Look for instructors with verifiable credentials and positive reviews from past students.