
Hey there! Some links on this page may be affiliate links which means that, if you choose to make a purchase, I may earn a commission at no extra cost to you. I greatly appreciate your support. Read the full disclosure here.
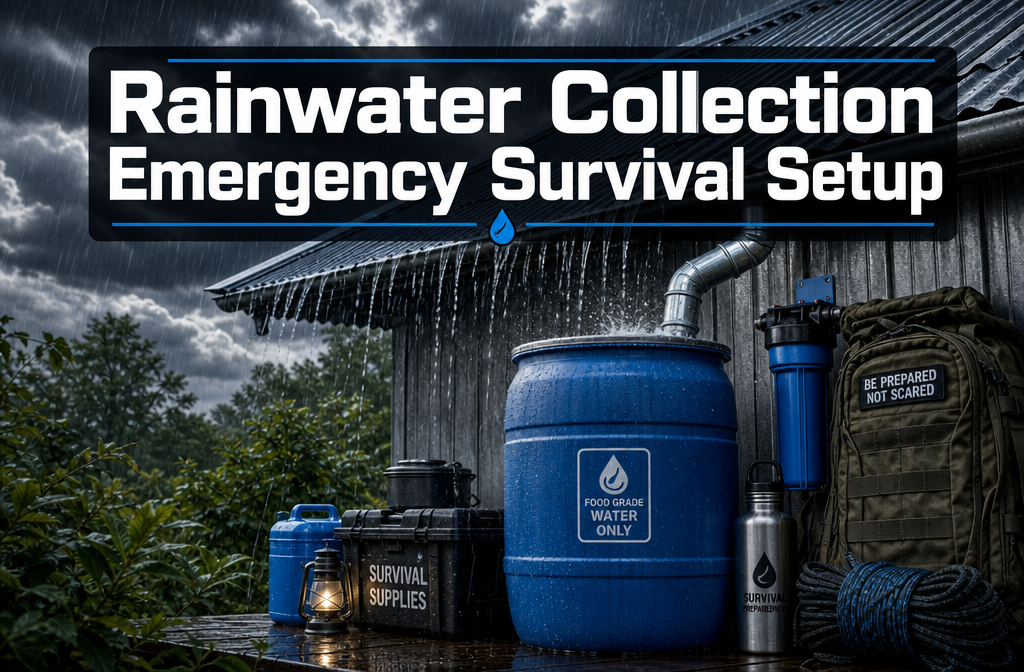
A rainwater collection emergency survival setup captures precipitation from a catchment surface (typically a roof or tarp), channels it through a first-flush diverter and debris filter, and stores it in a food-grade container for later use. Even a basic system using a 10×10 ft tarp and a single 55-gallon barrel can collect enough water to sustain one person for weeks during an emergency. Every collected gallon must be filtered and purified before drinking.
Key Takeaways
- A 1,000 sq ft roof can collect roughly 600 gallons from just one inch of rainfall (accounting for typical losses).
- Collected rainwater is not safe to drink untreated — it picks up contaminants from roofing materials, bird droppings, and atmospheric pollutants.
- A functional emergency system costs as little as $50–$150 using food-grade barrels, basic fittings, and a gravity filter.
- First-flush diverters are the single most important component most DIY setups skip — and the omission is costly.
- Stored rainwater stays safe for 6–12 months in a sealed, opaque container when treated with a small amount of unscented household bleach.
- Urban and rural setups differ primarily in catchment surface and container size — the purification process is identical.
- Algae and bacterial growth are the most common storage failures; both are preventable with proper container selection and treatment.
- Legal restrictions on rainwater harvesting vary by U.S. state — check local regulations before building a permanent system.
- A tarp-based portable setup works in desert and drought environments during rare rain events, but long-term desert water security requires supplemental strategies.
- Gravity-fed ceramic filters are the most reliable purification option for off-grid emergencies because they require no power and have no moving parts.

How Much Rainwater Can You Realistically Collect in an Emergency?
The short answer: more than most people expect. A standard formula used by rainwater harvesting practitioners estimates 0.623 gallons per square foot of catchment area per inch of rainfall, with a collection efficiency factor of roughly 0.85 to 0.90 for metal or asphalt shingle roofs (accounting for evaporation and splash loss).
Practical examples:
| Catchment Surface | Size | 1″ of Rain Collected (est.) |
|---|---|---|
| Standard home roof | 1,000 sq ft | ~530–560 gallons |
| Single-car garage roof | 400 sq ft | ~210–225 gallons |
| 10×10 tarp | 100 sq ft | ~53–56 gallons |
| 20×20 tarp | 400 sq ft | ~210–225 gallons |
To put that in survival context: the average person needs a minimum of 1 gallon per day for drinking and basic sanitation (per FEMA guidance). A 400 sq ft catchment during a 1-inch rain event produces enough water for one person for roughly 7 months at that minimum rate — from a single storm.
The catch: you need adequate storage capacity to hold what you collect, and you need to be ready before the rain arrives. A rainwater collection emergency survival setup is only as good as the containers waiting to receive it.
Decision rule: If you have a standard residential roof and live in a region that gets at least 20 inches of annual rainfall, a two-barrel (110-gallon) system is a realistic starting point. If you’re working with a tarp in the field, maximize surface area and minimize funneling distance to the container.
What Materials Do You Need to Build a Basic Rainwater Harvesting System?
A functional rainwater collection emergency survival setup requires five core components: a catchment surface, a conveyance system, a first-flush diverter, a storage container, and a purification method. You don’t need all five to be elaborate — but you do need all five.
Core components list:
- Catchment surface: Existing roof (metal or asphalt shingle preferred), or a clean polyethylene tarp (6-mil or heavier)
- Gutters and downspout: Standard aluminum or vinyl gutters if using a roof; paracord or PVC pipe to channel tarp runoff
- First-flush diverter: A PVC pipe section (typically 4-inch diameter) that captures and discards the first 10–15 gallons of runoff, which carry the highest concentration of contaminants
- Debris screen: Fine mesh (window screen or finer) over the barrel opening to block leaves, insects, and sediment
- Storage container: Food-grade 55-gallon barrel (HDPE plastic marked with recycling code #2), IBC tote (275–330 gallons), or food-grade 5-gallon buckets for portable setups
- Spigot and overflow valve: Installed near the barrel base for easy dispensing; overflow directs excess water away from the foundation
- Purification equipment: Covered in detail in the filtration section below
Optional but valuable additions:
- Opaque barrel wrap or dark paint to block sunlight and inhibit algae
- Barrel stand (cinder blocks work) to create gravity-fed pressure
- Locking lid to prevent tampering, mosquito breeding, and debris entry
- Secondary barrel connected in series for expanded capacity
Total cost for a single-barrel setup using new components: $80–$150. Using a reconditioned food-grade barrel (widely available from food processing companies): $50–$100.
For a deeper look at water storage fundamentals that complement any collection system, the Ultimate Emergency Water Storage and Purification Guide covers container selection, treatment ratios, and rotation schedules in full detail.
Is Collected Rainwater Safe to Drink Without Treatment?
No. Rainwater collected from any surface — including a “clean” metal roof — is not safe to drink without filtration and purification. This is one of the most dangerous misconceptions in the prepper community.
Rainwater picks up contaminants at multiple stages:
- Atmospheric absorption: Rain dissolves airborne pollutants, dust, pollen, and particulates as it falls.
- Catchment surface contact: Roofing materials leach zinc, lead, and other compounds. Bird and rodent droppings introduce E. coli, Salmonella, and Cryptosporidium.
- Conveyance contamination: Gutters accumulate organic debris, mold, and insect matter between rain events.
- Storage degradation: Even clean water stored improperly grows bacteria over time.
The U.S. Centers for Disease Control and Prevention (CDC) explicitly states that rainwater can carry bacteria, viruses, and parasites, and recommends treatment before drinking regardless of collection method.
The one exception: Rainwater collected directly into a clean container during an active storm (not via a roof or surface) is significantly cleaner — but still not guaranteed safe. Treat it anyway. The cost of a water purification tablet is trivial compared to the cost of waterborne illness in a survival scenario.
How Do I Filter and Purify Rainwater for Drinking?
Effective rainwater purification for a survival setup uses a multi-stage process: pre-filter, then filter, then disinfect. Skipping stages leaves gaps that single-method treatment cannot close.

Stage 1 — Pre-filtration (sediment removal): Run collected water through a fine mesh screen or a cotton cloth to remove visible particulates, debris, and sediment. This protects your primary filter from clogging prematurely.
Stage 2 — Filtration (pathogen and chemical reduction): Choose one of the following based on your setup:
- Gravity ceramic filter (e.g., Berkey, Doulton): Removes bacteria, protozoa, and many chemicals. No power required. Flow rate is slow but reliable. Best option for stationary emergency setups.
- Activated carbon filter: Improves taste and removes chlorine, some heavy metals, and organic compounds. Does NOT remove biological pathogens on its own — must be paired with disinfection.
- Portable squeeze/straw filter (e.g., Sawyer Squeeze): Removes bacteria and protozoa down to 0.1 micron. Lightweight, field-deployable. Does not remove viruses — add chemical disinfection in areas with potential viral contamination.
Stage 3 — Disinfection (kill remaining pathogens):
- Household bleach (unscented, 6–8.25% sodium hypochlorite): Add 8 drops per gallon of clear water, 16 drops per gallon of cloudy water. Wait 30 minutes before drinking. This is the CDC-recommended emergency disinfection method.
- Boiling: Bring water to a rolling boil for 1 minute (3 minutes above 6,500 ft elevation). Kills all biological pathogens. Requires fuel.
- UV purification pen (e.g., SteriPen): Effective against bacteria, viruses, and protozoa in clear water. Requires batteries.
- Water purification tablets (iodine or chlorine dioxide): Portable, inexpensive, effective. Chlorine dioxide tablets are preferred — they work against Cryptosporidium, which iodine does not reliably kill.
Common mistake: Using bleach alone on heavily turbid (cloudy) water. Organic matter neutralizes chlorine before it can disinfect. Always pre-filter to clarity before chemical treatment.
For a comprehensive breakdown of water storage mistakes that compromise even well-built systems, see The Worst Water Storage Mistakes Preppers Still Make.
What Are the Cheapest Ways to Set Up Rainwater Collection?
A functional rainwater collection emergency survival setup doesn’t require expensive commercial products. The cheapest functional approach costs under $60 and can be assembled in an afternoon.
Budget setup options:
| Setup Type | Estimated Cost | Best For |
|---|---|---|
| Tarp + food-grade bucket system | $20–$40 | Bug-out location, field use |
| Reconditioned 55-gal barrel + downspout diverter | $50–$80 | Home/backyard use |
| IBC tote (used, food-grade) + fittings | $100–$200 | High-volume home storage |
| DIY PVC first-flush + new barrel | $80–$130 | Permanent home installation |
Where to source cheap components:
- Food-grade barrels: Contact local food manufacturers, restaurants, or car washes. Many sell used barrels for $10–$25.
- IBC totes: Farm supply stores, Craigslist, and Facebook Marketplace regularly list food-grade totes for $75–$150.
- Gutters and downspout diverters: Hardware stores carry basic diverter kits for $15–$30.
- PVC pipe for first-flush diverter: A 4-inch PVC cap, pipe, and ball valve costs under $20 at any hardware store.
Choose the tarp setup if: you’re building a portable or bug-out system, or you need something deployable in under 30 minutes. Choose the barrel-and-downspout setup if: you have a permanent residence and want a low-maintenance, higher-volume system.
How Much Space Do You Need for an Emergency Rainwater System?
A single 55-gallon barrel requires roughly 2 square feet of ground footprint and stands about 36 inches tall. Most homeowners can fit one or two barrels alongside a house foundation without meaningful space sacrifice.
Space planning by setup type:
- Single barrel: 2 sq ft footprint, fits under any standard downspout
- Two barrels in series: 4–5 sq ft, doubles capacity to 110 gallons
- 275-gallon IBC tote: Approximately 4×4 ft footprint, 46 inches tall — fits in a standard garage corner or along a fence line
- Tarp system (field use): Requires open overhead space and a slope for runoff; the collection container can be as small as a 5-gallon bucket
For apartment and small-space preppers, a compact tarp-and-bucket system stored flat until needed takes almost no storage space. The Apartment Water Storage Complete Guide covers space-constrained water strategies in detail, including balcony collection options.
Urban vs. Rural Rainwater Collection: What’s the Difference?
Urban and rural rainwater collection setups share the same core principles but differ in catchment options, legal constraints, and contamination profiles.

Urban setup characteristics:
- Primary catchment: residential roof (often asphalt shingle or flat membrane)
- Higher contamination risk from air pollution, lead paint on older roofs, and HVAC exhaust
- More likely to face local ordinances or HOA restrictions
- Smaller storage footprint required; municipal backup water usually available
- Downspout diverter kits are the standard installation method
Rural setup characteristics:
- Greater catchment flexibility: metal barn roofs, greenhouse panels, open tarps
- Lower atmospheric pollution but higher biological contamination from wildlife
- Fewer legal restrictions; many rural properties already use cistern systems
- Higher storage volume practical and often necessary (no municipal backup)
- Gravity-fed systems to outbuildings are common
The contamination difference matters: Urban rainwater tends to carry more chemical pollutants (heavy metals, hydrocarbons), while rural rainwater carries more biological contaminants (animal waste, organic debris). Both require the same multi-stage purification process, but urban collectors should prioritize activated carbon filtration for chemical reduction, while rural collectors should emphasize biological disinfection.
For preppers building urban resilience, the Ultimate Urban Survival Guide covers water sourcing alongside shelter, security, and communication strategies.
Can You Use Rainwater Collection in a Drought or Desert Environment?
Yes, but with realistic expectations. In true desert climates (under 10 inches of annual rainfall), a rainwater collection emergency survival setup is a supplemental strategy, not a primary water source.
What works in arid environments:
- Large-surface tarp systems: A 20×20 ft tarp can collect 210+ gallons from a single 1-inch rain event — even in the desert, that’s meaningful.
- Fog collection nets: In coastal desert areas (like parts of California, Chile, and Namibia), fine-mesh fog collectors can harvest moisture from morning fog even without rain. Yields vary widely but can reach 1–5 gallons per square meter per day in optimal conditions.
- Swales and earthworks: Directing surface runoff into berms or cisterns amplifies collection from rare rain events significantly.
- Underground cisterns: Reduce evaporation losses dramatically in hot climates.
What doesn’t work: Relying on a standard 55-gallon barrel as your sole water source in Phoenix, Arizona, where annual rainfall averages around 8 inches. You’d need to supplement with stored water, well access, or water procurement skills.
Edge case: During a grid-down emergency in a drought region, even a small tarp setup can bridge the gap between stored water running out and resupply becoming available. Don’t dismiss it — just don’t depend on it exclusively.
How Long Can Rainwater Be Stored Safely?
Properly treated and stored rainwater remains safe to drink for 6–12 months in a sealed, opaque, food-grade container. Untreated rainwater in an open or translucent container can become unsafe within days to weeks.
Factors that affect storage life:
- Container material: Food-grade HDPE (#2 plastic) or stainless steel is best. Avoid containers that previously held non-food chemicals — residues leach into water over time.
- Light exposure: UV light promotes algae growth and degrades some plastics. Use opaque containers or wrap translucent ones.
- Temperature: Warm storage accelerates bacterial growth. Keep containers in a cool, shaded location when possible.
- Treatment: Adding 8 drops of unscented 6% bleach per gallon at storage extends safe shelf life significantly by maintaining residual chlorine.
- Sealing: A tight-fitting lid prevents recontamination from insects, debris, and airborne bacteria.
Rotation schedule: Label every container with the fill date and treatment date. Rotate stored rainwater every 6 months — use it for garden irrigation or sanitation before replacing with fresh, treated water.
What Common Mistakes Do People Make With Rainwater Collection?
The most costly mistakes in a rainwater collection emergency survival setup aren’t equipment failures — they’re planning and maintenance oversights that compromise water safety or system function.
The seven most common mistakes:
-
Skipping the first-flush diverter. The first 10–15 gallons of runoff from any roof carry the highest concentration of bird droppings, dust, and debris. Without a diverter, all of that goes directly into your storage barrel.
-
Using non-food-grade containers. Barrels that previously held chemicals, motor oil, or industrial products leach toxins into water regardless of how thoroughly they’re cleaned.
-
Leaving containers uncovered. Open barrels become mosquito breeding grounds within days and collect additional debris continuously.
-
Storing water in translucent containers in sunlight. Algae blooms develop rapidly in light-exposed water, making it unsafe and foul-tasting.
-
Treating collection as a “set it and forget it” system. Gutters clog, screens tear, and first-flush chambers fill up. A system that isn’t inspected every few months will fail silently.
-
Not purifying before drinking. Addressed above — but worth repeating because it’s the most dangerous mistake of all.
-
Ignoring local legal restrictions. Some U.S. states historically restricted rainwater collection; regulations have evolved, but checking current state law before building a permanent system avoids legal complications.
For a broader look at water preparedness errors that extend beyond collection, The Worst Water Storage Mistakes Preppers Still Make is essential reading.
How Do I Prevent Algae and Bacteria Growth in Stored Rainwater?
Algae and bacterial growth in stored rainwater are preventable with four consistent practices: block light, treat chemically, seal containers, and clean regularly.
Prevention checklist:
- ✅ Use opaque or dark-colored containers (or paint/wrap translucent ones)
- ✅ Keep containers tightly sealed with a locking or gasketed lid
- ✅ Add unscented household bleach at the recommended rate (8 drops/gallon for clear water) at the time of storage
- ✅ Store in a cool, shaded location — ideally below 70°F
- ✅ Inspect and clean containers every 6 months: empty, scrub interior with a diluted bleach solution (1 tablespoon per gallon of water), rinse thoroughly, refill
- ✅ Replace mesh screens annually — torn screens allow insect entry and organic debris accumulation
- ✅ Never top off old water with new water without first treating the combined volume
If algae has already developed: Empty the container completely. Scrub the interior with a stiff brush and a 1:10 bleach-to-water solution. Rinse with clean water three times. Allow to air dry in sunlight (UV kills residual organisms). Refill and treat before storing.
Bacterial contamination from a compromised first-flush diverter or damaged screen is harder to detect visually. If stored water smells off, appears cloudy, or has been stored longer than 12 months without treatment, discard it and start fresh.
FAQ: Rainwater Collection Emergency Survival Setup
Q: Do I need a permit to collect rainwater at home? Regulations vary by U.S. state. As of 2026, most states permit residential rainwater collection, and several (including Texas and Oregon) actively encourage it. A handful of states have volume limits or registration requirements. Check your state’s current environmental or water resources agency guidelines before installing a permanent system.
Q: What’s the best container size for a beginner? A single 55-gallon food-grade barrel is the best starting point. It’s affordable, manageable, and provides meaningful emergency capacity. Once you understand the system, add a second barrel in series to double your storage.
Q: Can I collect rainwater off a metal roof? Yes, and metal roofs are actually the preferred catchment surface. They shed water efficiently, don’t absorb contaminants the way asphalt shingles can, and are easier to keep clean. Galvanized metal roofs may leach zinc — activated carbon filtration addresses this before drinking.
Q: How do I connect two barrels together? Use a bulkhead fitting and short section of garden hose or PVC pipe connecting the overflow port of the first barrel to the inlet of the second. When barrel one fills, overflow automatically routes to barrel two. Both barrels should have their own spigots for independent dispensing.
Q: Is rainwater safe for cooking and washing even without full purification? Pre-filtered (but not fully purified) rainwater is generally acceptable for washing dishes, bathing, and laundry. For cooking — especially anything that won’t reach a full boil — treat it as you would drinking water and purify fully.
Q: What’s the minimum setup I can carry in a bug-out bag? A folded 10×10 ft polyethylene tarp (roughly 1–2 lbs), 50 feet of paracord, and a collapsible 5-gallon water container. Add a Sawyer Squeeze filter and chlorine dioxide tablets for purification. This entire kit weighs under 3 lbs and can collect 50+ gallons from a single inch of rain.
Q: How do I know if my stored rainwater has gone bad? Signs include visible cloudiness or discoloration, a sulfur or musty odor, visible algae (green or brown film), or floating particulates. Any of these indicate the water needs to be discarded and the container cleaned before reuse.
Q: Can I use a swimming pool tarp or regular blue poly tarp for collection? A standard blue polyethylene tarp is acceptable for emergency use. Avoid tarps treated with mold inhibitors or pesticides — these chemicals leach into collected water. For long-term use, food-safe polyethylene tarps are preferable.
Q: What if I live somewhere it rarely rains? Supplement your rainwater setup with stored water reserves and learn additional water procurement skills. The Ultimate Emergency Water Storage and Purification Guide covers stored water strategies that work alongside collection systems.
Q: How does rainwater collection fit into a broader emergency plan? It’s one layer of a multi-source water strategy. Stored water handles the first 72 hours; rainwater collection extends your supply indefinitely if rain is available; water procurement skills (finding natural sources, solar distillation) cover worst-case gaps. For a complete framework, see The 4-Layer Disaster Plan.
Conclusion: Build Your Rainwater System Before You Need It
A rainwater collection emergency survival setup is one of the highest-return investments a prepper can make. The materials are cheap, the skills are learnable in an afternoon, and the payoff — a renewable water source that works as long as rain falls — is genuinely life-sustaining.
Actionable next steps:
- This week: Measure your roof or available tarp area. Calculate your potential collection volume using the 0.623 gallons/sq ft/inch formula.
- This month: Source a food-grade 55-gallon barrel (check local food manufacturers or Craigslist). Purchase a downspout diverter kit and a first-flush diverter from a hardware store.
- Before first use: Install a debris screen, add a spigot, and build or buy a basic first-flush diverter. Test the system during the next rain event.
- Purification: Acquire at minimum a gravity ceramic filter and a supply of unscented household bleach or chlorine dioxide tablets.
- Maintenance: Set a calendar reminder every 6 months to inspect screens, clean containers, and rotate stored water.
Water is the one resource you cannot improvise around indefinitely. Building a rainwater collection system now — while infrastructure is intact and supplies are available — is the kind of quiet, confident preparation that defines what this community is about.
For the complete picture of water security in an emergency, pair your collection setup with a solid emergency water storage and purification plan. And if water is just one piece of a larger preparedness build, the Complete Prepping Guide for Beginners is the logical next read.
Products, Tools, and Resources
These are practical recommendations based on what actually works in emergency rainwater collection setups — not the most expensive options, but the most reliable ones for the money.
Containers:
- Food-grade 55-gallon HDPE barrel with lid and bung— The standard starting point. Look for blue or black barrels (opaque is better). New barrels run $40–$60; reconditioned food-grade barrels are $15–$30 from local suppliers.
- 275-gallon IBC tote (food-grade, used) — Best value for high-volume storage. Often available for $100–$150. Pair with a UV-resistant cover or tarp wrap to block light.
Filtration:
- Big Berkey Gravity-Fed filter — The gold standard for off-grid water filtration. No power, no moving parts, removes bacteria and protozoa reliably. A worthwhile investment for any serious preparedness setup.
- Sawyer Squeeze filter — Best portable option for bug-out or field use. Filters to 0.1 micron, lightweight, and the squeeze bags are replaceable.
Disinfection:
- Chlorine dioxide tablets (Katadyn Micropur or similar) — More effective than iodine, works against Cryptosporidium, and leaves minimal taste. Keep a 50-tablet supply minimum.
- SteriPen UV purifier — Fast and effective for clear water. Requires batteries; keep spares or a solar charging setup.
System components:
- Amerimax or similar downspout diverter kit — Widely available at hardware stores for $15–$25. Diverts roof runoff into your barrel without cutting the downspout permanently.
- 4-inch PVC pipe, end cap, and ball valve — The components for a DIY first-flush diverter. Total cost under $20. Plans are widely available and straightforward to build.
Reference:
- The Worst Water Storage Mistakes Preppers Still Make — Read this before finalizing your setup to avoid the most common and costly errors.
- 14 Essential Survival Skills Every Prepper Must Know — Water collection is one skill in a broader survival framework. This guide covers the full picture.
References
- U.S. Centers for Disease Control and Prevention (CDC). Emergency Water Supply and Sanitation. cdc.gov/healthywater. (2023)
- Texas Water Development Board. The Texas Manual on Rainwater Harvesting, Third Edition. twdb.texas.gov. (2005)
- Federal Emergency Management Agency (FEMA). Emergency Water Supplies. ready.gov. (2021)
- World Health Organization (WHO). Harvested Rainwater Quality. who.int. (2011)
- American Rainwater Catchment Systems Association (ARCSA). Rainwater Harvesting Standards and Best Practices. arcsa.org. (2022)