
Hey there! Some links on this page may be affiliate links which means that, if you choose to make a purchase, I may earn a commission at no extra cost to you. I greatly appreciate your support. Read the full disclosure here.
The average U.S. power outage now lasts over 8 hours, and major grid disruptions can stretch into days or weeks. When the lights go out and the electric range goes cold, your camp stove becomes one of the most valuable pieces of gear in your preparedness kit. Camp stove cooking, and having 20 quick meals ready for when the power goes out, is not a backup plan. It’s a core survival skill that separates prepared households from panicked ones.
This guide covers everything: how camp stoves work, which fuel type makes the most sense for your situation, 20 meals you can actually cook on one burner, and the safety rules that keep your family fed without putting them at risk.
Key Takeaways
- A camp stove is a portable, fuel-burning cooking device that works independently of the electrical grid, making it essential for power outages and emergency preparedness.
- Propane and butane canister stoves are the most common choices for emergency home cooking; dual-fuel stoves offer the most flexibility.
- A standard 1 lb propane canister lasts approximately 1 to 2 hours on high heat, longer on simmer, stock at least 6 to 10 canisters for a 72-hour outage.
- Never use a camp stove indoors without adequate ventilation; carbon monoxide poisoning is a genuine, life-threatening risk.
- The 20 meals in this guide are designed around shelf-stable pantry staples, no refrigeration required.
- Lightweight aluminum or stainless steel pots work best on camp stoves; avoid non-stick coatings on high heat.
- One-pot meals, rehydrated freeze-dried foods, and canned protein dishes are the fastest and most fuel-efficient options.
- Cooking without power is a skill, practice these meals before an emergency so they become second nature.
What Is a Camp Stove and How Does It Work?
A camp stove is a portable, self-contained cooking device that burns fuel, propane, butane, white gas, or alcohol, to produce a controlled flame for cooking. Unlike a kitchen range, it requires no electrical connection, making it fully functional during grid failures, natural disasters, or off-grid living situations.
Most camp stoves operate through a simple mechanism: pressurized fuel flows from a canister or tank through a valve, mixes with air at the burner head, and ignites to produce a flame. The user controls heat output by adjusting the valve, similar to a gas range. Some models include a piezoelectric igniter; others require a lighter or match.
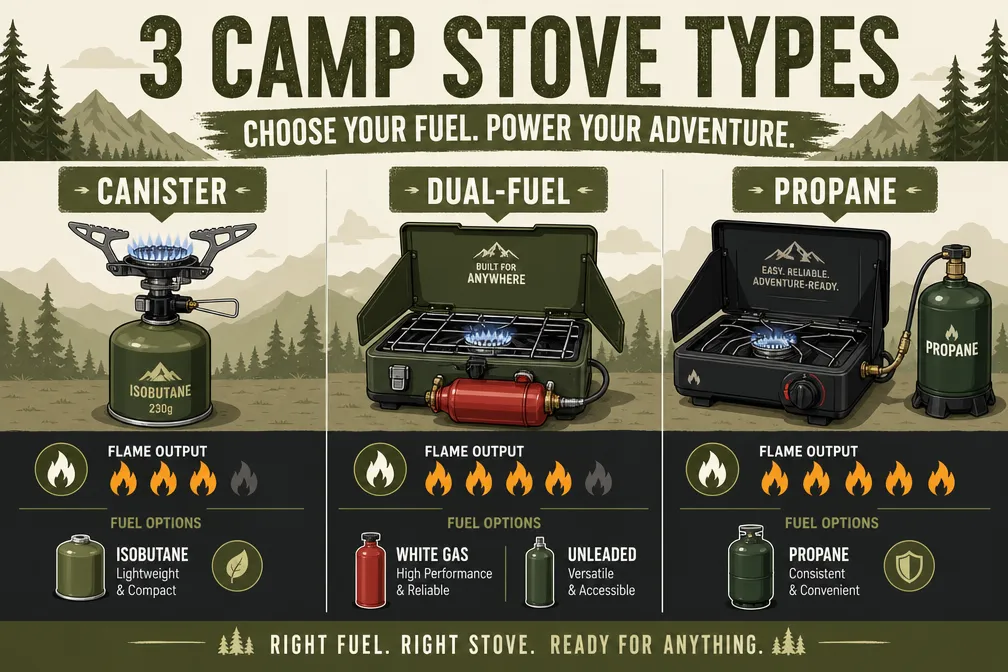
The three main camp stove categories preppers should know:
- Canister stoves: Screw onto pre-pressurized fuel canisters (isobutane/propane mix). Lightweight, fast to set up, and widely available. Best for short-term outages.
- Dual-fuel stoves: Run on white gas or unleaded gasoline. More complex but extremely reliable in cold weather and for extended use. Coleman’s classic dual-fuel stove is the benchmark here.
- Single-burner propane stoves: Connect to standard 1 lb or larger propane cylinders. High heat output, affordable fuel, and easy to find at hardware stores. The most popular choice for home emergency cooking.
For most preppers focused on home-based power outage cooking, a single-burner or two-burner propane stove hits the right balance of power, fuel availability, and cost.
Best Camp Stove for Cooking Indoors During a Power Outage
The best camp stove for indoor emergency cooking is a well-ventilated propane stove used near an open window or in a garage with the door open, never in a sealed room. For indoor-adjacent use, canister stoves with low CO output and precise heat control are the safest option.
That said, “indoors” is the critical variable here. No camp stove is designed for use in a sealed, unventilated space. The safest indoor-compatible options are:
- Coleman Classic Propane Stove (2-burner): Reliable, widely available, and runs on standard 1 lb propane canisters. Best used in a garage, covered porch, or well-ventilated room with windows open.
- Camp Chef Explorer: Higher BTU output, works with larger propane tanks for extended outages. Better for cooking for families.
- MSR PocketRocket 2 (canister stove): Extremely compact, efficient, and produces lower CO than larger burners. Good for apartment preppers with limited storage.
For more on managing a full power outage at home, the Ultimate Power Outage Preparedness Checklist covers everything from lighting to cooking to communication.
Can You Use a Camp Stove Indoors Safely?
Using a camp stove indoors is dangerous without proper ventilation and carries a real risk of carbon monoxide (CO) poisoning. CO is colorless and odorless, you won’t smell it until it’s too late. The answer is: only with significant airflow, and ideally not at all in a fully enclosed space.
The safety rules are non-negotiable:
- Always use camp stoves in open-air environments or areas with cross-ventilation (two open windows or doors creating airflow).
- Never use in a bedroom, bathroom, or sealed living room.
- Keep a battery-operated CO detector nearby whenever cooking with any fuel-burning device indoors.
- Garage cooking is acceptable if the garage door is fully open.
- Covered porches and patios are the ideal compromise for bad-weather cooking.
The CDC reports that CO poisoning is responsible for more than 400 unintentional deaths annually in the U.S., with spikes during and after major power outages when people turn to alternative heat and cooking sources. That number is entirely preventable with the right setup.
“The stove that feeds your family during a crisis should never be the thing that harms them. Ventilation is not optional, it’s part of the meal plan.”
For a broader look at cooking without grid power, see the complete guide to cooking without power at Preppers HQ.
Camp Stove Fuel Types and Which Is Cheapest
The four main camp stove fuel types are propane, isobutane/butane canisters, white gas (naphtha), and denatured alcohol. Propane is the cheapest per BTU for home emergency use; alcohol stoves are cheapest for ultralight backpacking setups but impractical for family cooking.
| Fuel Type | Cost (approx.) | Best For | Cold Weather Performance |
|---|---|---|---|
| Propane (1 lb canister) | $2-$4 each | Home outage cooking | Good |
| Isobutane/Propane mix | $5-$9 each | Backpacking, compact use | Excellent |
| White gas | $10-$15/quart | Extended expeditions | Excellent |
| Denatured alcohol | $5-$8/quart | Ultralight, solo cooking | Poor |
| Butane (single-fuel) | $2-$4 each | Mild climate, short outages | Poor below 32°F |
For most preppers stocking up for home emergencies, propane is the clear winner: it’s inexpensive, burns hot, and is available at virtually every hardware store, gas station, and big-box retailer. Stock the 1 lb green canisters for a portable stove, or invest in a 20 lb tank with an adapter hose for extended outages.
How Long Does a Camp Stove Fuel Canister Last?
A standard 1 lb (16 oz) propane canister lasts approximately 1 to 2 hours on high heat, or up to 3 to 4 hours on a low simmer. For a family cooking three meals a day, plan on 2 to 3 canisters per day minimum.
Fuel consumption planning for a 72-hour outage:
- 3 meals/day x 20-30 minutes cooking time each = roughly 1.5 hours of active burn time per day
- On high heat: 1 canister per day, minimum
- On mixed high/simmer: 1.5 canisters per day for a family of 4
- Recommended stock for 72 hours: 6 to 8 standard 1 lb canisters, or one 20 lb tank with an adapter
For extended outages lasting a week or more, a 20 lb propane tank is far more cost-effective and provides roughly 25 to 30 hours of cooking time. If you’re preparing for long-term grid failure scenarios, review the Backup Power For Emergencies guide for a full fuel and power planning framework.
Camp Stove vs. Propane Grill for Emergency Cooking
A camp stove is more versatile for emergency cooking than a propane grill because it accommodates standard cookware, uses less fuel per meal, and is easier to control for simmering and boiling. A propane grill excels at grilling proteins but struggles with soups, pasta, rice, and one-pot meals.
Choose a camp stove if:
- You need to boil water, cook rice, make soups, or simmer sauces.
- Fuel conservation is a priority.
- You’re cooking for multiple days with shelf-stable pantry ingredients.
Choose a propane grill if:
- You have frozen meat to cook through before it spoils in the first 24 hours of an outage.
- Grilling is your primary cooking method.
- You already own one and have a full tank.
The practical answer for most preppers: own both. Use the grill to cook through perishables in the first day, then switch to the camp stove for the sustained, fuel-efficient cooking that follows.
Is a Camp Stove Better Than a Portable Generator for Power Outages?
A camp stove and a portable generator solve different problems. A camp stove is cheaper, simpler, and requires no electricity, it’s the right tool specifically for cooking. A generator restores electrical power to appliances but costs significantly more and requires gasoline storage. For cooking alone, a camp stove wins on cost, simplicity, and safety.
A 2,000-watt portable generator costs $300 to $800 and requires stored gasoline, which degrades over time and creates its own storage and safety challenges. A quality camp stove costs $30 to $120 and runs on canisters that store safely for years.
That said, a generator provides value beyond cooking, it powers medical equipment, refrigeration, and communications. For a complete comparison of backup power options, the Complete Prepper’s Guide to Backup Power breaks down every option with real cost analysis.
Cooking on a Camp Stove: 20 Quick Meals for When the Power Goes Out
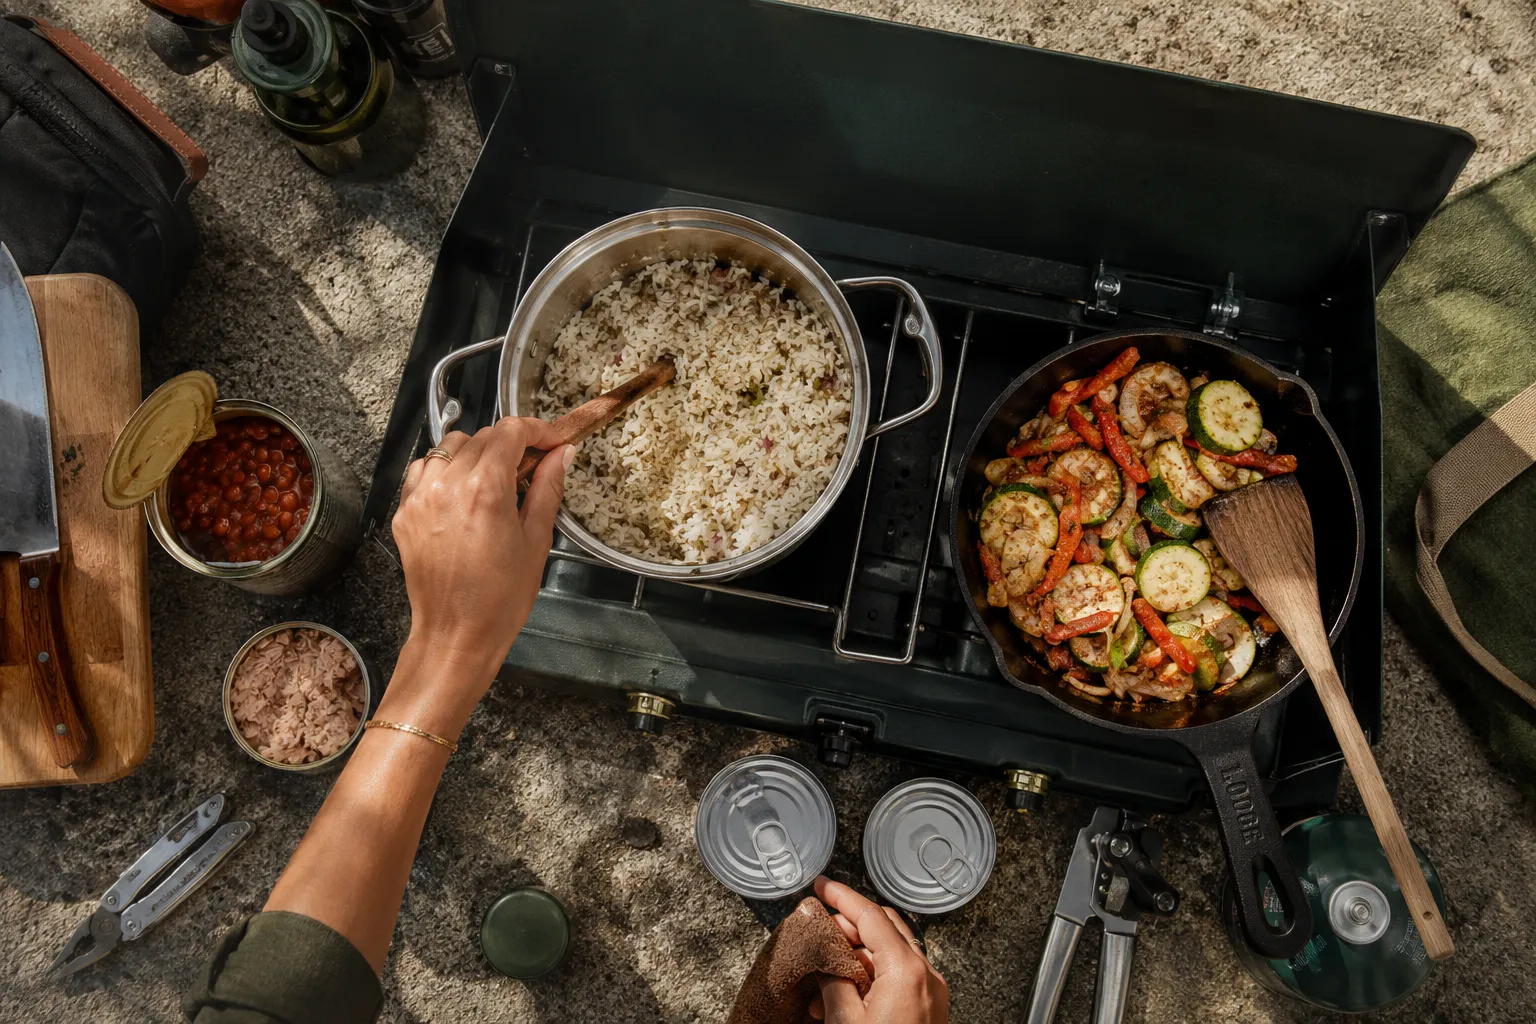
These 20 meals are built around shelf-stable ingredients, canned goods, dried grains, freeze-dried foods, and pantry staples. Each one cooks on a single burner in 30 minutes or less.
Breakfast Meals (1-5)
- Oatmeal with dried fruit and honey, Boil water, add rolled oats, simmer 5 minutes. Add raisins, dried cranberries, and a drizzle of honey. Done in under 10 minutes.
- Scrambled eggs from powdered eggs, Reconstitute powdered eggs with water, cook in a lightly oiled pan over medium heat. Add canned diced peppers or freeze-dried vegetables.
- Pancakes from dry mix, Standard pancake mix requires only water. Cook on a lightly greased pan over medium-low heat.
- Grits with canned butter, Bring water to a boil, whisk in quick grits, stir for 5 minutes. Season with salt, canned butter, or shelf-stable cheese.
- Instant coffee and hard-boiled eggs, Boil water for coffee. Boil eggs for 10 minutes. Simple, high-protein, zero waste.
Lunch Meals (6-10)
- Tuna noodle soup, Boil water, add egg noodles, cook 8 minutes. Drain slightly, add canned tuna, cream of mushroom soup concentrate, and salt.
- Black bean quesadillas, Heat canned black beans in a pan. Warm tortillas directly on the burner grate for 30 seconds per side. Fill with beans and shelf-stable salsa.
- Ramen upgrade, Cook instant ramen, discard half the sodium packet. Add canned chicken, soy sauce, and freeze-dried vegetables for a real meal.
- Lentil soup, Red lentils cook in 20 minutes. Combine with canned diced tomatoes, cumin, garlic powder, and salt. High protein, high calorie.
- Peanut butter rice cakes with canned fruit, No cooking needed. Pair with a hot cup of tea or instant coffee.
Dinner Meals (11-17)
- One-pot chili, Combine canned kidney beans, canned diced tomatoes, canned corn, chili powder, and cumin. Simmer 15 minutes. Serve over rice or with crackers.
- Pasta with canned marinara, Boil pasta 8 to 10 minutes. Drain, top with canned marinara sauce and canned olives or mushrooms.
- Rice and canned salmon, Cook white rice (20 minutes). Top with canned salmon, lemon juice from a bottle, and dried dill.
- Chickpea curry, Sauté garlic powder and curry powder in oil, add canned chickpeas and canned coconut milk. Simmer 10 minutes. Serve over rice.
- Canned beef stew, Heat directly in the can or pour into a pot. Add dried rosemary and serve with crackers or hardtack.
- Freeze-dried meal rehydrated, Boil water, pour into a freeze-dried pouch, wait 10 minutes. Mountain House and Backpacker’s Pantry make genuinely good options for this.
- Spam fried rice, Cook rice, let it cool slightly. Dice canned Spam, fry in oil, add rice and soy sauce. A high-calorie, complete meal in 25 minutes.
Quick Snacks and Sides (18-20)
- Hot cocoa or instant soup, Boil water, add packet. Two minutes, zero effort, high morale value.
- Hardtack with canned cheese spread, No cooking needed. Hardtack stores for years; pair with any canned spread for a quick calorie boost.
- Refried bean and tortilla wraps, Heat canned refried beans in a pan, warm tortillas, roll and eat. Five minutes total.
For a deeper dive into building the food stockpile behind these meals, the Complete Guide to Emergency Food Rationing and Cooking is essential reading.
How to Cook Rice and Pasta on a Camp Stove
Rice and pasta cook on a camp stove the same way they do on a gas range, but fuel conservation matters. Use the absorption method for rice and a rolling boil with a lid for pasta to minimize cook time and fuel use.
Rice (absorption method):
- Combine 1 cup white rice and 2 cups water in a pot.
- Bring to a boil on high heat.
- Reduce to the lowest simmer, cover tightly.
- Cook 15 to 18 minutes without lifting the lid.
- Remove from heat, let steam for 5 minutes.
Pasta:
- Bring water to a full rolling boil (use a lid to speed this up).
- Add pasta, stir once.
- Cook per package directions, usually 8 to 10 minutes.
- Drain using the pot lid as a strainer, no colander needed.
Fuel-saving tip: Bring water to a boil, add pasta or rice, cover, and then turn off the heat. Let it sit for 15 to 20 minutes. This “retained heat” method works surprisingly well for pasta and saves significant fuel during extended outages.
What Pots and Pans Work Best on Camp Stoves?
Stainless steel and aluminum cookware work best on camp stoves. Both conduct heat efficiently, tolerate open flame, and are durable enough for rough use. Avoid non-stick coatings on high heat, the coating degrades and can release harmful fumes when overheated on an open flame.
Best choices:
- Stainless steel pot (2-3 quart): The workhorse for soups, rice, pasta, and boiling water. Durable and easy to clean.
- Cast iron skillet: Excellent heat retention for frying and searing. Heavy but worth it if you’re cooking at home rather than bugging out.
- Aluminum camp cookset: Lightweight, heats quickly, and packs flat. Ideal if you need to grab-and-go.
- Titanium cookware: Lightest option, extremely durable, but expensive. Best for bug-out scenarios rather than home emergency cooking.
Avoid: Thin-bottomed pans that warp, non-stick coatings on open flame, and glass lids that can crack from thermal shock.
Camp Stove Cooking Tips for Beginners
Camp stove cooking for beginners comes down to three things: heat control, fuel conservation, and one-pot simplicity. Master these and you can feed a family of four through a week-long outage without stress.
Practical tips that make a real difference:
- Always use a lid. A covered pot boils water in roughly half the time of an uncovered one. This alone cuts fuel use significantly.
- Start with high heat, finish on low. Bring things to temperature quickly, then reduce the flame to a simmer. Most foods cook fine on low heat.
- Pre-measure water before the outage. Know your pot’s capacity and how much water each meal requires. Guessing wastes both water and fuel.
- Cook in batches. Make a large pot of rice or beans once and use it across multiple meals.
- Keep a windscreen handy. Wind is the biggest enemy of camp stove efficiency. A simple aluminum windscreen can reduce fuel consumption by 30% or more.
- Practice before you need it. Cook one meal per week on your camp stove during normal times. The learning curve is real, and an emergency is not the time to figure out heat settings.
For apartment-based preppers, the guide to surviving in an apartment without power, water, or heat addresses the specific constraints of small-space emergency cooking.
How Do You Keep Food from Sticking on a Camp Stove?
Food sticks on camp stoves primarily because of uneven heat distribution and insufficient fat. The solution is to use adequate oil or fat, preheat the pan before adding food, and keep the flame lower than you think necessary.
Anti-stick technique for camp stove cooking:
- Preheat the pan on medium heat for 60 to 90 seconds before adding oil.
- Add oil and let it heat until it shimmers slightly.
- Add food and resist the urge to move it immediately, let it develop a crust first.
- Use a metal spatula for cast iron; a silicone spatula for aluminum.
- Deglaze stuck bits with a splash of water, it lifts residue and adds flavor to soups and stews.
For eggs specifically: use more fat than you think you need, keep heat low, and stir constantly. Powdered eggs are more forgiving than fresh eggs on high heat.
Common Mistakes When Cooking on Camp Stoves
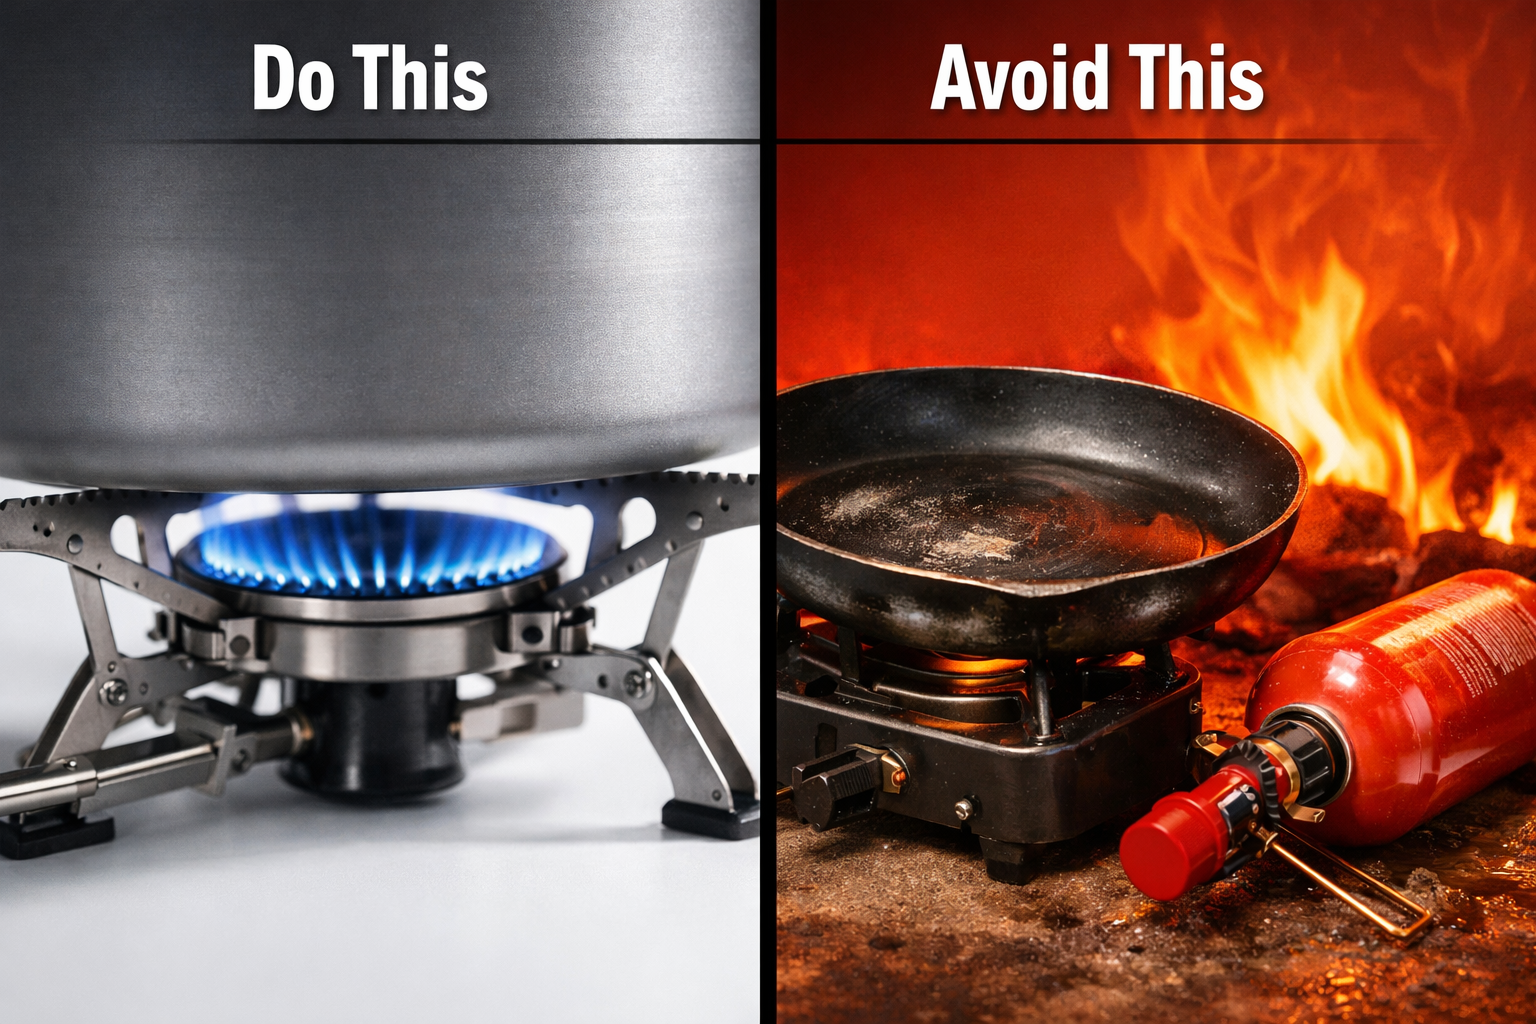
The most common camp stove cooking mistakes are using too much fuel, ignoring ventilation, and attempting complex recipes under pressure. These errors are easy to avoid with a little preparation.
Mistakes that cost preppers the most:
- Cranking the heat to maximum: High heat burns fuel fast and scorches food. Most camp stove cooking works better on medium-low.
- Not testing the stove before an emergency: Discover a faulty igniter or a leaky canister connection during a calm Tuesday, not during a hurricane.
- Storing fuel canisters in a hot car or garage: Propane canisters should be stored in cool, dry locations away from direct sunlight. Never store them indoors in living spaces.
- Using the wrong cookware: A large, heavy pot on a small canister stove creates instability. Match pot size to stove footprint.
- Forgetting water for cooking: Meals like rice, pasta, and rehydrated freeze-dried food require clean water. Stock water alongside your food supply, the Ultimate Emergency Water Storage and Purification Guide covers exactly how much to store and how to keep it safe.
- No backup ignition: Always carry a lighter and waterproof matches. Piezoelectric igniters fail.
Camp Stove Meal Prep for Extended Power Outages
For power outages lasting more than 72 hours, camp stove meal prep shifts from reactive cooking to a planned rotation system. The goal is to maximize calories per fuel unit while minimizing prep complexity.
A practical 7-day meal rotation framework:
- Days 1-2: Cook through any perishables from the refrigerator and freezer. Prioritize proteins and dairy.
- Days 3-5: Shift to canned goods and dried staples. Rotate through the 20 meals listed above. Cook large batches of rice and beans to use across multiple meals.
- Days 6-7+: Lean on freeze-dried meals, hardtack, peanut butter, and no-cook options to conserve remaining fuel.
Fuel conservation becomes critical after day 3. Use the retained-heat method for grains, minimize boiling time, and consolidate cooking into two sessions per day rather than three.
For a complete framework on building the food supply behind this rotation, the Complete Guide to Emergency Food Rationing and Cooking and the Ultimate Survival Pantry List are the two resources to read next.
Frequently Asked Questions
Can I use a camp stove on a kitchen countertop? Yes, but place it on a heat-resistant surface and keep it away from cabinets and flammable materials. Ensure the window above the counter is open for ventilation. Never leave it unattended.
How do I know if my propane canister is empty? Weigh it. A full 1 lb canister weighs approximately 1 lb 14 oz total. An empty canister weighs about 14 oz. The difference is your remaining fuel. You can also place the canister in warm water, the fuel level shows as a temperature line on the outside.
What’s the minimum camp stove setup for a family of four? A two-burner propane stove, 10 to 12 standard 1 lb canisters (or one 20 lb tank with adapter), a 3-quart stainless steel pot, and a 10-inch cast iron skillet. This setup handles every meal on the list above.
Can camp stove fuel canisters expire? Propane canisters don’t expire if undamaged and properly sealed, but inspect them annually for rust, dents, or valve damage. Isobutane canisters have a similar shelf life. Discard any canister with a damaged valve or visible rust.
Is it safe to cook camp stove meals for children? Yes. The meals above are nutritionally adequate for children. Pay attention to sodium content in canned goods, rinse beans and use low-sodium options where available. Powdered milk and peanut butter are excellent calorie sources for kids during outages.
What’s the fastest meal to cook on a camp stove? Instant ramen cooks in 3 minutes. Upgraded with canned chicken and soy sauce, it becomes a genuinely filling meal. Hot cocoa or instant soup takes 2 minutes. For a more substantial fast meal, canned beef stew heated directly takes under 5 minutes.
Do I need a special regulator for a 20 lb propane tank? Yes. A standard camp stove canister connection won’t fit a 20 lb tank directly. You need a low-pressure propane regulator hose adapter, which costs $15 to $25 at most hardware stores. This is worth having in your kit for extended outages.
Can I cook camp stove meals during a winter power outage? Absolutely, but cold temperatures affect fuel performance. Butane performs poorly below freezing. Propane works down to about -44°F. Isobutane/propane blends perform well in cold weather. Keep fuel canisters warm (inside, in a pocket) before use in freezing conditions.
What if I run out of fuel mid-outage? This is where a backup cooking method matters. A wood-burning rocket stove, a fire pit, or even a backyard fire with a grate can bridge the gap. The guide to starting a fire without matches is worth reading before you need it.
How much water do I need per day for camp stove cooking? Beyond drinking water (1 gallon per person per day minimum), cooking adds roughly 1 to 2 quarts per person per day for meals like rice, pasta, and soups. Store accordingly, and always have a purification method as backup.
Conclusion
Cooking on a camp stove when the power goes out is not complicated. It requires the right equipment, a small fuel stockpile, and a rotation of 20 quick meals built around shelf-stable ingredients. The preppers who eat well during emergencies are the ones who practiced before the lights went out.
Actionable next steps to take this week:
- Purchase a two-burner propane camp stove and at least 6 standard 1 lb canisters (or a 20 lb tank with adapter hose).
- Stock the pantry ingredients for at least 10 of the 20 meals listed above.
- Install a battery-operated CO detector near your emergency cooking area.
- Cook one meal on your camp stove this weekend, not during an emergency, but before one.
- Review your water supply. You need cooking water in addition to drinking water. The Ultimate Emergency Water Storage and Purification Guide is the place to start.
Preparedness isn’t about fear. It’s about sitting down to a hot meal with your family while the rest of the neighborhood scrambles. That’s the confidence a camp stove and 20 solid recipes can give you.
Products, Tools, and Resources
Camp stoves worth owning:
- Coleman Classic Propane Stove (2-burner): The most reliable, widely available option for home emergency cooking. Runs on standard 1 lb canisters or a 20 lb tank with an adapter. Around $50 to $70.
- Camp Chef Explorer 2-Burner: Higher BTU output, more stable for larger pots, and compatible with bulk propane tanks. Around $80 to $120. A solid upgrade for families.
- MSR PocketRocket 2: Compact canister stove for apartment preppers or bug-out kits. Excellent cold-weather performance. Around $45.
Essential accessories:
- Low-pressure propane regulator hose (for 20 lb tank connection): $15 to $25 at any hardware store.
- Aluminum windscreen: $10 to $20. Reduces fuel consumption significantly in outdoor cooking.
- Battery-operated CO detector: $20 to $40. Non-negotiable for any indoor-adjacent cooking.
- 3-quart stainless steel pot with lid: $20 to $40. The single most useful piece of cookware for camp stove cooking.
Further reading at Preppers HQ:
- Complete Guide to Emergency Food Rationing and Cooking
- Ultimate Power Outage Preparedness Checklist
- The Ultimate Survival Pantry List
- City Blackout Survival Checklist Essentials
Tags: camp stove cooking, power outage meals, emergency cooking, camp stove safety, propane stove, survival food, prepper meals, cooking without electricity, emergency preparedness, camp stove fuel, one-pot meals, off-grid cooking