
Hey there! Some links on this page may be affiliate links which means that, if you choose to make a purchase, I may earn a commission at no extra cost to you. I greatly appreciate your support. Read the full disclosure here.
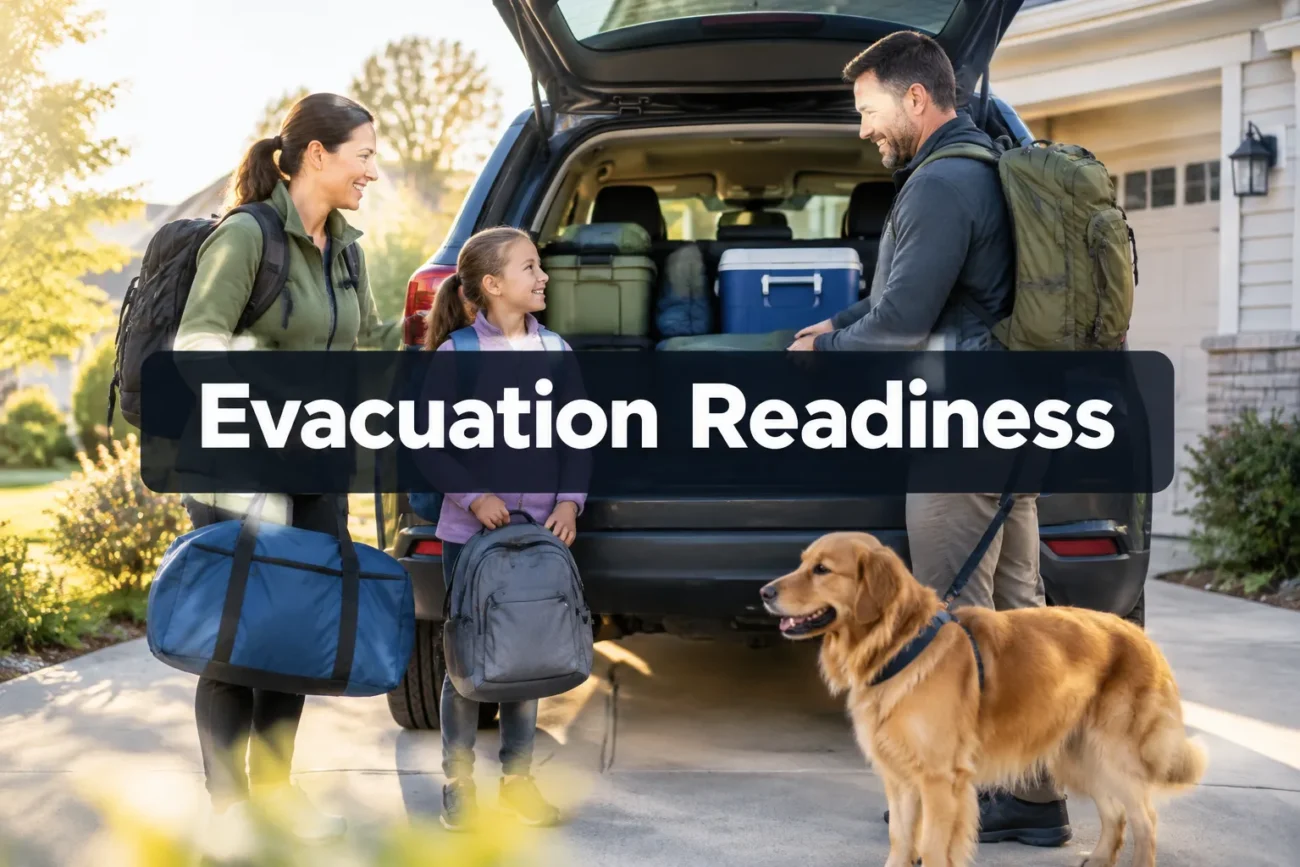
Most families who lose everything in a wildfire, flood, or gas leak don’t lack supplies. They lacked a rehearsed sequence. Research from FEMA’s community preparedness surveys has repeatedly found that households with a written, practiced plan evacuate faster and with fewer injuries than those relying on memory alone. Evacuation Readiness: How to Get Your Family Out in Under 10 Minutes isn’t a slogan; it’s a trainable skill built from pre-staged gear, assigned roles, and muscle memory you build through repetition, not panic.
This guide breaks the 10-minute window into concrete steps: what goes in the go-bag, how to handle kids, pets, elderly relatives, and medical equipment, where to meet if you’re separated, and the mistakes that eat up the minutes you don’t have.
Find this useful? Add us as a preferred source on Google and more of what we publish will show up in your results.
Key Takeaways
- Evacuation Readiness: How to Get Your Family Out in Under 10 Minutes depends on pre-staged bags, assigned family roles, and a written plan, not improvisation.
- Every family member, including kids over age five, should know their one job during an evacuation.
- Go-bags belong near exits, not in closets or basements you’d have to dig through.
- Practice drills quarterly at minimum; twice a year is the realistic floor for most households.
- Pick a primary and a backup meeting spot, one near home, one outside the neighborhood.
- Families with elderly members, pets, or medical equipment need extra lead time built into the plan, not less.
- A laminated card near the door beats a mental checklist every single time.
What Should Be in an Evacuation Go-Bag for Families
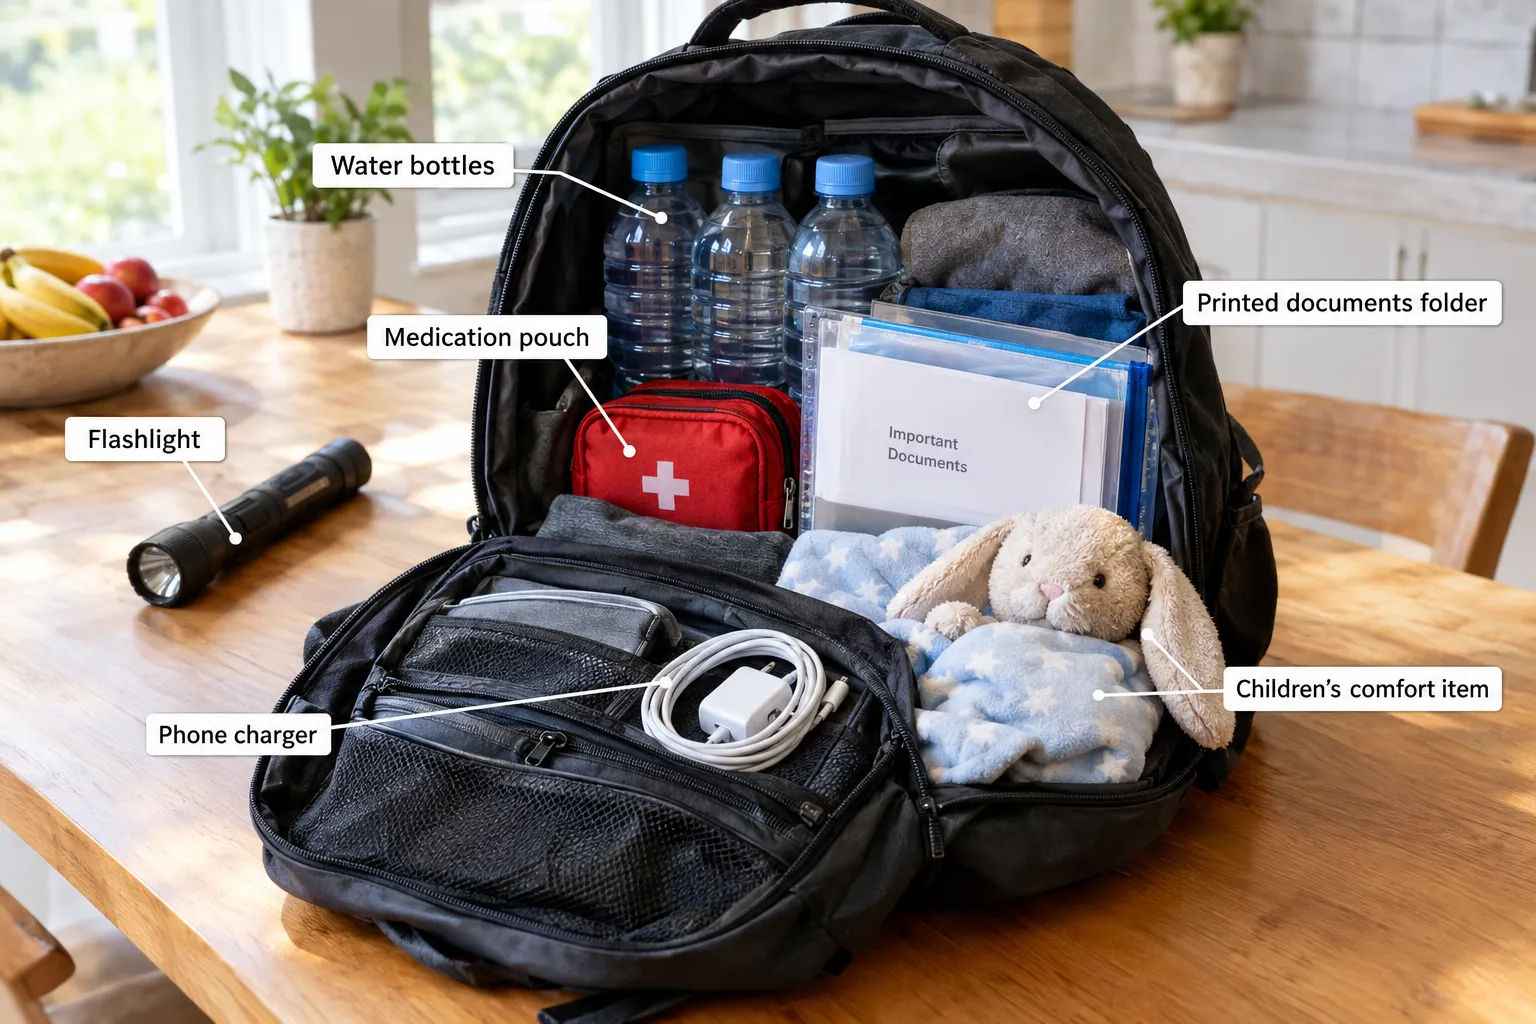
A family evacuation go-bag should cover water, basic medical needs, identification documents, and a change of clothes per person, packed and zipped, not assembled on the fly. The bag’s only job is to get you through the first 24 to 72 hours without needing to stop and think.
Core contents for a family of four:
- Water: at least one liter per person, plus a portable filter or purification tablets
- Food: shelf-stable bars or pouches that need no cooking
- Documents: copies of IDs, insurance policies, and medical records in a waterproof pouch
- Flashlight and headlamp with spare batteries
- Phone chargers and a small power bank
- Basic first aid kit and a seven-day supply of prescription medications
- Cash in small bills
- One change of clothes and sturdy shoes per family member
- Comfort item for young children (a small toy, blanket corner)
For a deeper breakdown by age group and a packing list you can print, see this guide on building a family bug out bag with age-specific gear. If your timeline is tighter than 10 minutes, the 5-minute evacuation packing guide strips the list down further.
Common mistake: packing bulk food supplies into the go-bag. That’s what your 72-hour kit is for, the go-bag stays light enough to grab and run.
How to Create an Evacuation Plan With Kids and Pets
A workable family evacuation plan assigns each person a specific job and gives kids and pets their own gear and exit role, rather than lumping them into “everyone just follows mom.” Children as young as five can carry their own small bag and know a single task, like grabbing the family cat’s carrier.
Build the plan around these roles:
- One adult grabs go-bags and documents
- One adult (or older teen) loads the vehicle and starts it
- Kids over five carry their own bag and a flashlight
- One person is permanently assigned to pets, leash, carrier, and food pouch staged together near the door
Pets need their own kit: carrier, leash, a week of food, vaccination records, and a photo in case you’re separated. Keep carriers pre-assembled near the exit, not stored flat in a closet.
Decision rule: if your household includes children under five, add two minutes to your target time and rehearse the “who carries the toddler” question specifically, this is the single biggest point of confusion in real drills.
Evacuation Drills for Apartment vs .House Differences
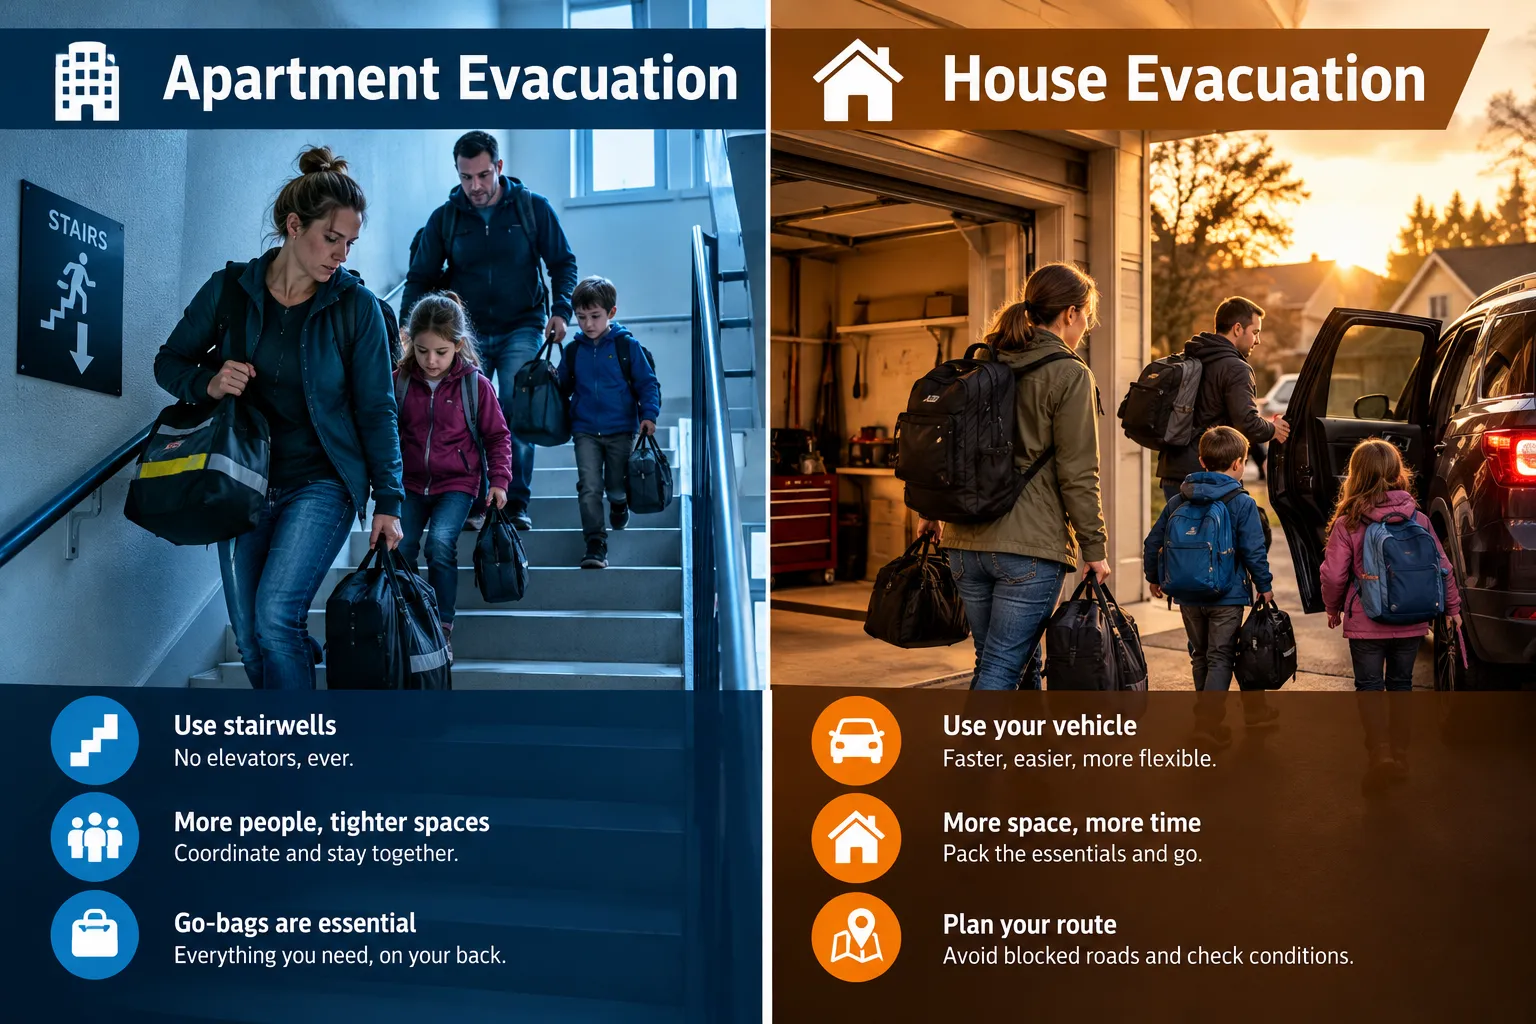
Apartment evacuations and house evacuations require different drills because stairwells, parking distance, and elevator restrictions change your bottleneck points. House drills focus on vehicle loading speed; apartment drills focus on stairwell flow and ground-floor regroup points.
Apartment-specific considerations:
- Never use elevators during fire or structural emergencies, practice the stairwell route specifically
- Identify your floor’s primary and secondary stairwell exits
- Agree on a ground-floor meeting point outside the building, not inside the lobby
- Pre-stage go-bags near the apartment door, since there’s no garage to grab gear from on the way out
House-specific considerations:
- Keep a car key and go-bags in the same staging zone, ideally near the garage or front door
- Practice loading the vehicle in the dark, since many evacuations happen at night or during power loss
- Know two routes out of your neighborhood in case the main road is blocked. See this urban evacuation route planning guide for building backup routes
Edge case: multi-story homes should assign someone specifically to check upstairs bedrooms last, after bags are already in the vehicle, so that sthe earch doesn’t delay the group’s departure.
How Often Should Families Practice Evacuation Procedures
Families should run a full evacuation drill at least twice a year, with a quick walkthrough every quarter to keep roles fresh in everyone’s mind. Annual-only drills tend to fail under real stress because the sequence hasn’t become automatic.
A realistic practice schedule:
- Full-time drill: twice a year (spring and fall work well)
- Quick walkthrough without timing: quarterly
- Spontaneous surprise drill: once a year, to test real reaction time without warning
Track your time with a phone stopwatch for each drill. If you’re consistently over 10 minutes, the delay is almost always in one of three places: searching for documents, arguing about what to bring, or hunting for keys. Fix the bottleneck, not the whole plan.
What to Do If a Family Member Refuses to Evacuate
If a family member refuses to evacuate, stay calm, state the specific risk in plain terms, and give them a short deadline rather than arguing in circles. Most refusals come from disbelief in the threat, not stubbornness, so concrete information usually works better than pressure.
Steps that tend to work:
- Name the specific hazard (“the fire is two miles out and moving toward the ridge”)
- Give a firm but short deadline (“we’re leaving in five minutes”)
- Offer them a task so they feel useful instead of cornered
- If they still refuse and time is critical, evacuate the rest of the household to safety first and contact emergency services about the holdout from a safe location
Common mistake: waiting for full agreement before anyone leaves. If children are in the vehicle, get them to safety,;you can continue working on a reluctant adult’s departure separately, including by phone.
Evacuation Plan for Elderly Parents or Family With Disabilities
Evacuation plans involving elderly parents or family members with disabilities need extra lead time, mobility equipment staged in advance, and a clearly assigned helper, treating their evacuation as a separate mini-plan nested inside the family plan.
Build this into your timeline:
- Add 5 to 10 extra minutes to your household target time if mobility assistance is needed
- Stage wheelchairs, walkers, or oxygen equipment near the exit, fully charged or filled, at all times
- Assign one person as the dedicated helper, not “whoever’s free,” but a named role
- Keep a laminated card with medical conditions, allergies, and emergency contacts in your bag at all times
- If stairs are involved, practice the actual carry or transfer method in advance, not just in theory
Quick example: a household with a grandparent who uses a walker found their real bottleneck wasn’t the walker itself; it was forgetting the portable oxygen concentrator’s charger. Staging that charger permanently with the go-bag cut their drill time by three minutes.
Best Meeting Spots for Families to Reunite After Evacuation
Every family needs two meeting spots: one close to home for a sudden, localized emergency, and one outside the neighborhood for events that make the immediate area unsafe or inaccessible. Write both down and keep copies in every go-bag.
- Primary spot: a neighbor’s mailbox, a specific tree, or a corner two blocks away, somewhere fixed and easy to describe to a child
- Secondary spot: a relative’s house, a church, or a well-known business outside the evacuation zone
- Out-of-area contact: one person outside the region everyone can call or text if local lines are overloaded
Put these three details on a laminated card in every bag and on the fridge. This single step solves most of the confusion that happens when family members scatter during a chaotic exit.
Common Mistakes People Make During Family Evacuations
The most common evacuation mistakes are delayed decision-making, disorganized gear, and skipping practice runs, all of which cost minutes you won’t have once a real threat is closing in.
Watch for these specific failures:
- Waiting for “official” confirmation before acting, instead of leaving when conditions clearly warrant it
- Storing go-bags in hard-to-reach places like attics or garages buried behind other items
- Forgetting to rotate water and medication in the go-bag, leaving expired supplies when it’s needed
- Loading the vehicle with non-essentials first because they’re easiest to grab
- Not having a paper map backup when cell networks go down during regional emergencies
A quick fix for most of these: run one timed drill this month and track exactly where the minutes went. For wildfire-specific timing and packing order, the 30-minute wildfire evacuation checklist breaks the sequence down further.
How to Keep Kids Calm During an Emergency Evacuation
Kids stay calmer during evacuations when they have a specific job, a familiar comfort item, and parents who narrate what’s happening in simple, steady language. Panic in children is often a mirror of the panic adults project, more than a reaction to the event itself.
- Give each child a concrete task, like carrying their own small bag or holding a flashlight
- Use short, factual sentences: “We’re leaving now because of the storm. You’re doing great.”
- Pack a familiar comfort object into their bag ahead of time, not grabbed last minute
- Practice the drill as a game occasionally, so the sequence feels familiar rather than frightening
Evacuation Checklist Template for Families
A usable evacuation checklist fits on one laminated page, lists tasks by person, and sits near the front door where everyone can see it during the actual event, not buried in a binder.
Sample Family Evacuation Checklist
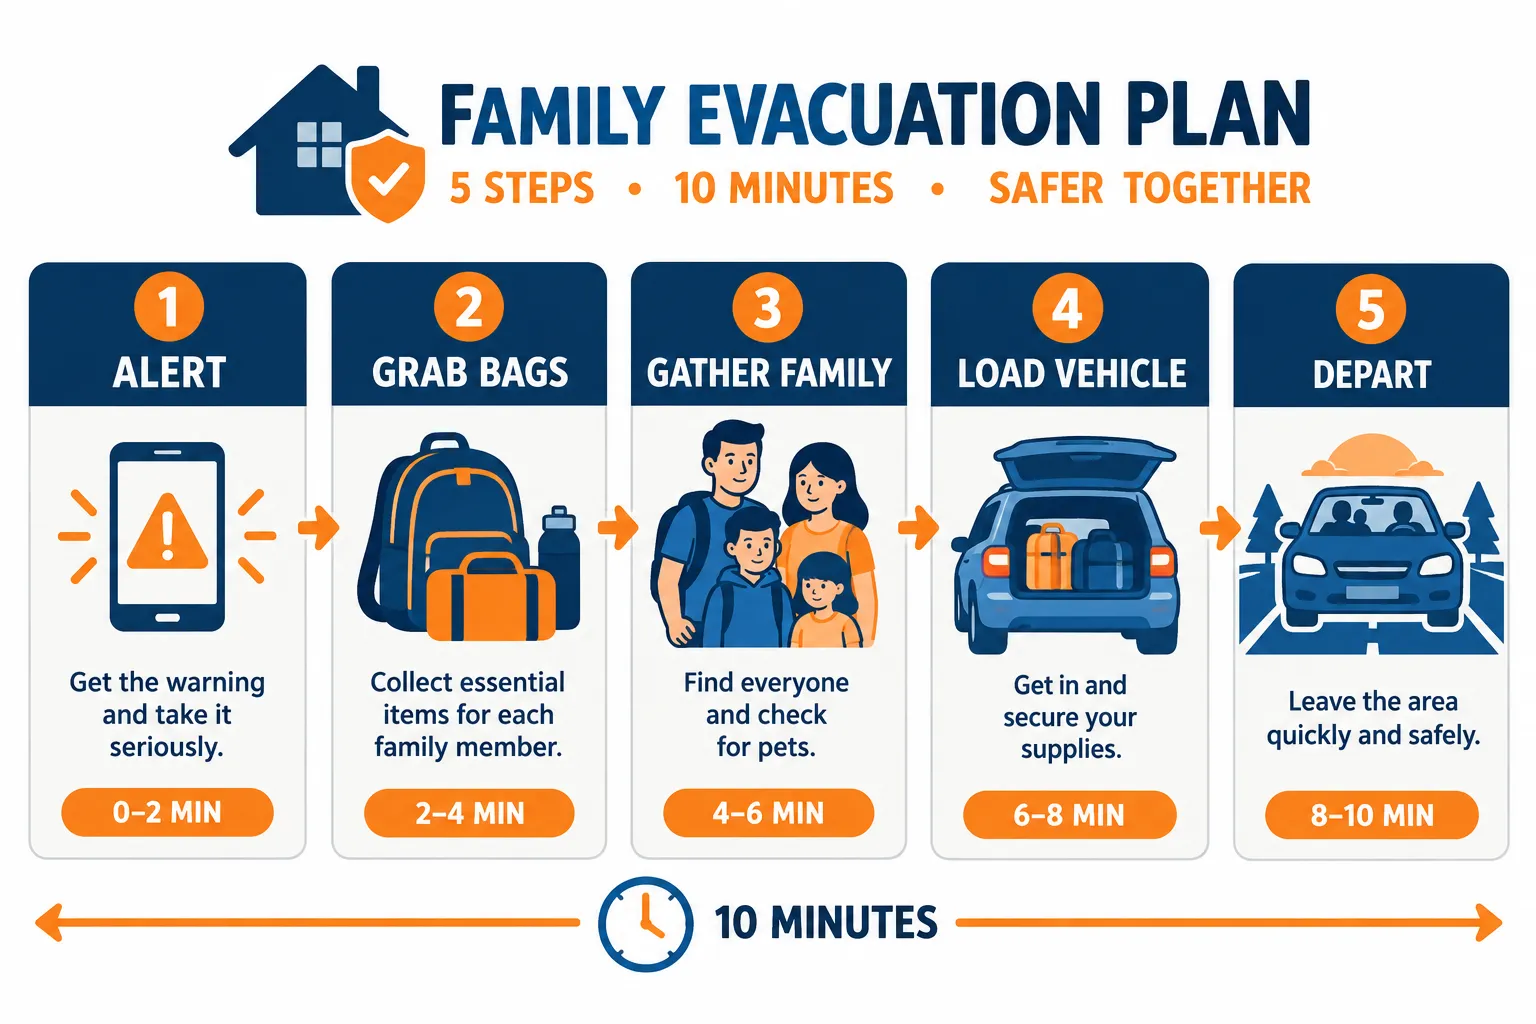
- Minute 0-1: Alert sounds; adult confirms threat, calls “evacuate now”
- Minute 1-3: Each person grabs their assigned go-bag and comfort/pet item
- Minute 3-5: Documents folder, medications, and chargers grabbed from staging zone
- Minute 5-7: Vehicle loaded, pets secured, elderly/disabled family member assisted
- Minute 7-9: Final headcount at the door, lights/gas checked if time allows
- Minute 9-10: Depart, text out-of-area contact your route and destination
Adapt this timeline using the broader framework in the ultimate evacuation plan guide and the family emergency plan template, which covers communication trees and route mapping in more depth.
What Happens if You Get Separated During Evacuation
If family members get separated during an evacuation, the plan should default to the pre-agreed meeting spots and the out-of-area contact, rather than everyone trying to search for each other in an active hazard zone. Searching during an unfolding emergency often creates a second crisis.
- Head to the primary meeting spot first; wait a set amount of time (10-15 minutes is reasonable)
- If the primary spot is unreachable or unsafe, move to the secondary spot outside the area
- Call or text the designated out-of-area contact with your location and status
- Teach children to tell any adult their name and the out-of-area contact’s phone number if they’re found alone
Edge case: if a family member is at work or school when the evacuation order hits, their move is to go directly to the secondary meeting spot rather than attempting to return home through an active hazard zone.
How to Evacuate at Night or When Family Is at Different Locations
Night evacuations and evacuations where family members are scattered across different locations both require a pre-agreed default: everyone converges on the designated meeting spot independently, without waiting for a group text that may never arrive.
- Keep headlamps (not just flashlights) in every go-bag so hands stay free for kids or pets
- Reflective clothing or tape on bags helps responders see your group in low light or smoke
- If family members are at work, school, or elsewhere, each person should already know: go directly to the secondary meeting spot, don’t try to regroup at home first
- Charge phones nightly as a habit, not just during emergencies, since night evacuations often come with power already out
Evacuation Readiness for Families With Medical Equipment or Medications
Families relying on medical equipment or regular medications need backup power, a labeled medication bag, and a written plan for what happens if the primary device loses power. This is one of the areas where Evacuation Readiness: How to Get Your Family Out in Under 10 Minutes requires planning well before the 10-minute window even starts.
- Keep a 7 to 14 day supply of medications rotated and current in the go-bag, with dosage instructions attached
- For equipment like oxygen concentrators or CPAP machines, keep a charged backup battery or portable power station staged with the device
- Laminate a card listing diagnoses, medications, dosages, and allergies for first responders
- Know your device’s runtime on battery power so you can plan the evacuation window realistically
Do You Need Special Insurance or Permits for Evacuation Preparedness
No special permit is required to prepare an evacuation plan or stock a go-bag, but reviewing your homeowners or renters insurance policy for evacuation-related coverage, like additional living expenses, is worth doing before disaster season begins. Some policies cover temporary housing costs if you’re displaced; others don’t, and the difference matters when you’re deciding how long to stay away.
- Confirm whether your policy covers temporary lodging during a mandatory evacuation
- Keep a digital and paper copy of your policy number in your go-bag’s document pouch
- Vehicle registration and proof of insurance should also travel with you, not stay in a glovebox you might not reach
Comparison: Apartment vs. House Evacuation Priorities
| Factor | Apartment | House |
|---|---|---|
| Biggest bottleneck | Stairwell congestion | Vehicle loading time |
| Exit route | Stairs only, never elevator | Garage or front door to driveway |
| Staging location | By front door | Near garage entry |
| Meeting spot | Outside building, away from entrance | End of driveway or nearby fixed landmark |
For more on building redundancy into your routes once you’re on the road, review the 4-layer disaster plan built on FEMA protocols, which covers what happens after the first 10 minutes.
FAQ
Can we really get out in under 10 minutes with young kids?
Yes, with practice. Families with kids under five typically need an extra two to three minutes built into the plan, mostly for carrying a toddler and managing a comfort item. The target stays realistic once bags are pre-staged and roles are assigned ahead of time.
What if we don’t have time for a full drill this month?
Even a five-minute walkthrough without a stopwatch beats skipping practice entirely. Walk the route from bed to vehicle once, out loud, naming each task as you go.
Do pets really need their own evacuation kit?
Yes. Pets often cause the biggest delays because carriers and leashes get searched for at the last second. Staging pet gear with the family go-bags removes that entire bottleneck.
What if our car won’t start?
Have a backup plan: a neighbor’s vehicle, a walking route to a nearby meeting point, or a rideshare arranged through the out-of-area contact. Don’t let one point of failure be the only plan.
How do we handle an evacuation if one parent is traveling for work?
The parent at home runs the plan solo using the same assigned roles, shifting some tasks to older kids if needed. The traveling parent should know the secondary meeting spot and the out-of-area contact’s number by heart.
Should we evacuate before an official order is issued?
If conditions clearly point to danger, don’t wait for an official order. Many evacuation delays and losses trace back to households waiting for confirmation that arrived too late.
Conclusion
Evacuation Readiness: How to Get Your Family Out in Under 10 Minutes comes down to preparation done in advance, not heroics done in the moment. The families who move fastest aren’t the ones with the most expensive gear; they’re the ones who’ve staged their bags by the door, assigned every person a job, and run the drill enough times that nobody has to think; they just move.
Start this week: pack or refresh your go-bags, write your meeting spots on a card, and run one timed walkthrough with everyone in the house, including the kids. Review it again in three months. That’s the whole system, repeated until it’s automatic.
Products, Tools, and Resources
A few additions make the 10-minute window easier to hit consistently. A dedicated headlamp for each family member keeps hands free during a night exit, which matters more than most people expect until they’ve tried loading a car one-handed while holding a flashlight. A small portable power station staged near medical equipment solves the single biggest delay for families relying on oxygen concentrators or CPAP machines. For documents, a simple waterproof pouch kept in the go-bag, not a drawer, removes the most common last-minute scramble. And a basic laminated checklist taped inside a closet door, listing each person’s job by name, turns a stressful scramble into something closer to routine. None of these need to be expensive; they need to be in place before the alert ever sounds.