
Hey there! Some links on this page may be affiliate links which means that, if you choose to make a purchase, I may earn a commission at no extra cost to you. I greatly appreciate your support. Read the full disclosure here.
Hypothermia sets in faster than most people expect — within 30 minutes in cold, wet conditions if your core temperature drops enough. Fire is not a comfort item in a survival scenario. It is the difference between making it through the night and not. This how to start fire in wet conditions survival guide covers every method, material, and mindset shift needed to get a flame going when everything around you is soaked, frozen, or dripping.
Key Takeaways
- Wet conditions don’t mean impossible conditions — they mean you need a smarter approach and better preparation.
- The driest wood is always found inside a log, not on the surface. Splitting wood is often the first step.
- Carry at least three fire-starting methods in your bug out bag, stored in waterproof containers.
- Fatwood, birch bark, and cattail fluff are among the best natural tinder options in damp environments.
- Waterproof matches and ferro rods outperform standard lighters in rain and cold.
- Chemical fire starters and petroleum jelly cotton balls are worth every penny in wet weather survival.
- Primitive friction methods like the bow drill can work in humid conditions, but only with the right wood pairing and technique.
- Shelter your fire-starting process first — even a poncho lean-to over your workspace changes everything.
- Most people fail to start fire in wet conditions because of poor tinder preparation, not a bad ignition source.
- Professionals always prepare fire-starting materials before they need them, not during an emergency.
What Materials Burn Best When Everything Is Damp?
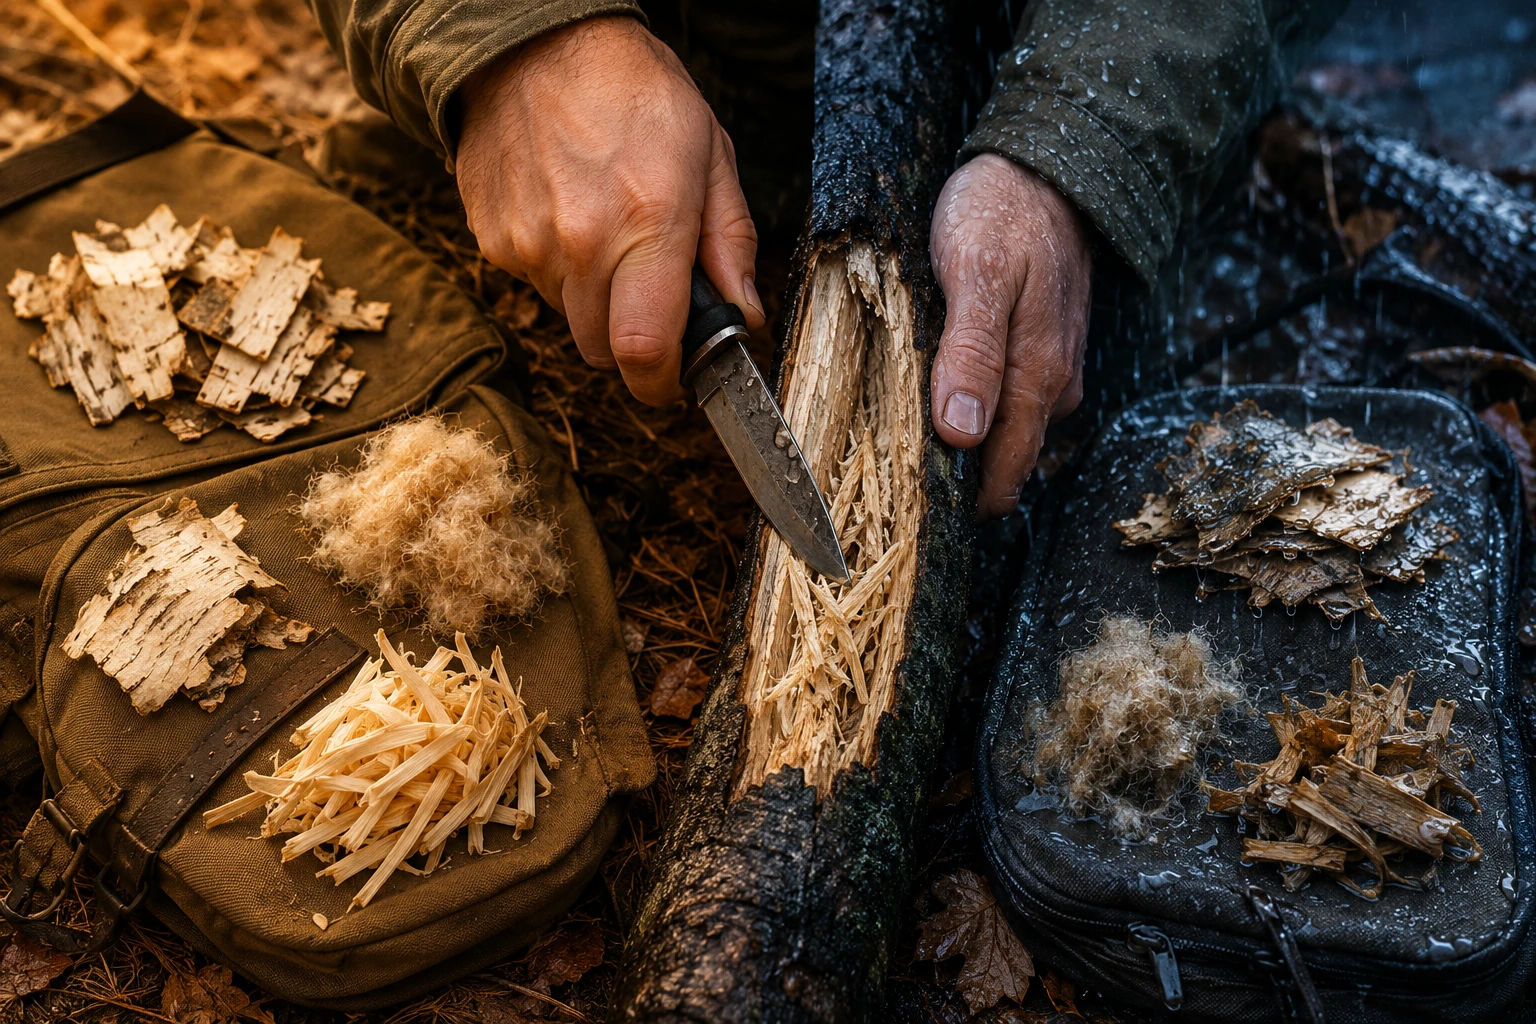
The best materials for fire-starting in wet conditions are those with natural oils, resins, or low moisture content at their core. Fatwood (resin-saturated heartwood from pine trees), birch bark, and cattail fluff are the top natural options. Manufactured options like petroleum jelly cotton balls, wax-based fire starters, and commercial tinder cubes perform even more reliably.
Natural tinder that works when wet:
- Fatwood: Found in the heartwood of dead pine stumps. The resin content is so high it lights even when the exterior is damp. Shave the outer layer off and work with the dry interior.
- Birch bark: Contains oils that burn hot even when wet on the surface. Peel back the outer layers to reach the drier inner bark.
- Cattail fluff: The seed heads stay relatively dry inside even after rain. Pull them apart to expose the dry fibers.
- Dead standing wood: Wood that died on the tree and never fell to the ground retains far less moisture than wood on the forest floor.
- Inner bark of dead trees: The cambium layer between bark and heartwood often stays dry enough to use as tinder.
- Dry grass from inside a dense clump: The outer stalks protect the interior. Pull from the center.
Manufactured tinder that outperforms everything else in rain:
- Petroleum jelly-coated cotton balls (homemade, costs pennies)
- Wax-based fire starters (commercial brands like WetFire or Coghlan’s)
- Fatwood sticks (pre-cut, sold commercially)
- Fire paste or gel
Decision rule: If you’re in a true emergency with no manufactured tinder, split any dead log you can find. The interior wood is almost always significantly drier than the surface. Use a knife or sharp rock to shave fine curls from the interior — those shavings are your tinder.
Can You Start a Fire If All Your Tinder Is Wet?
Yes, but it requires finding or creating dry material rather than trying to ignite wet tinder directly. Wet tinder will not catch a spark or flame reliably. The solution is to either expose the dry interior of wood through splitting and shaving, or use a chemical/wax-based fire starter that burns hot enough to dry and ignite surrounding damp material.
Step-by-step process when all natural tinder appears wet:
- Find a dead log or standing dead tree — not one lying on the ground.
- Split it open with a knife and baton (using another stick to drive the knife blade) or a rock.
- Shave the dry interior wood into fine curls using your knife blade at a 90-degree angle.
- Build a bird’s nest shape from the shavings, placing the finest material in the center.
- If available, add a petroleum jelly cotton ball or wax fire starter to the center of the nest.
- Shield the tinder nest from rain with your body or a piece of bark before striking.
Common mistake: People try to dry wet tinder by holding it near a spark source. That doesn’t work. You need to physically remove the wet outer layers to reach dry material underneath.
For a broader look at the skills that support this process, the 25 Most Critical Wilderness Survival Skills guide covers fire-making alongside the other competencies that keep you alive in the field.
How Do Waterproof Matches Actually Work?
Waterproof matches are coated with a wax or lacquer layer that prevents moisture from reaching the match head’s chemical compound. When struck, the friction generates enough heat to burn through the coating and ignite the phosphorus and oxidizer mixture underneath. Quality waterproof matches will light after being submerged in water for 30 seconds or more.
What to look for in waterproof matches:
- Storm-proof or lifeboat-grade matches burn for 10–15 seconds even in wind and rain — far longer than standard waterproof matches.
- Store them in a waterproof case with a striker strip, not loose in a pocket.
- UCO Stormproof Matches are a well-regarded option; each match burns for roughly 15 seconds.
Waterproof matches vs. ferro rod in wet conditions:
| Feature | Waterproof Matches | Ferro Rod |
|---|---|---|
| Works when submerged | Yes (briefly) | Yes |
| Wind resistance | Moderate (storm matches: high) | High |
| Number of uses | Limited (count in box) | Thousands of strikes |
| Ease of use with cold hands | Easy | Moderate |
| Shelf life | 5–10 years | Indefinite |
| Fails when… | Striker strip gets wet | Tinder is too wet |
Bottom line: Waterproof matches are an excellent backup, but a ferro rod with a quality scraper is the more durable long-term tool. Carry both.
Survival Techniques for Making Fire in Rain or Snow
Starting fire in rain or snow is possible with the right technique, but the process requires more preparation and more patience than in dry conditions. The key differences are: you must create a dry workspace, build a fire platform off wet ground, and shield the ignition process from wind and precipitation.
Step-by-step wet environment fire-starting technique:
- Create a dry workspace first. Lean a large piece of bark against a tree to form a rain shield. Use a poncho or tarp if you have one. Even 60 seconds of shelter during ignition dramatically improves success.
- Build a fire platform. Lay down a base of dry sticks or a flat piece of bark to keep your fire off wet ground. Ground moisture will steal heat from a young fire and kill it.
- Prepare more tinder than you think you need. In dry conditions, a golf-ball-sized tinder bundle is enough. In wet conditions, prepare two or three times that volume.
- Use a feather stick. Take a dry stick (split from a log interior) and shave thin curls along its length without detaching them. The curls catch a spark more easily than a flat surface.
- Build a progressive fuel structure. Start with the finest tinder, then pencil-sized sticks, then finger-sized sticks, then wrist-sized wood. Don’t add large fuel until the fire is fully established.
- Protect the flame during transfer. Once your tinder bundle catches, move it into the fire lay carefully and shield it from wind with your body.
In snow specifically: Dig down to bare ground if possible, or use a platform of green logs to prevent the fire from melting into the snow and extinguishing itself.
This process is a core component of any solid bug out survival skill set — and it’s one that rewards practice before you need it.
Why Do Some People Carry Multiple Fire-Starting Methods?
Experienced survivalists carry multiple fire-starting methods because each tool has a specific failure point, and wet conditions expose those failure points faster than any other environment. A lighter fails when the fuel runs out or the flint wheel gets wet. Matches run out. A ferro rod is useless without dry tinder. No single tool covers every scenario.
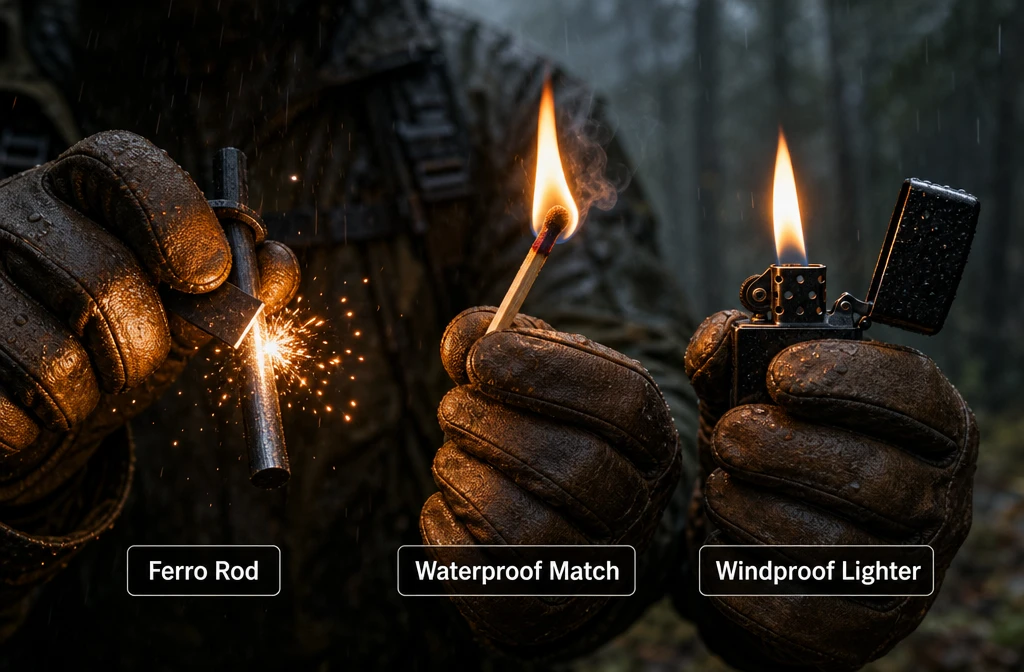
The recommended three-tool carry:
- Primary: Windproof/waterproof lighter (Zippo with extra fuel, or a plasma arc lighter)
- Secondary: Ferro rod with a fixed scraper
- Tertiary: Waterproof storm matches in a sealed case
Each tool is stored separately — one in a jacket pocket, one in a bug out bag, one in a waterproof kit. If one gets lost or fails, the others are still accessible.
This layered approach mirrors the broader prepper philosophy: redundancy is not paranoia, it’s just good engineering. The same logic applies to building a complete bug out bag — every critical function should have a backup.
Mistakes That Prevent Fire Starting in Wet Wilderness
The most common reason people fail to start fire in wet conditions is not a bad tool — it’s poor tinder preparation. The second most common reason is trying to rush the process. Wet-weather fire starting takes longer and requires more fuel at each stage than dry-weather fire starting.
The most damaging mistakes:
- Using surface wood as tinder. Any wood that has been rained on for more than a few hours is too wet to catch a spark without help. Always split to the interior.
- Building directly on wet ground. The ground wicks heat away from a young fire. Always use a platform.
- Adding large fuel too early. A small flame in wet conditions is fragile. Smothering it with big logs before it’s established is the single most common failure point.
- Neglecting wind direction. Wind can help or hurt. Position the fire lay so the wind feeds oxygen into the base, not blows the flame sideways.
- Not shielding the ignition moment. The first few seconds of a tinder bundle catching are the most vulnerable. Shield it with your body, a piece of bark, or a tarp.
- Giving up after one or two attempts. Wet-weather fire starting sometimes takes five to ten attempts. Each attempt teaches you something. Don’t stop.
Edge case: In extreme cold (below -10°C / 14°F), metal tools like ferro rods become harder to grip with bare hands and produce fewer sparks. Warm the rod in your armpit or inner pocket before use, and wear thin liner gloves rather than thick mittens for the striking motion.
How Long Can You Survive Without Fire in Cold, Wet Conditions?
Without fire in cold, wet conditions, hypothermia can become life-threatening within 1–3 hours depending on temperature, wind, and whether clothing is wet. The U.S. Army Survival Manual (FM 21-76) identifies fire as one of the top three survival priorities alongside shelter and water. In temperatures below 10°C (50°F) with wet clothing and no shelter, the timeline compresses significantly.
Survival timeline without fire in wet/cold conditions (general estimates):
- Above 10°C (50°F), wet but sheltered: Several hours before dangerous hypothermia, longer with good insulation
- 0–10°C (32–50°F), wet clothing, no shelter: Hypothermia risk within 1–3 hours
- Below 0°C (32°F), wet, wind present: Life-threatening within 30–60 minutes without action
These are rough estimates that vary by body size, fitness, and clothing. The point is not to memorize numbers — it’s to understand that fire is an urgent priority, not a nice-to-have.
This is why the essential survival gear guide consistently ranks fire-starting tools among the top five items for any kit.
Emergency Fire Techniques If You Have Zero Dry Materials
If every material around you is saturated and you have no manufactured fire starters, the options narrow but don’t disappear. The priority is finding or creating any dry material, even a small amount, and using it as a starting point.
Emergency options when nothing is dry:
- Fatwood from a pine stump: Even in heavy rain, the resin content in old pine heartwood makes it combustible. Dig into the base of a dead pine stump and extract the reddish, resin-soaked core.
- Inner bark of standing dead trees: Peel back the outer bark and scrape the inner cambium layer. It’s often damp but not saturated.
- Pocket lint and clothing fibers: Dry lint from deep in a pocket catches a spark more easily than most natural materials. Combine with the finest wood shavings you can produce.
- Hand sanitizer or alcohol-based products: If you have any in your kit, a small amount on tinder dramatically lowers the ignition threshold.
- Candle wax: A short candle stub is one of the most underrated survival fire-starting aids. It burns long enough to dry and ignite damp kindling.
- Food-grade fats: Animal fat or cooking oil from your food supply can be applied to tinder to improve combustion.
When all else fails — the bow drill in wet conditions: A bow drill can work in humid environments, but it requires specific wood pairings (willow, cottonwood, or basswood for the fireboard and spindle), and the fireboard must be dry enough to produce a coal. This is a last-resort skill that demands practice before an emergency. See the section below on primitive methods for more detail.
What Professional Survival Experts Recommend for Wet Environment Fire Making
Professional survival instructors consistently emphasize preparation over improvisation. The consensus recommendation is to carry manufactured fire starters, practice wet-weather techniques before needing them, and always prepare a dry workspace before attempting ignition.
What the professionals consistently say:
- Tom Brown Jr. and other primitive skills instructors emphasize that friction fire in wet conditions is possible but requires wood moisture content below approximately 10–15% — which means the wood must come from a protected dry source, not the forest floor.
- Military survival training (U.S. Army FM 21-76) prioritizes having multiple ignition sources and teaches soldiers to always carry a lighter, matches, and a fire-starting material in separate locations on their person.
- Wilderness medicine professionals emphasize that fire prevention of hypothermia is far easier than treating it — meaning fire should be started before you’re cold, not after.
The professional wet-weather fire kit (what instructors actually carry):
- Ferro rod (minimum 6mm diameter for better spark output)
- Storm-proof matches in a waterproof case
- Petroleum jelly cotton balls in a sealed zip-lock bag
- A small piece of fatwood or a commercial fire starter cube
- A windproof lighter as a convenience tool
Are Chemical Fire Starters Worth the Money?
Yes. Chemical fire starters are among the highest-value items in a wet-weather survival kit relative to their cost and weight. Products like WetFire tinder cubes, Esbit fuel tablets, and fire paste burn at high temperatures for extended periods, even in rain and wind, and they dry out surrounding damp material as they burn.
Comparison of popular chemical fire starters:
| Product | Burns in Rain | Burn Time | Approx. Cost | Weight |
|---|---|---|---|---|
| WetFire Tinder Cubes | Yes | 10–12 min | ~$1–2/cube | 8g each |
| Esbit Fuel Tablets | Yes | 12–15 min | ~$0.50/tab | 14g each |
| Fire Paste (tube) | Yes | Variable | ~$8–12/tube | 60g tube |
| DIY PJ Cotton Balls | Yes | 3–5 min | Pennies | 2–3g each |
Choose chemical fire starters if: You’re building a bug out bag for a cold or wet climate, you’re not confident in your primitive fire skills, or you need a reliable option that works even with cold, clumsy hands.
The DIY option: Petroleum jelly cotton balls cost almost nothing to make. Coat a cotton ball thoroughly in petroleum jelly (Vaseline), store in a small zip-lock bag, and you have a fire starter that burns for 3–5 minutes in rain. This is the most cost-effective wet-weather fire solution available.
How to Protect Fire-Starting Equipment from Moisture
Fire-starting equipment should be stored in waterproof containers before entering the field, not sealed in a bag after it gets wet. The most reliable method is a dedicated waterproof case or a sealed zip-lock bag inside a hard container.
Storage options by reliability:
- Waterproof hard case (like a Pelican micro case): Best protection, slightly bulky
- Sealed zip-lock bag inside a stuff sack: Practical, lightweight, works well
- Waterproof match case with gasket: Purpose-built for matches, inexpensive
- Vacuum-sealed pouch: Excellent moisture protection, requires a sealer to repack
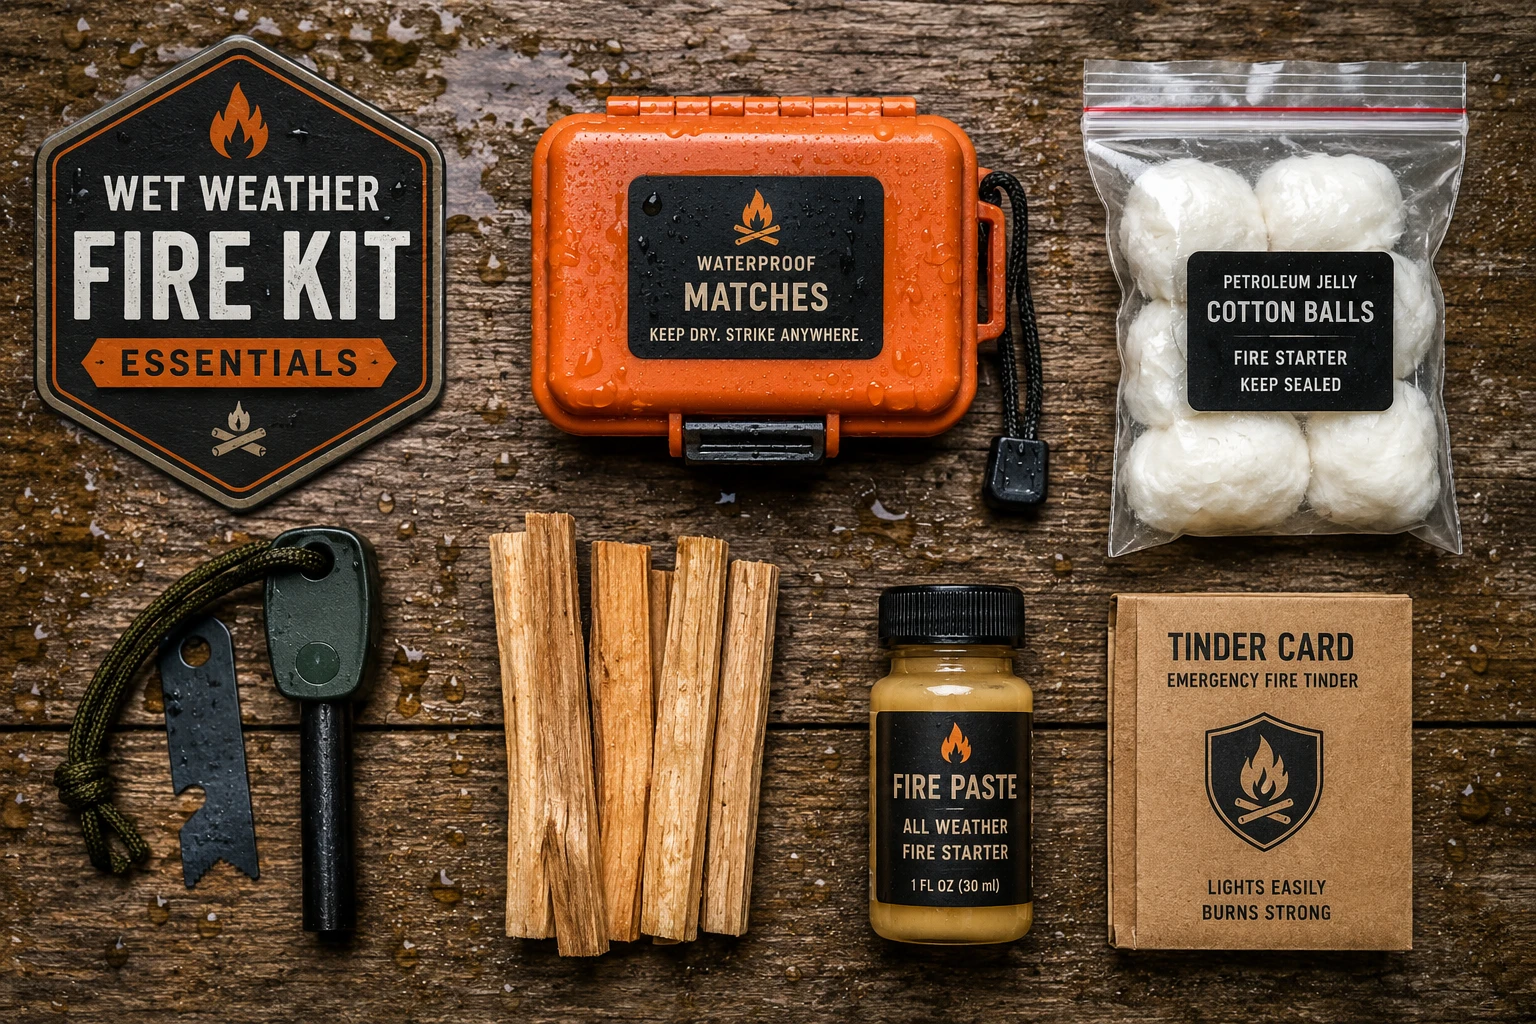
What to store together in a fire kit pouch:
- Ferro rod with attached scraper
- Storm matches (in their own sealed case)
- 6–10 petroleum jelly cotton balls in a zip-lock
- 2–3 WetFire cubes or Esbit tablets
- A small piece of fatwood or a tinder card
Keep this kit in an accessible outer pocket of your pack, not buried at the bottom. In a survival situation, you need it fast.
Primitive Fire-Starting Methods That Work in Humid Environments
Primitive friction fire methods — bow drill, hand drill, fire plow — can work in humid environments, but they require dry wood and significant skill. These are not beginner techniques for emergencies. They are backup skills that take months of practice to execute reliably under stress.
Which primitive methods work best in humid conditions:
- Bow drill: The most reliable friction method because the bow provides mechanical advantage. Best wood pairings for damp conditions: willow/willow, cottonwood/cottonwood, or basswood/basswood for board and spindle.
- Fire plow: Simpler than the bow drill but requires more physical effort. Works in humid conditions if the wood is dry enough.
- Hand drill: Requires the driest possible wood and is significantly harder in humid air. Not recommended as a primary wet-weather technique.
Making friction fire work when it’s humid:
- The fireboard must be as dry as possible — carry it inside your clothing against your body to dry it out before use.
- Carve the notch fresh each time. Old notches accumulate moisture.
- Work fast and maintain consistent pressure and speed. Slowing down allows the wood dust to cool before it forms a coal.
- Once you have a coal, transfer it to your tinder bundle immediately and shield it from any moisture.
Honest assessment: If you’re relying on a bow drill in a wet survival scenario without prior practice, the odds are not in your favor. This is a skill that must be built before the emergency. Focus on carrying reliable manufactured fire starters, and treat primitive methods as a deep-backup skill.
For those building comprehensive wilderness competency, the 14 essential survival skills every prepper must know covers friction fire alongside other foundational techniques worth developing over time.
What’s the Cheapest Emergency Fire Starter Kit?
A functional wet-weather fire starter kit can be assembled for under $15. The most cost-effective combination is a ferro rod, DIY petroleum jelly cotton balls, and a windproof lighter — all stored in a zip-lock bag.
Budget wet-weather fire kit (under $15):
- Ferro rod with paracord handle: $6–10
- Windproof lighter (BIC or similar): $1–2
- Petroleum jelly cotton balls (homemade, 10–15 of them): $1–2 total
- Small zip-lock bag: Pennies
Total cost: approximately $10–14. This kit fits in a shirt pocket and handles the vast majority of wet-weather fire scenarios.
If budget allows (under $30 upgrade):
- Add a tube of UCO Stormproof Matches ($5–8)
- Add 4–6 WetFire tinder cubes ($6–10)
This upgraded kit covers scenarios where even the ferro rod and cotton balls struggle — extreme cold, driving rain, or situations where you simply need a longer burn time to get wet wood going.
Frequently Asked Questions
Can wet wood ever be used as fuel once the fire is going?
Yes. Once a fire is well established with dry kindling, wet wood can be added as larger fuel. The heat from the established fire dries the wet wood before it ignites. Start with dry material, build a hot base, then add wet wood gradually.
Does a ferro rod work in the rain?
A ferro rod itself is unaffected by water and will produce sparks in rain. The challenge is keeping the tinder dry enough to catch those sparks. Shield the tinder with your body or a piece of bark during ignition.
How do I keep my tinder dry while hiking in rain?
Store tinder in a sealed zip-lock bag inside a waterproof pouch in your pack. A secondary option is keeping a small amount of tinder in an inner chest pocket, where body heat also helps keep it dry.
Is a plasma arc lighter better than a regular lighter in wet conditions?
Plasma arc lighters (electric arc lighters) are windproof and moisture-resistant, which makes them more reliable than a standard flint lighter in wet conditions. They require charging via USB, so they’re best used as a primary tool with a ferro rod as backup.
What’s the fastest way to start a fire in rain if I’m already cold?
Use a manufactured fire starter (WetFire cube, Esbit tablet, or petroleum jelly cotton ball) with a windproof lighter. This combination requires the least manual dexterity and works even with cold, shaking hands. Shelter the ignition point first.
Can hand sanitizer start a fire?
Hand sanitizer with a high alcohol content (60%+) is flammable and can help ignite damp tinder. It’s not a primary fire starter, but in an emergency it lowers the ignition threshold of marginal tinder. Use sparingly — it burns off quickly.
How do I build a fire platform in wet conditions?
Lay down a base of the thickest, least-wet sticks you can find, arranged tightly side by side. Alternatively, use a flat piece of bark. This elevates your fire off wet ground and prevents ground moisture from stealing heat from the early flame.
Does altitude affect fire starting in wet conditions?
Yes. At higher altitudes, oxygen is thinner, which makes fire harder to start and maintain. This compounds the difficulty of wet conditions. Use finer tinder, build a smaller initial fire, and allow more time for the fire to establish before adding larger fuel.
What’s the best natural fire starter in a pine forest?
Fatwood from old pine stumps is the best natural option in a pine forest. The resin content makes it highly combustible even when the exterior is wet. Pine pitch (the hardened sap on tree wounds) is another excellent natural accelerant.
Should I practice wet-weather fire starting before I need it?
Absolutely. Deliberate practice in your backyard during rain is the single best preparation. Set a rule: no manufactured fire starters allowed. Learn what works, what fails, and how long it actually takes. That knowledge is worth more than any gear purchase.
Conclusion: Confidence Comes From Preparation
The how to start fire in wet conditions survival guide comes down to one principle: preparation beats improvisation every time. Wet conditions don’t make fire impossible — they make it harder and less forgiving of mistakes. The people who succeed are the ones who packed the right tools, stored them properly, and practiced the techniques before the emergency.
Actionable next steps:
- Build your fire kit this week. Ferro rod, windproof lighter, petroleum jelly cotton balls, and storm matches in a waterproof pouch. Keep it in your bag permanently.
- Practice the split-and-shave technique. Find a dead log, split it open, and practice shaving fine tinder from the dry interior. Do this until it’s automatic.
- Run a wet-weather fire drill. Wait for a rainy day and attempt to start a fire using only natural materials. The lessons from one failed attempt are worth hours of reading.
- Audit your bug out bag. Check that your fire-starting tools are in a waterproof container and accessible quickly. Review the complete bug out bag guide if your kit needs a full overhaul.
- Learn one primitive method. Even basic bow drill competency adds a meaningful layer of resilience. Start practicing in dry conditions, then move to humid environments as your skill grows.
Fire is not optional in a cold, wet survival scenario. Treat it like the life-critical skill it is — and prepare accordingly.
Products, Tools, and Resources Worth Having
Ferro Rods: Look for a minimum 6mm diameter rod with a comfortable handle. The Light My Fire Army model and Bayite ferro rods are consistently reliable and available for under $15. Larger diameter means more sparks per strike and a longer lifespan.
Storm Matches: UCO Stormproof Matches are the benchmark. Each match burns for approximately 15 seconds in wind and rain, and they relight after being briefly submerged. A box of 25 costs around $8 and belongs in every survival kit.
WetFire Tinder Cubes: Made by Ultimate Survival Technologies, these cubes burn in rain and snow and generate enough sustained heat to dry and ignite damp kindling. They’re lightweight, non-toxic, and shelf-stable for years. Worth keeping 6–10 in your kit.
Petroleum Jelly Cotton Balls: Make these yourself. A jar of Vaseline and a bag of cotton balls costs under $5 and produces 50–100 fire starters. Store them in a small zip-lock bag. No commercial product at this price point comes close to their performance.
Fatwood Sticks: Pre-cut fatwood is available from most outdoor retailers for $10–15 per bundle. It’s a reliable, all-natural fire starter that works in damp conditions without any chemical additives. Useful for both survival kits and home fireplace starting.
Windproof Lighter: A Zippo with extra fuel canisters or a plasma arc lighter (Saberlight, Tesla Coil) are both solid choices. The plasma arc option eliminates the fuel dependency problem but requires charging. Carry both types if possible.
Waterproof Match Case: A simple threaded aluminum match case with an O-ring gasket costs $3–5 and keeps matches dry even when submerged. Pair it with strike-anywhere matches for maximum versatility.
For a complete look at what belongs in a survival kit beyond fire-starting tools, the essential survival gear guide ranks 50 items by priority — a useful reference for anyone building or auditing their preparedness setup.